For 3ds Max + V-Ray

Build the scene once.
Render every variant.

Render Node System turns your render setup into a node graph. Each variant is a branch with its own geometry, lights, IDs and output — and they all run in one batch.

24 nodes V-Ray CPU & GPU Local queue or Backburner
The idea

Two graphs, not one

What is in the scene and how it renders are two different problems. Keeping them apart is what lets one scene feed many renders.

SCENE

What is in the scene

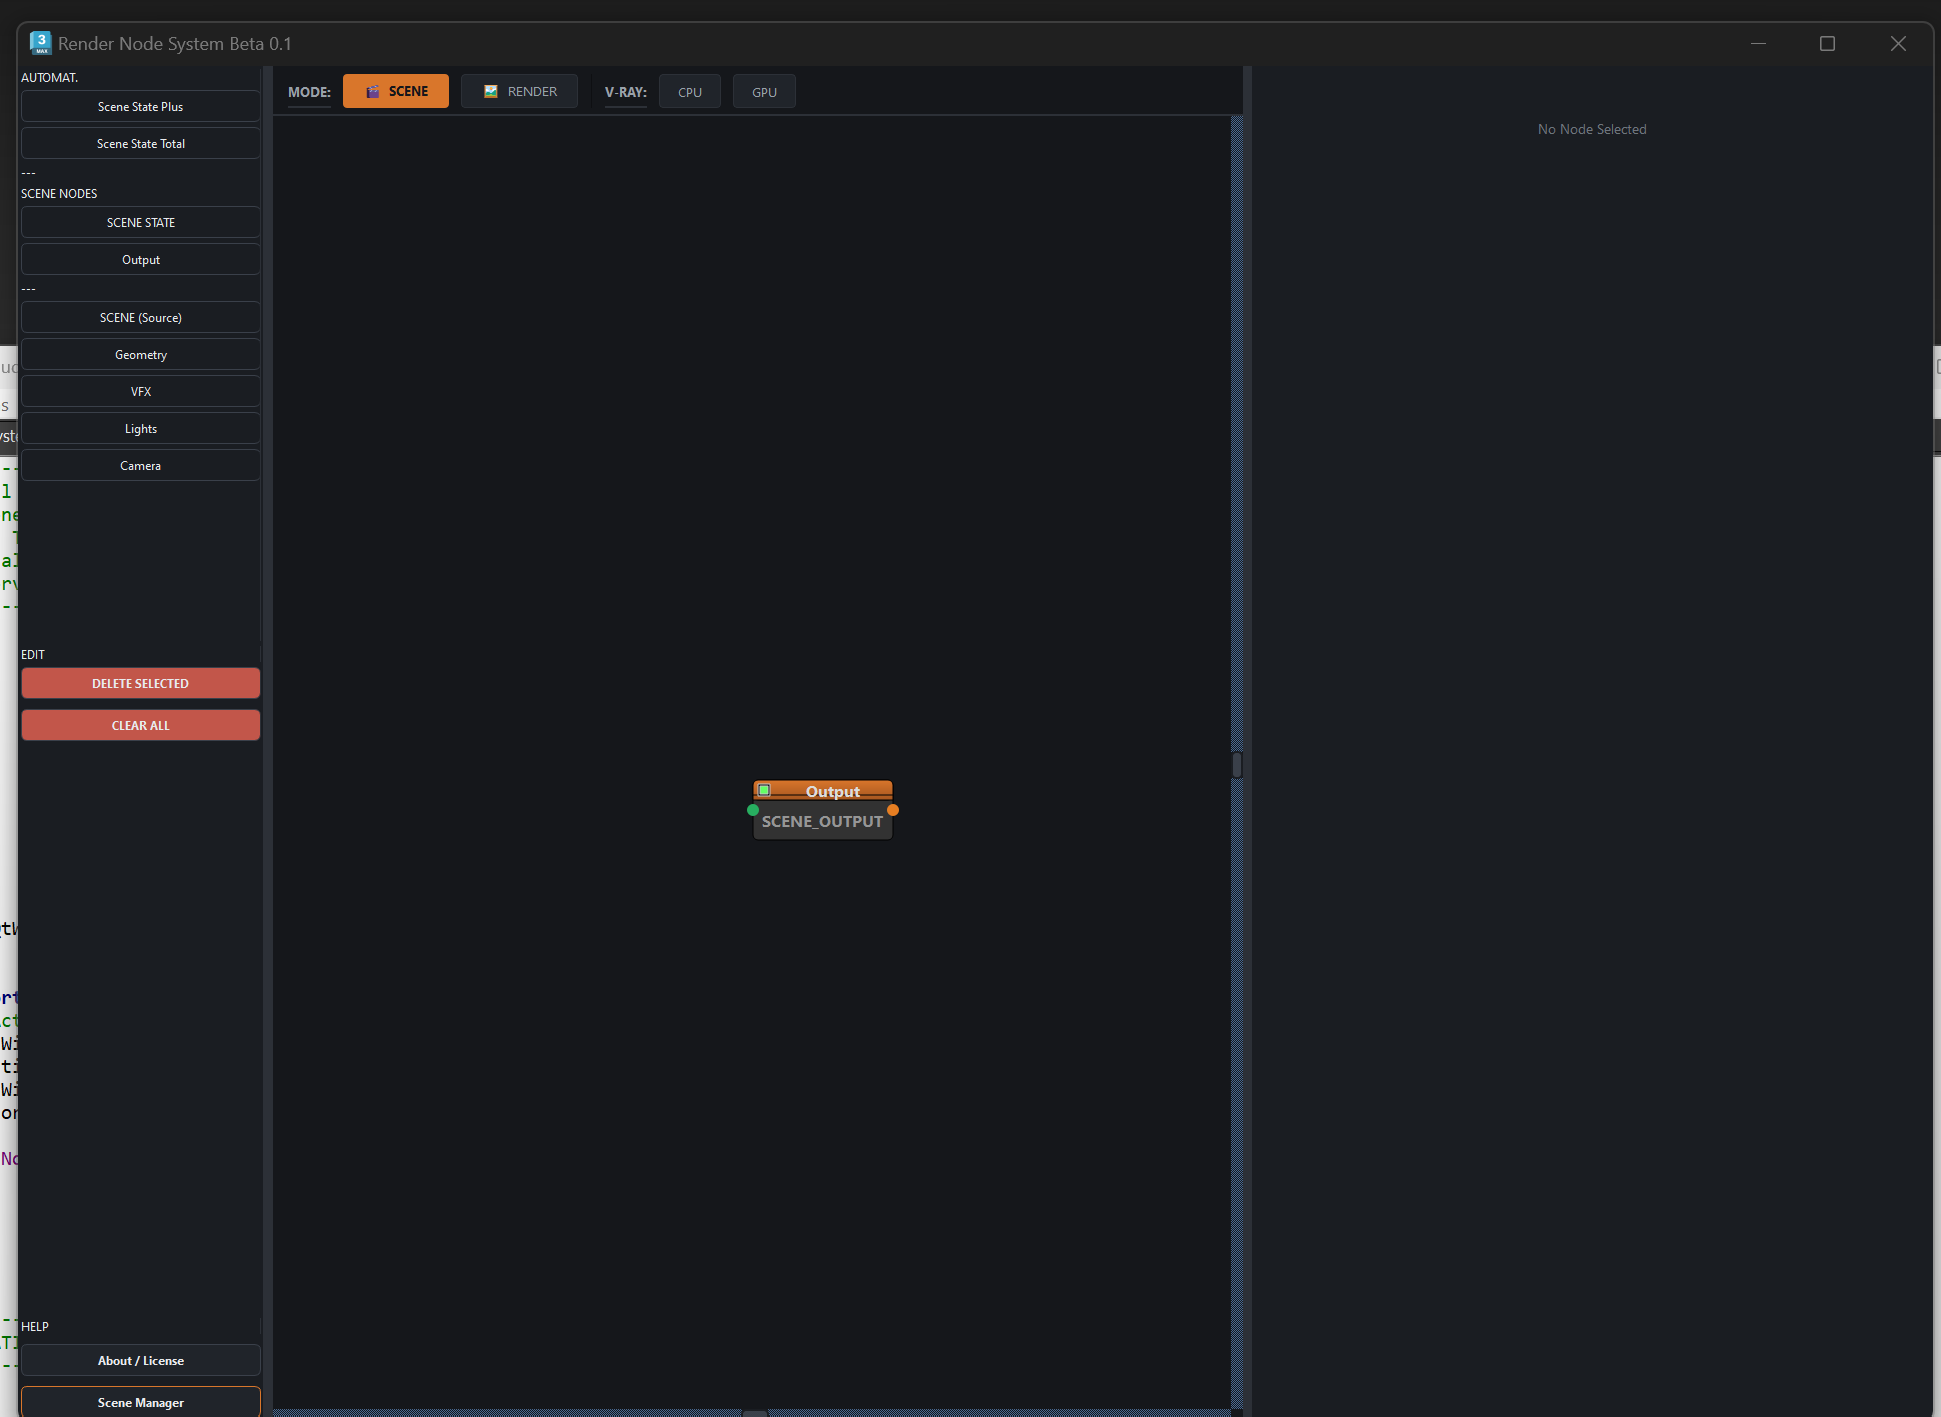
You define the content: which objects are visible, which lights are on, which camera is in charge. Captured straight from 3ds Max and saved as a named scene.

  • Geometry, VFX, lights and camera
  • Several scenes living in the same file
  • A separate manager to switch between them
RENDER

How it renders

You define the treatment: IDs, render elements, sampling, engine, output paths. One branch per variant, and they can all load the same scene.

  • Object and Material IDs with automatic MultiMattes
  • CPU or GPU engine chosen branch by branch
  • Render queue, local or on Backburner
Geometry · Lights · Camera · VFX →SCENE (Source) →Output →Input →IDs · Elements · Sampling · Output →SCENE STATE →Render
Why it helps

What it takes off your hands

Channels never shift

Add or remove objects and the IDs you already had stay put. Freed numbers are never reused, so the comp you built in After Effects or Nuke keeps working.

CPU and GPU in one batch

Each branch picks its engine. Preview on GPU and final on CPU, launched together. Switching the global engine does not touch branches you already set up.

One branch per layer, automatically

Scene State Plus reads the layers in your Scene Explorer and builds a complete branch for each, with its IDs, its MultiMattes and its output folder.

It keeps itself up to date

Add a light and its VRayLightSelect appears. Add an object and it joins the IDs and its MultiMatte. No going node by node.

In motion

See it running

Reference

All 24 nodes, one by one

Click any screenshot to see it full size.

01

The scene

What sits in front of the camera. These nodes live in the SCENE graph.

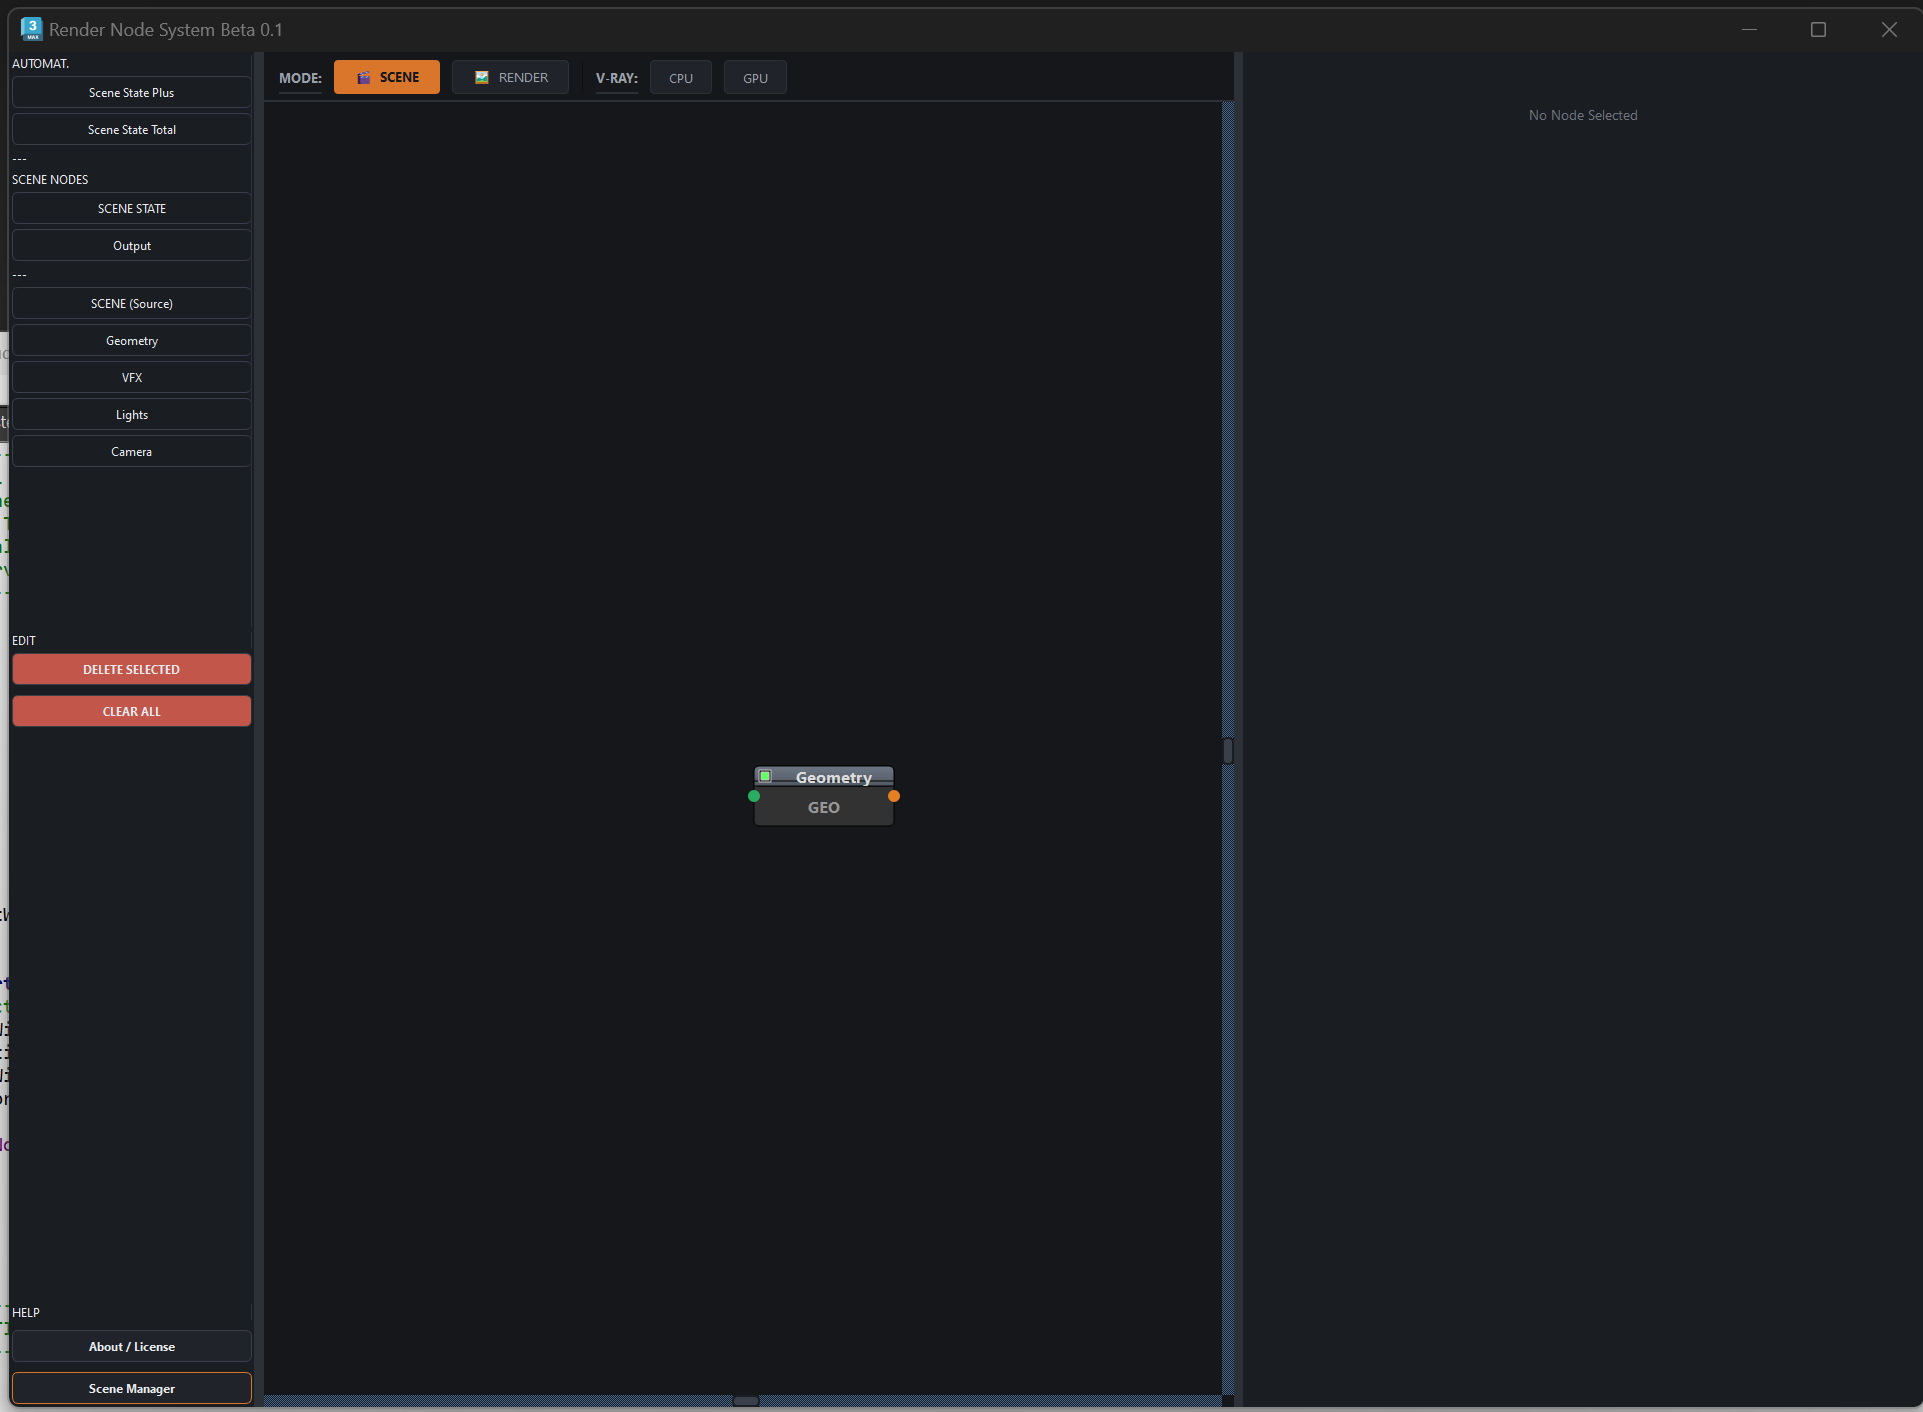
Geometry node
Scene

Geometry

Lists every visible mesh in the scene and remembers which ones belong to this one. Captured straight from the viewport, with each object's ID in the list.

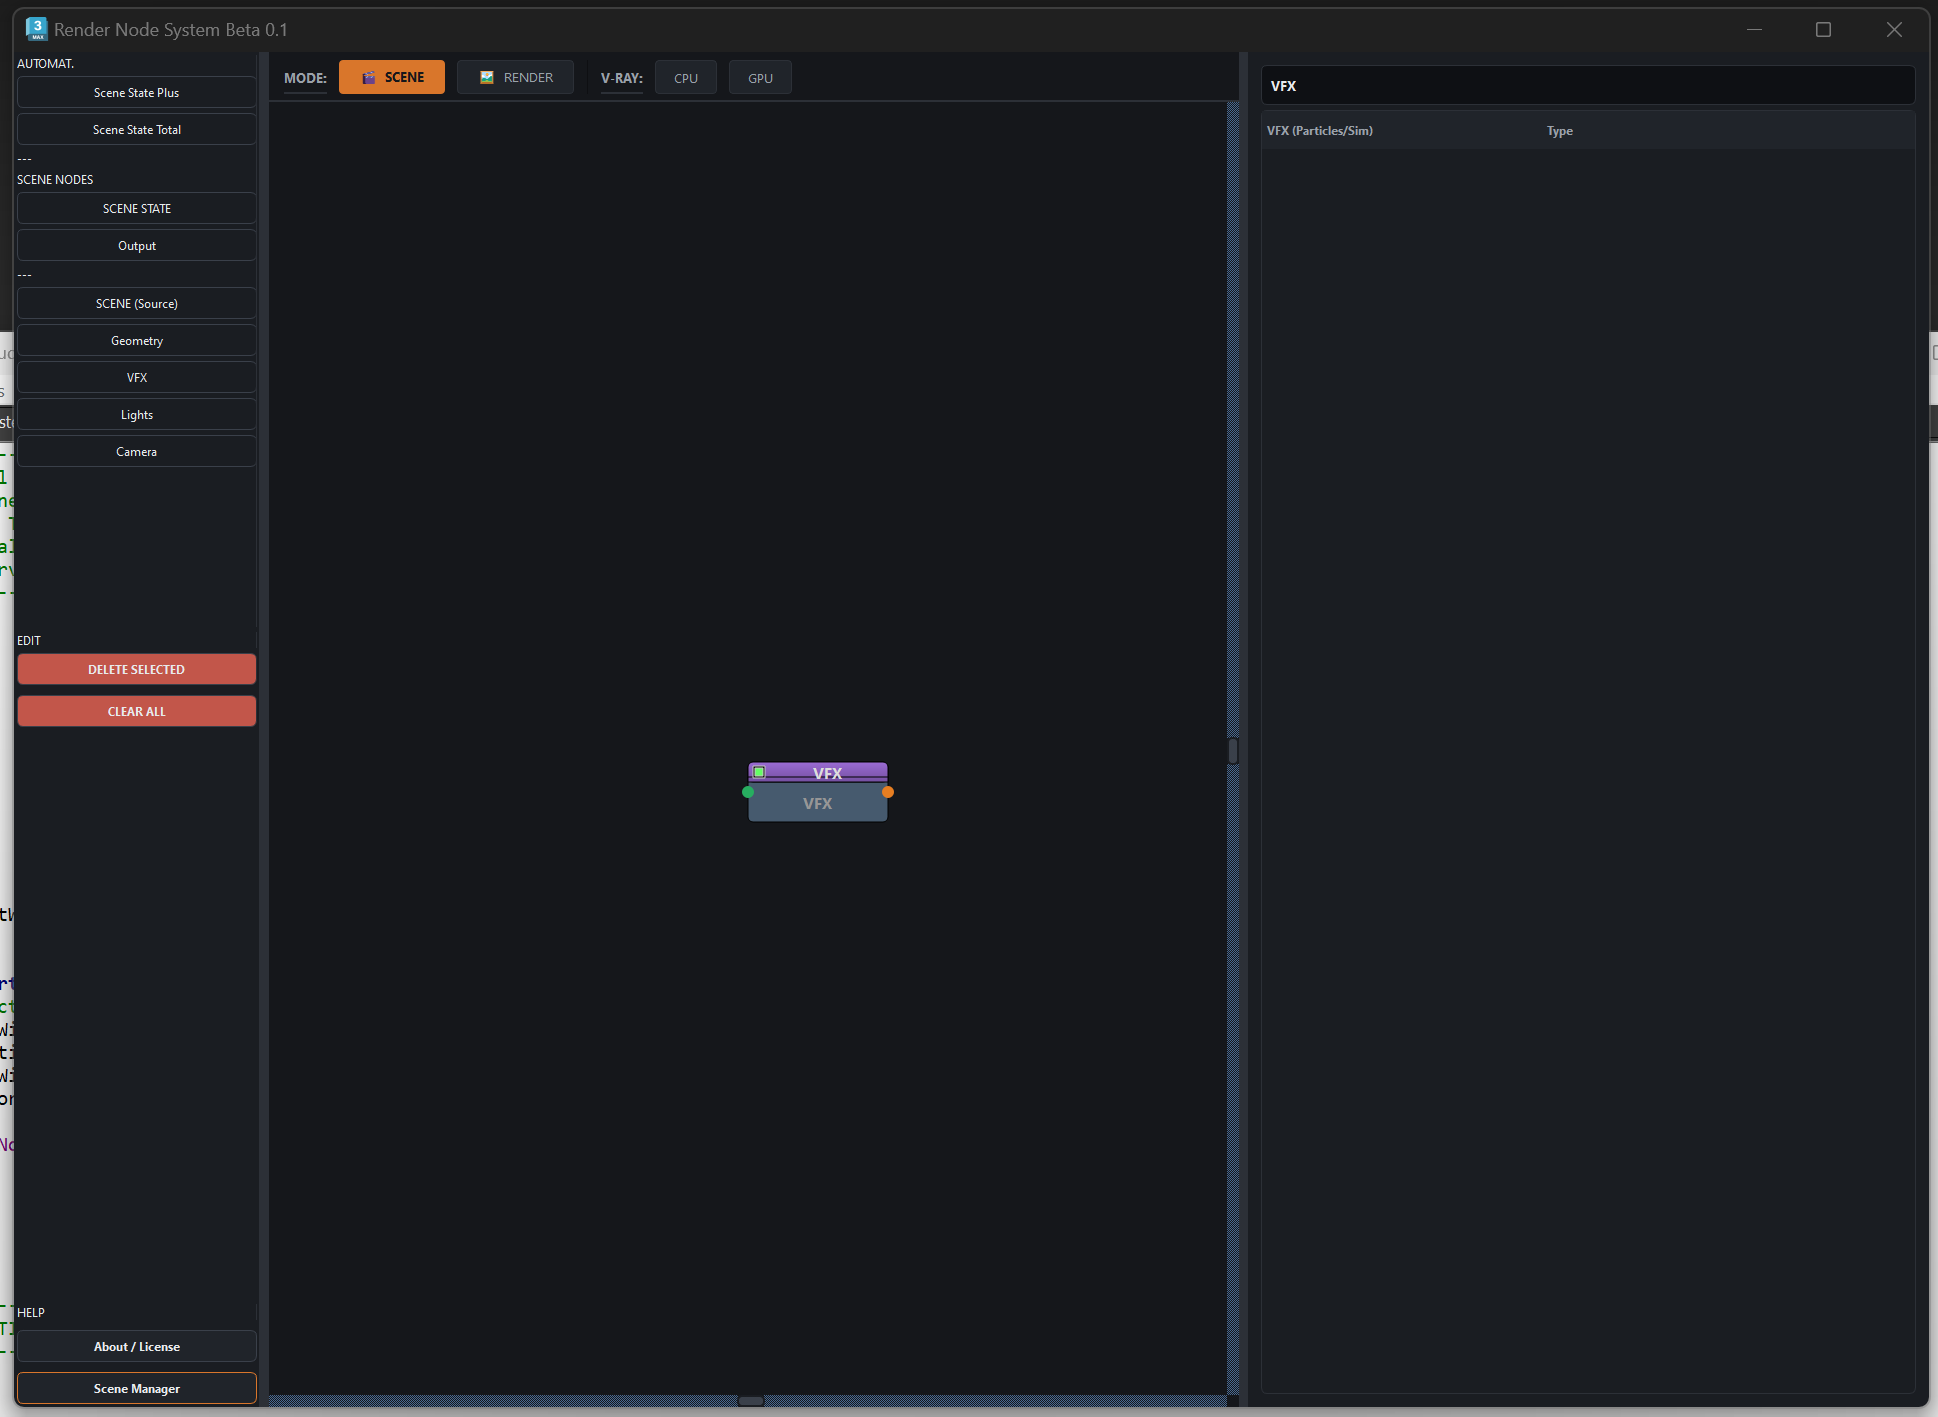
VFX node
Scene

VFX

Keeps particles and simulations apart from regular geometry — TyFlow, Phoenix FD, PF Source and the rest — so they do not get mixed in with IDs.

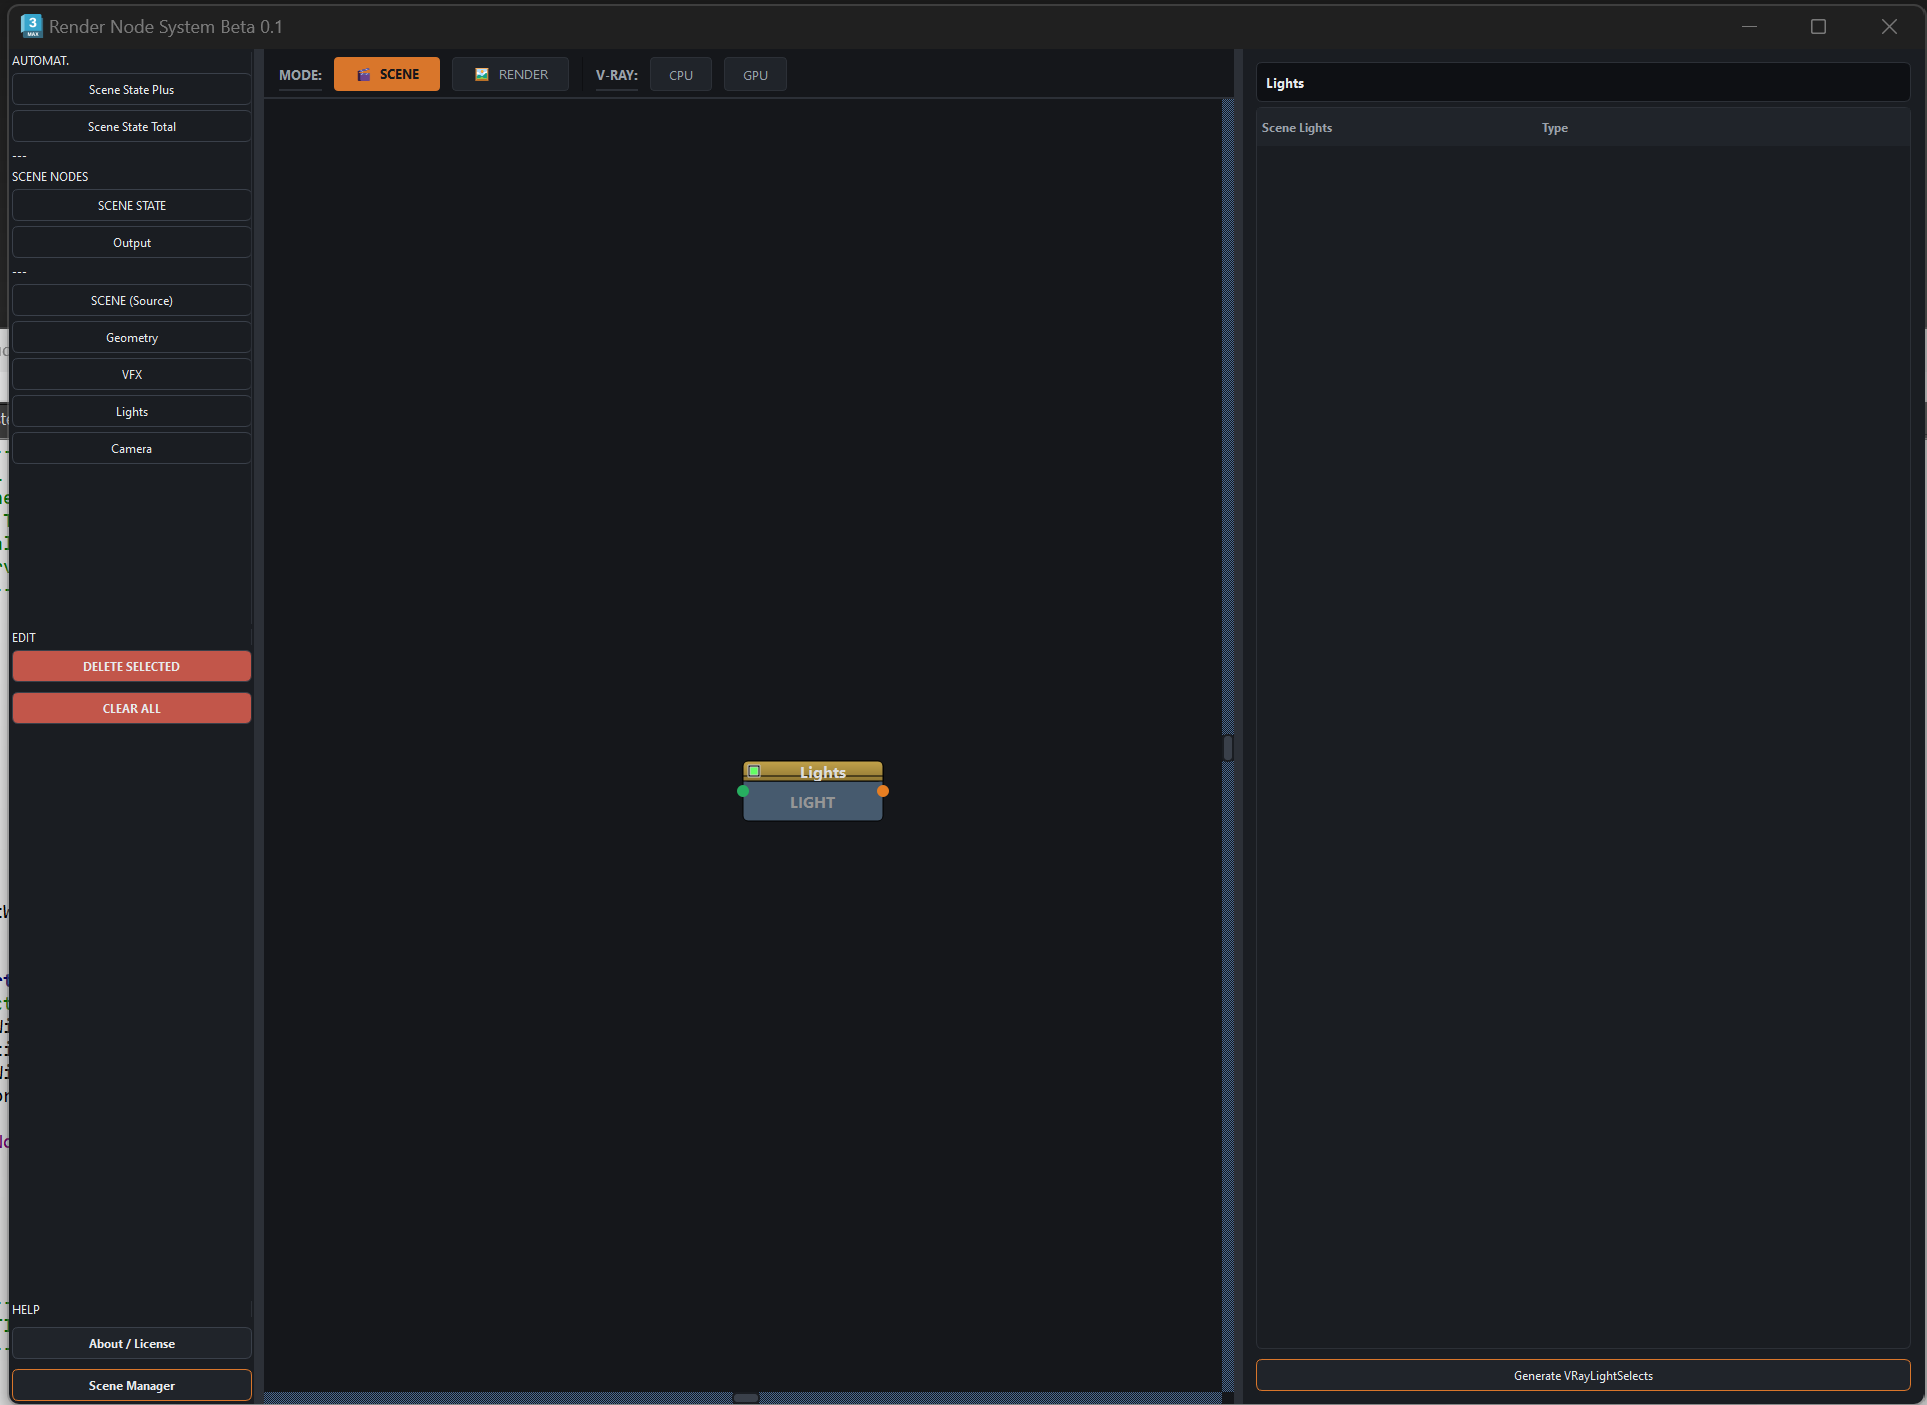
Lights node
Scene

Lights

Holds which lights stay on for this scene. Applying it switches off anything not in the list. It can also generate one VRayLightSelect per light.

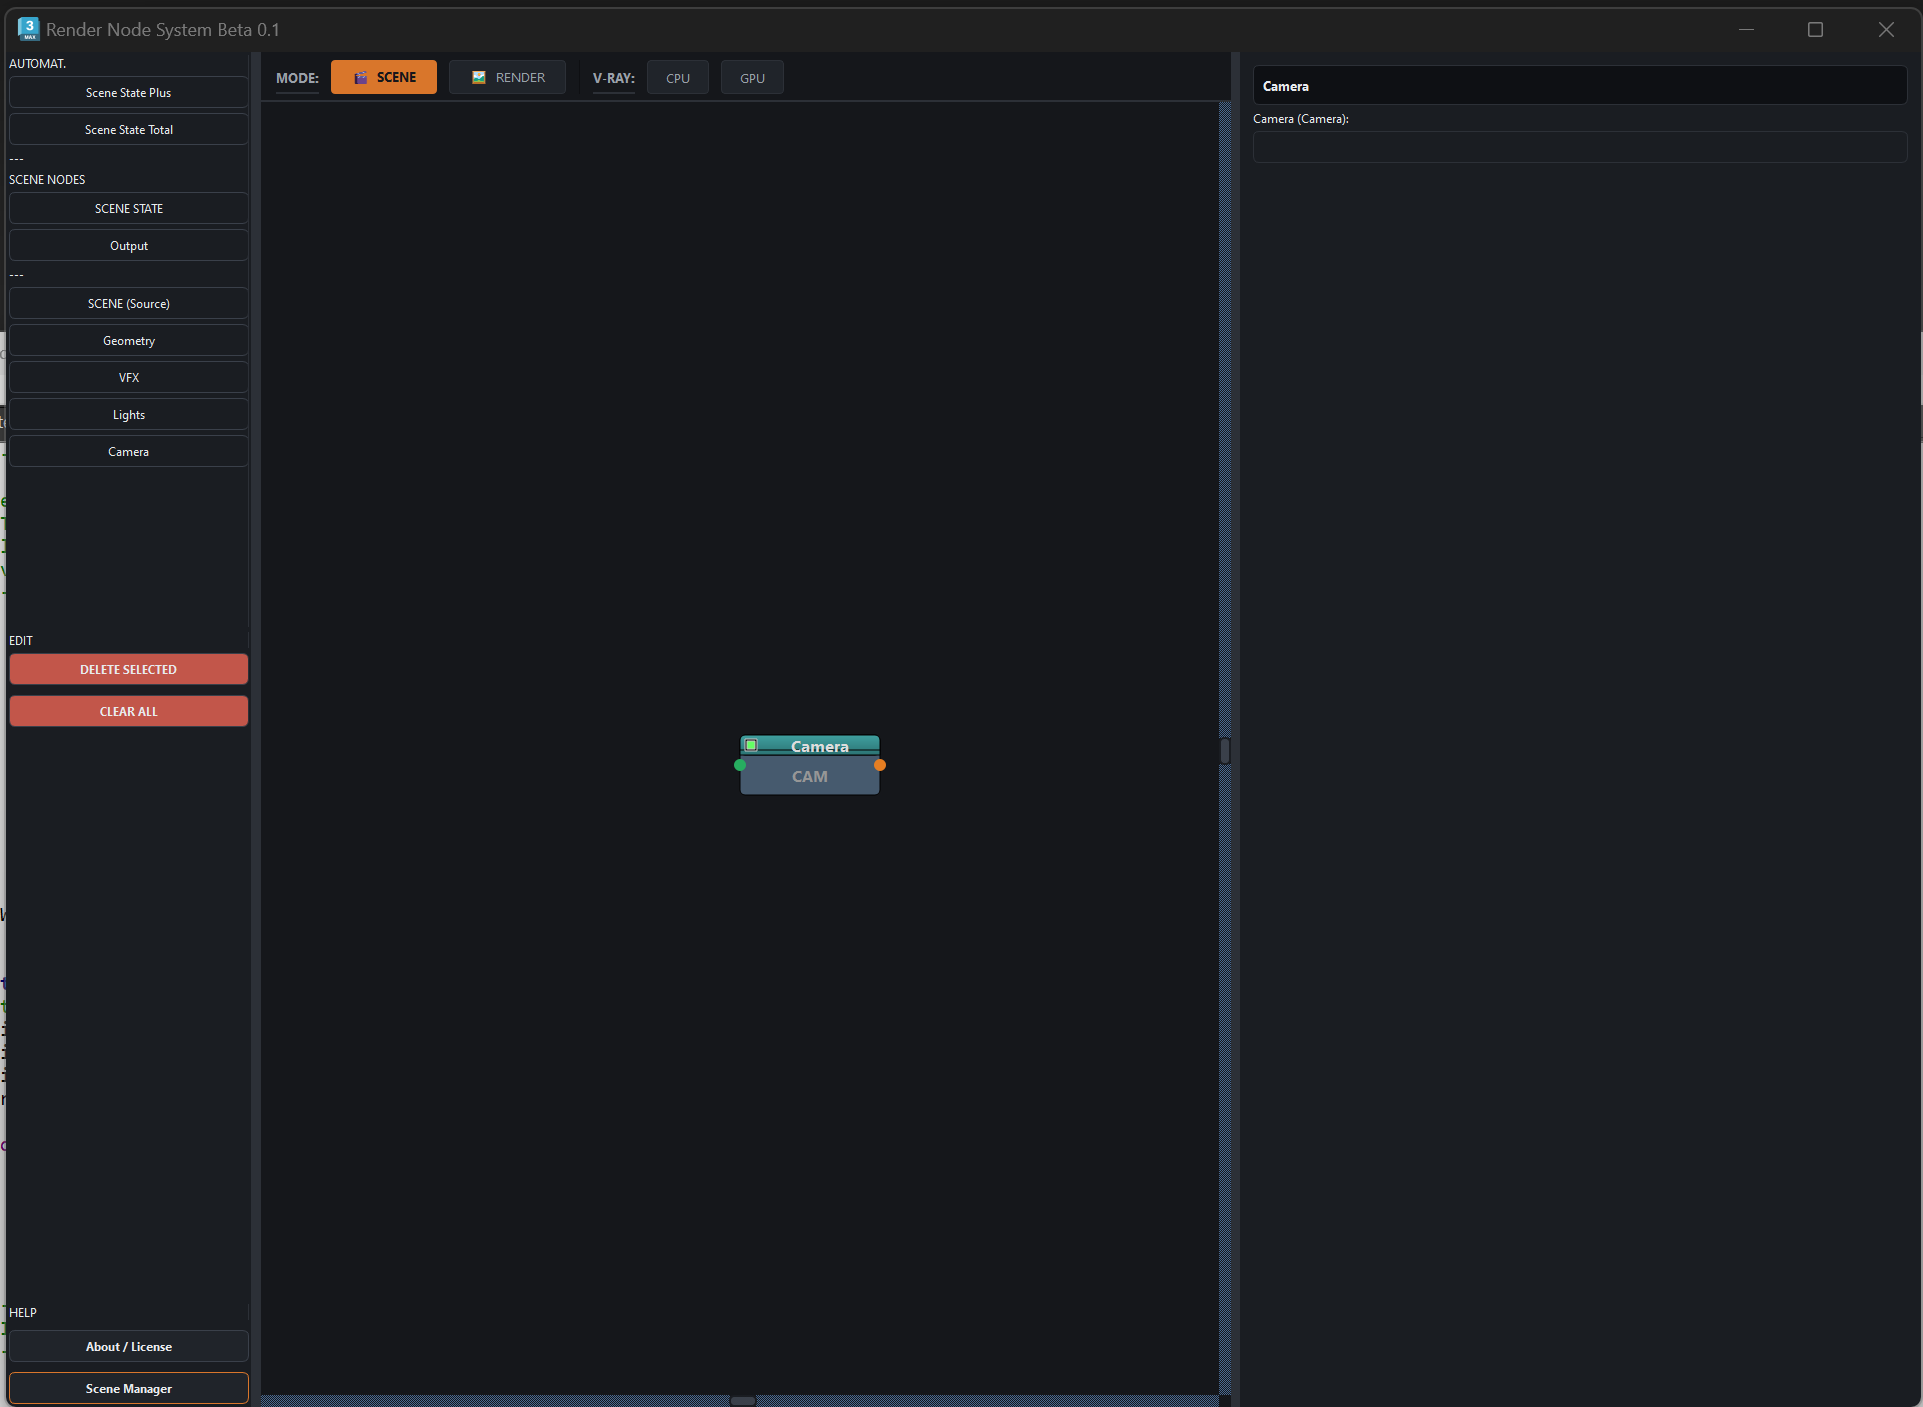
Camera node
Scene

Camera

Sets which camera renders. Activating the scene switches the viewport to it.

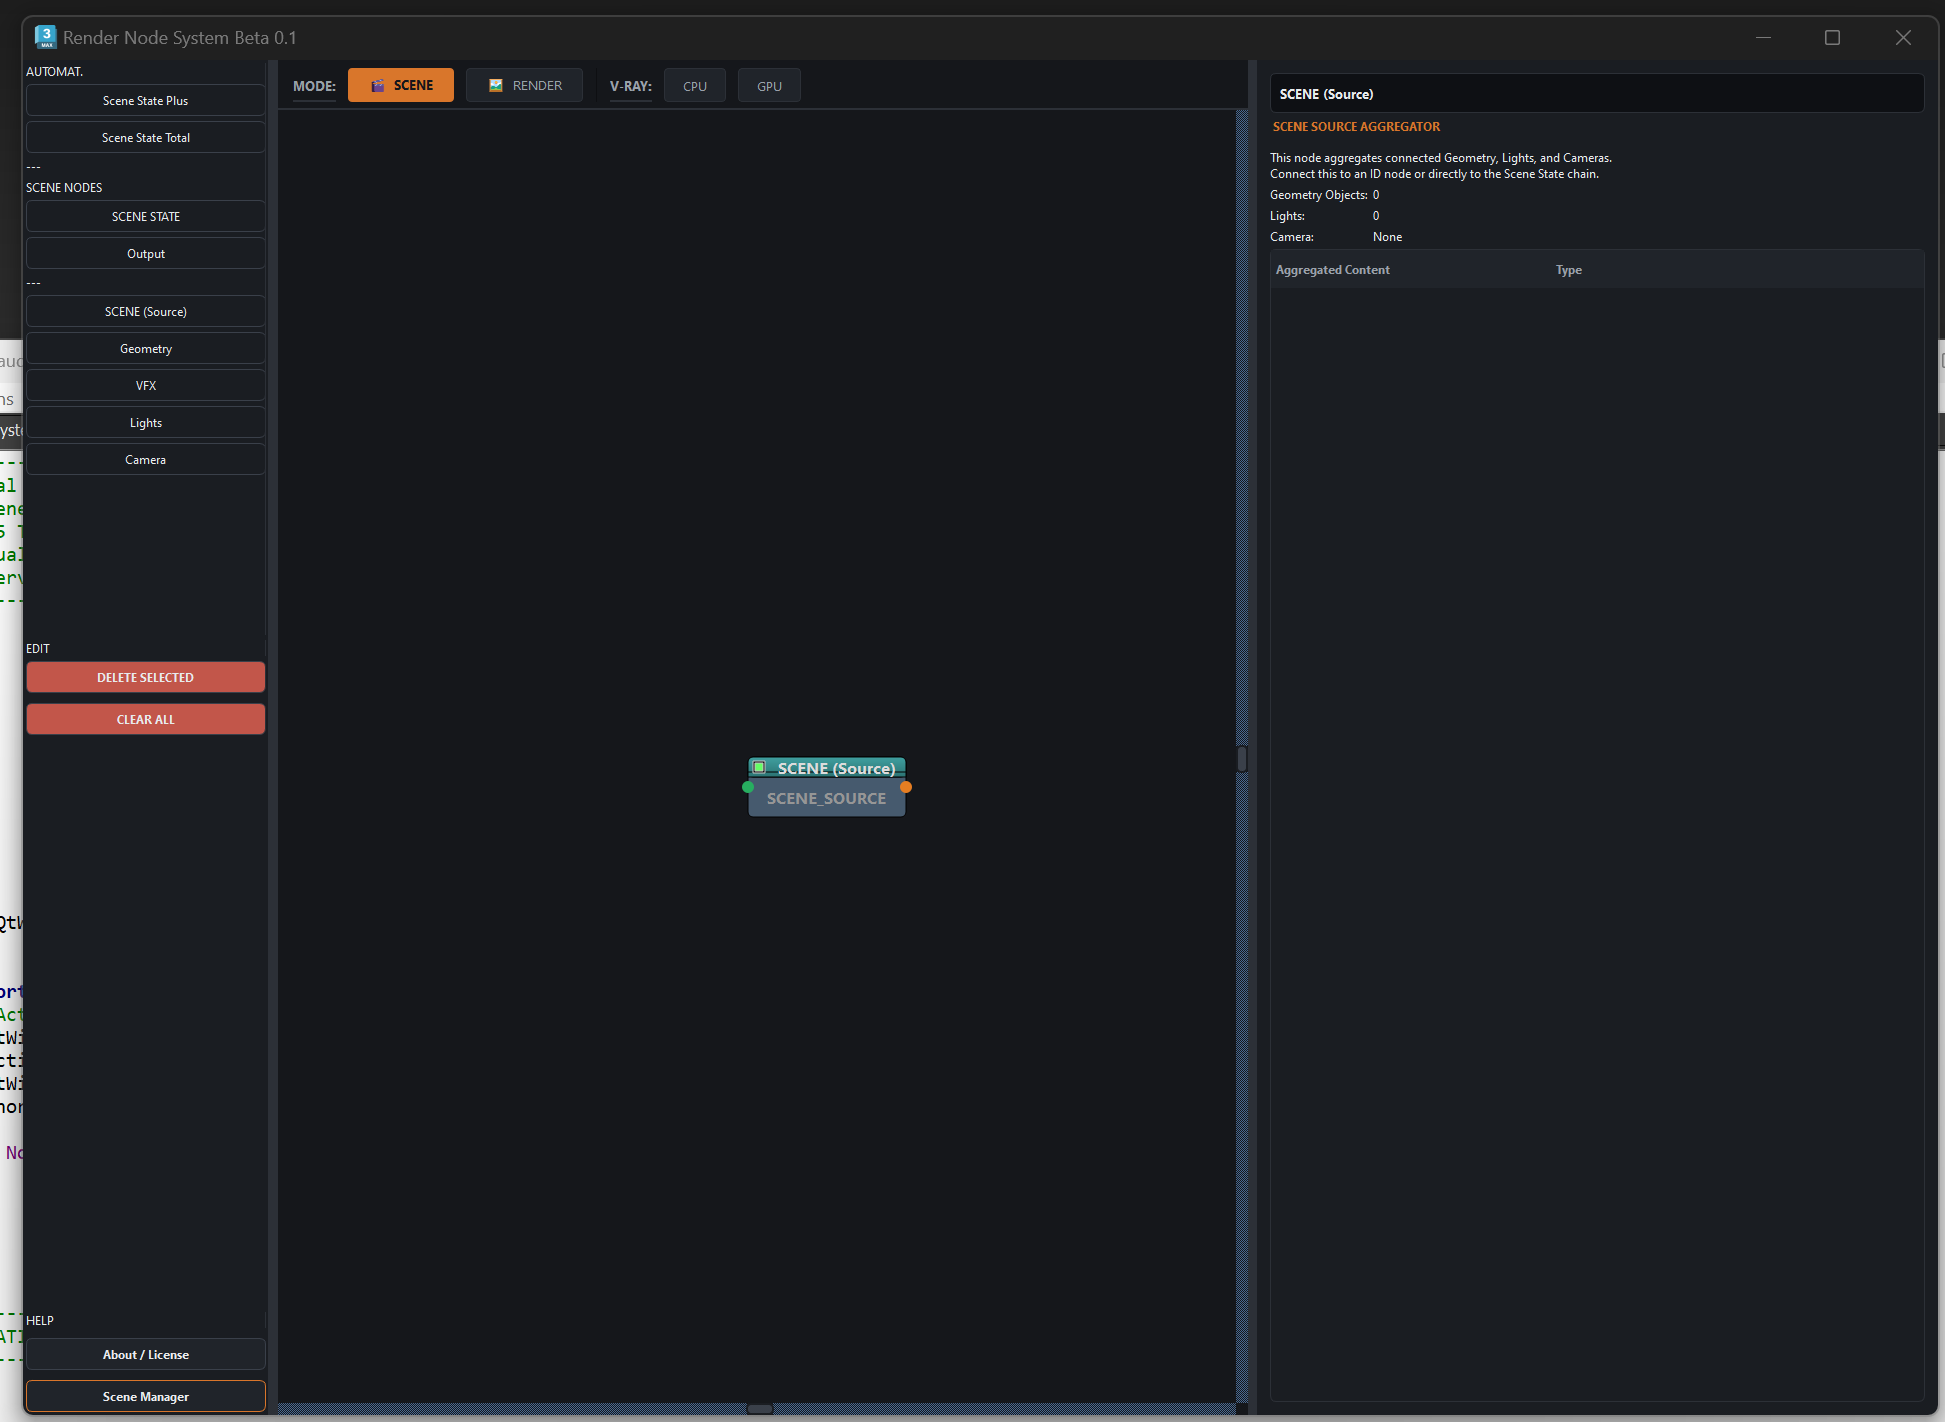
SCENE Source node
Aggregator

SCENE (Source)

Gathers Geometry, VFX, Lights and Camera into one stream and keeps count of what each contributes. Everything downstream reads from here.

Output node
Publish

Output

Closes the scene and publishes it under a name. This is what the Input node in the RENDER graph can load.

02

Automation

So you do not have to wire the graph by hand when the scene gets big.

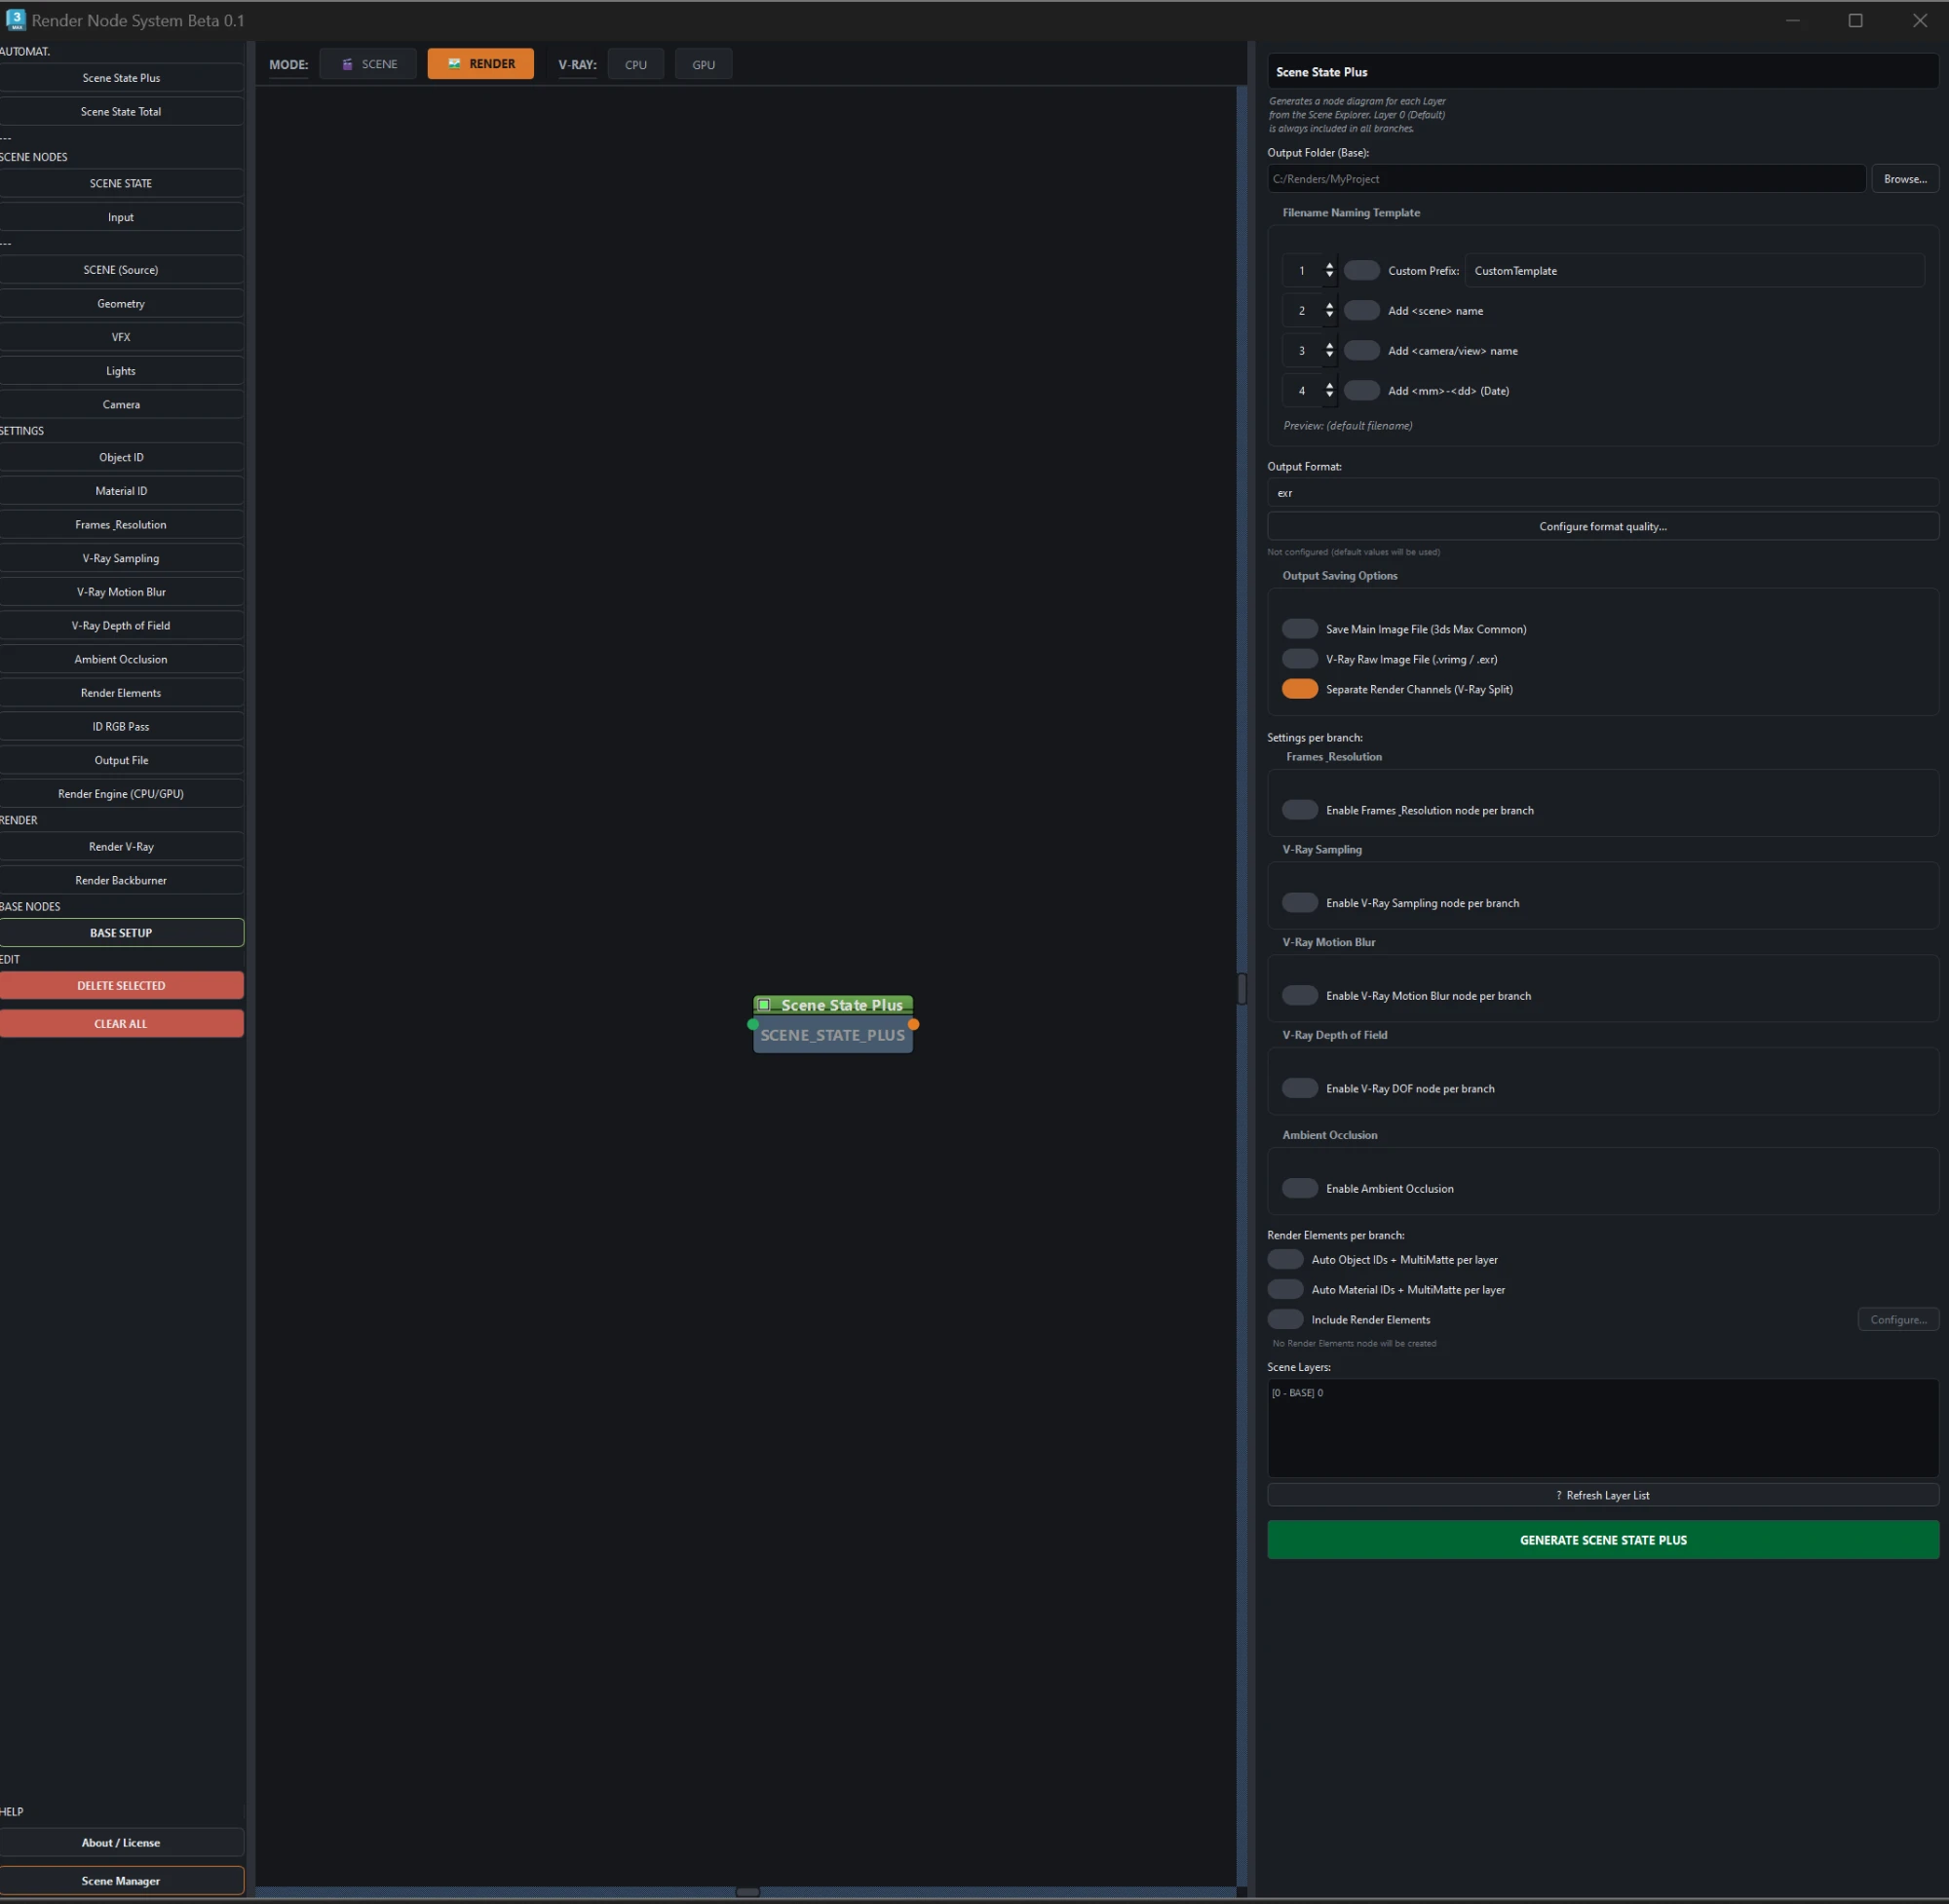
Scene State Plus node
Automatic

Scene State Plus

Reads the layers in your Scene Explorer and builds a complete render branch for each. You tick what every branch carries and it writes the whole graph, output folders included.

Layer 0 is always included in every branch.

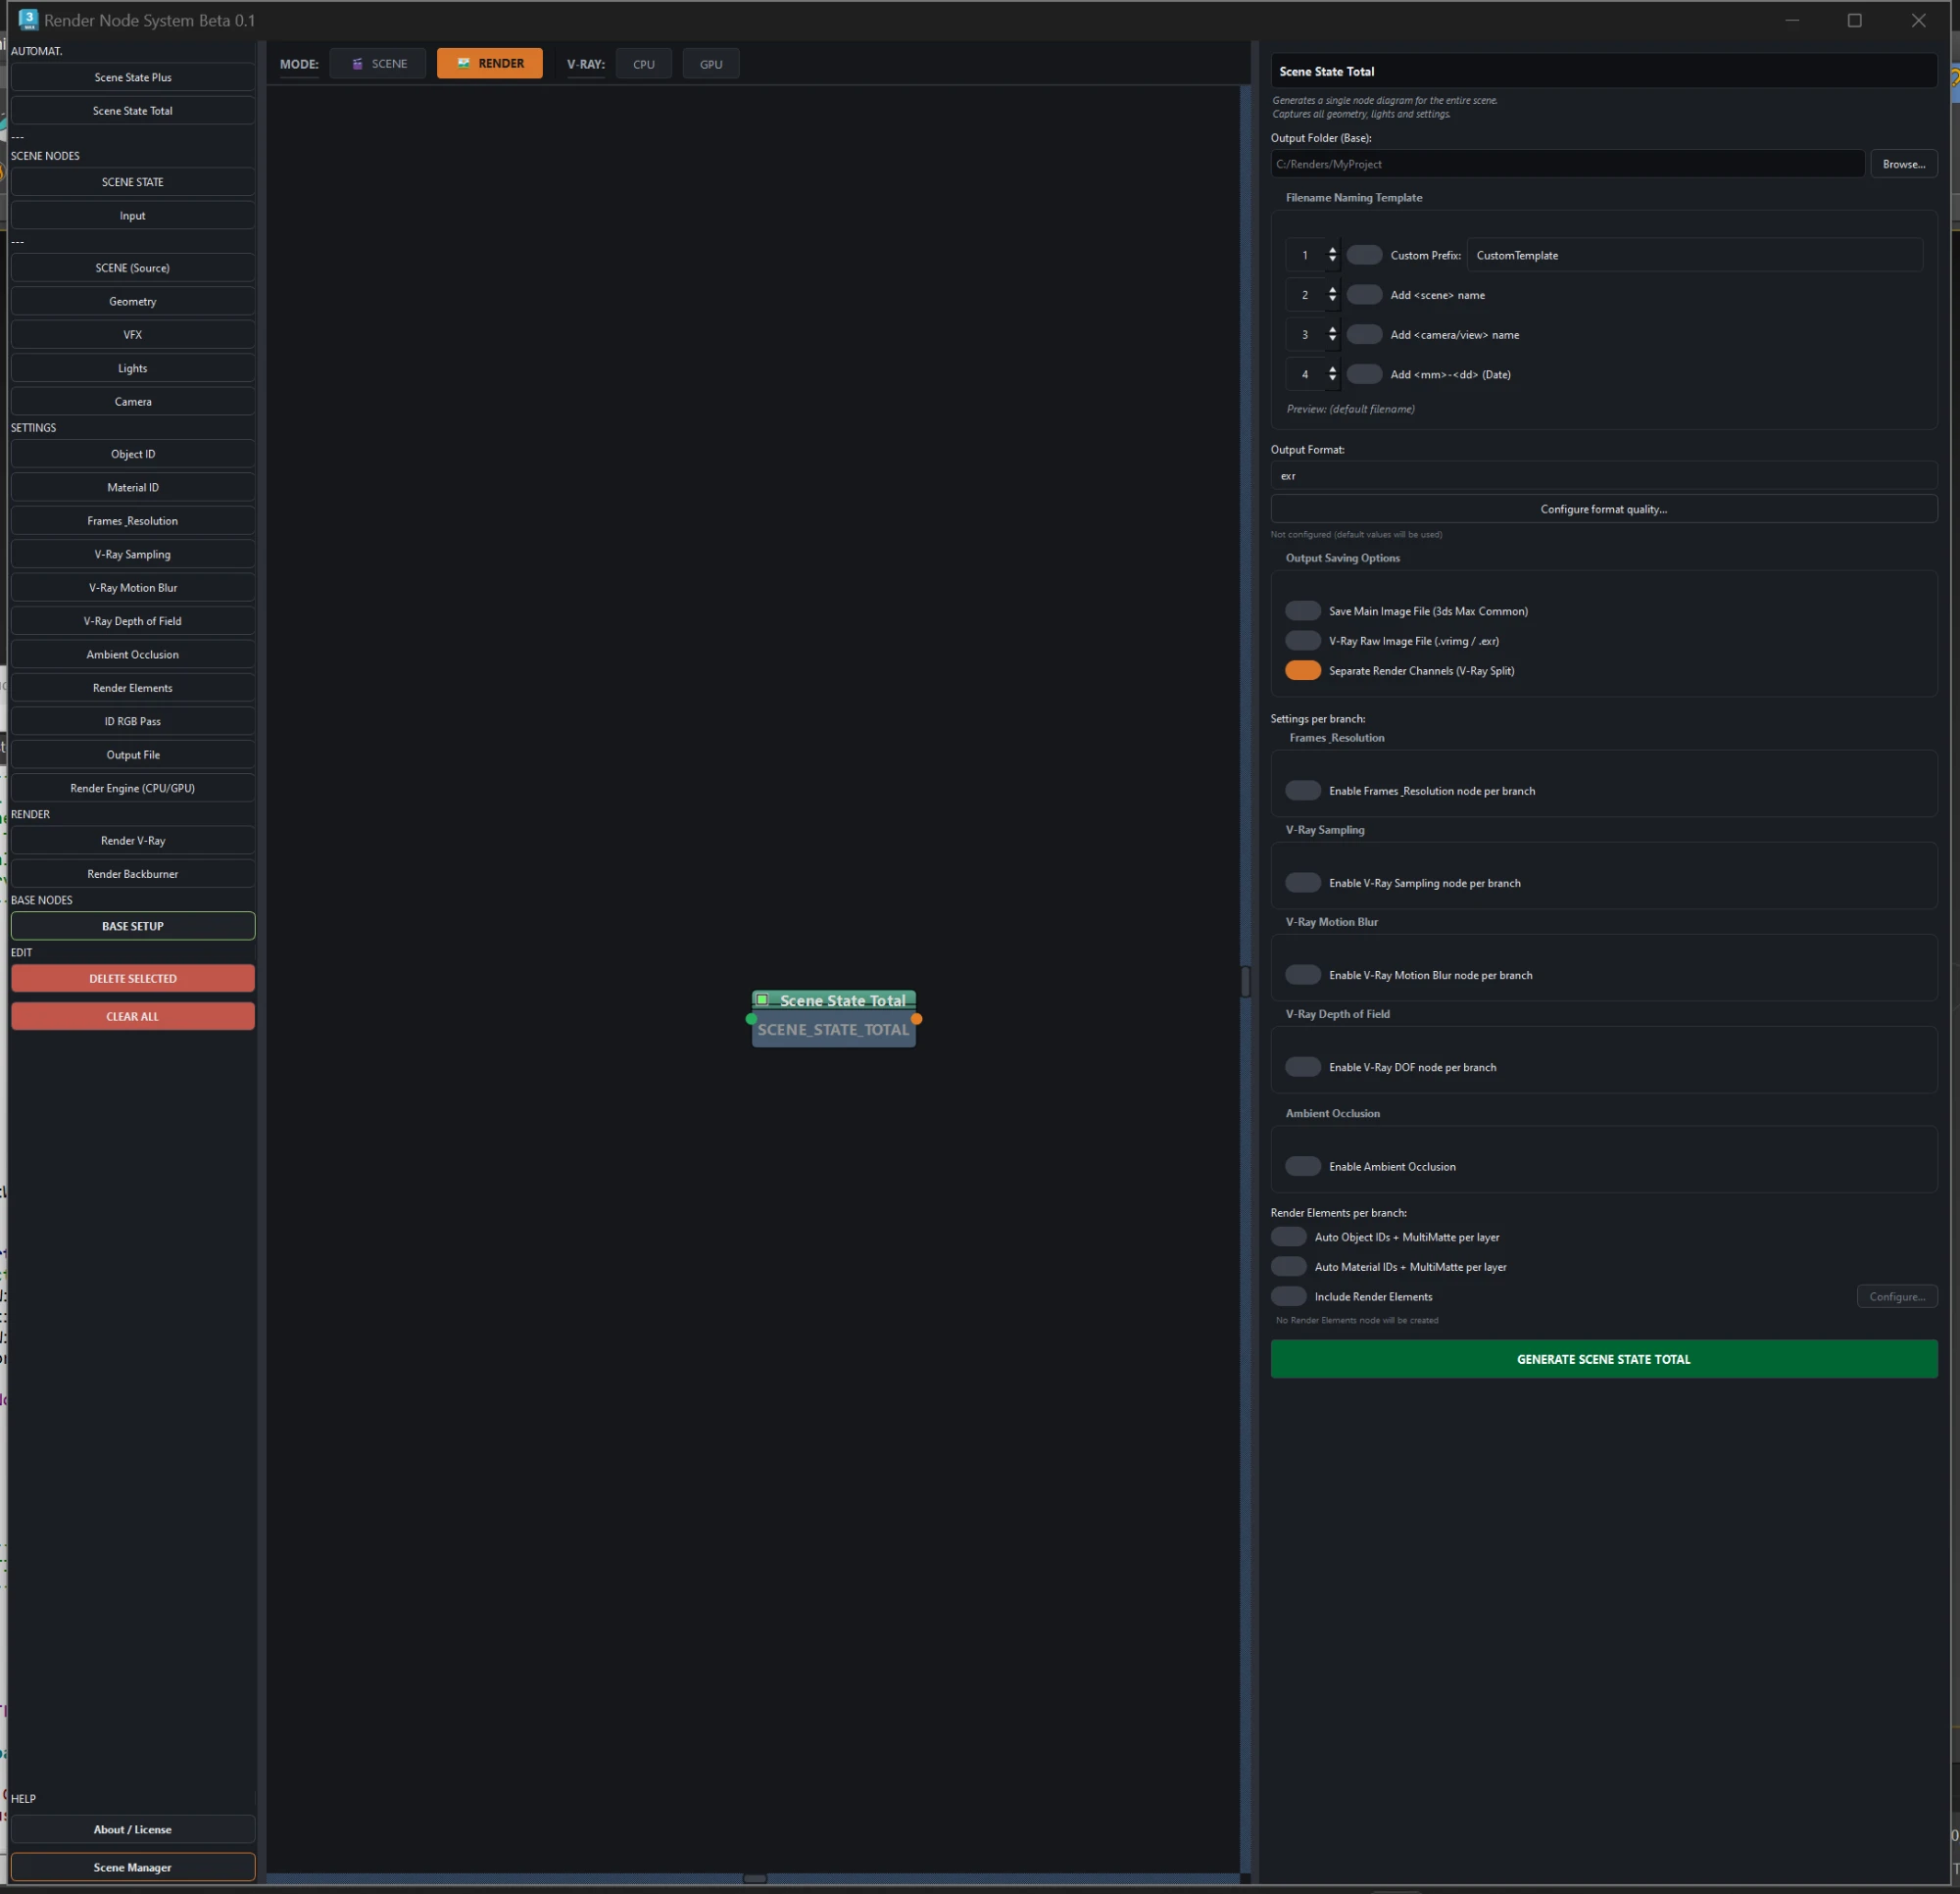
Scene State Total node
Automatic

Scene State Total

Same idea, but a single branch for the whole scene instead of one per layer. For when you do not need the split.

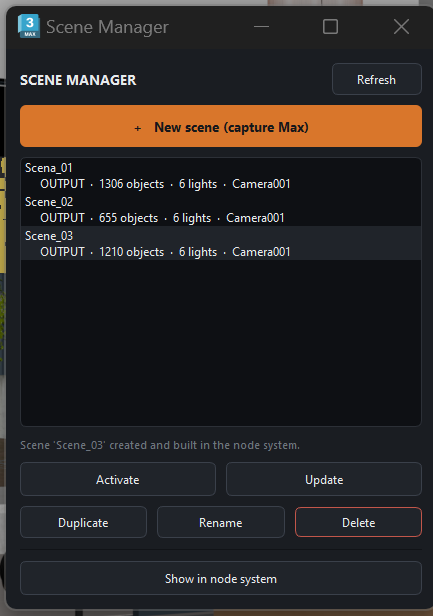
Scene Manager window
Window

Scene Manager

A separate window listing your scenes. Create, activate, update, duplicate, rename or delete without opening the node editor. You can leave it open while you work in Max.

If you created something that is not in the scene you are leaving, it warns you before switching.

03

The bridge

Where the scene graph meets the render graph.

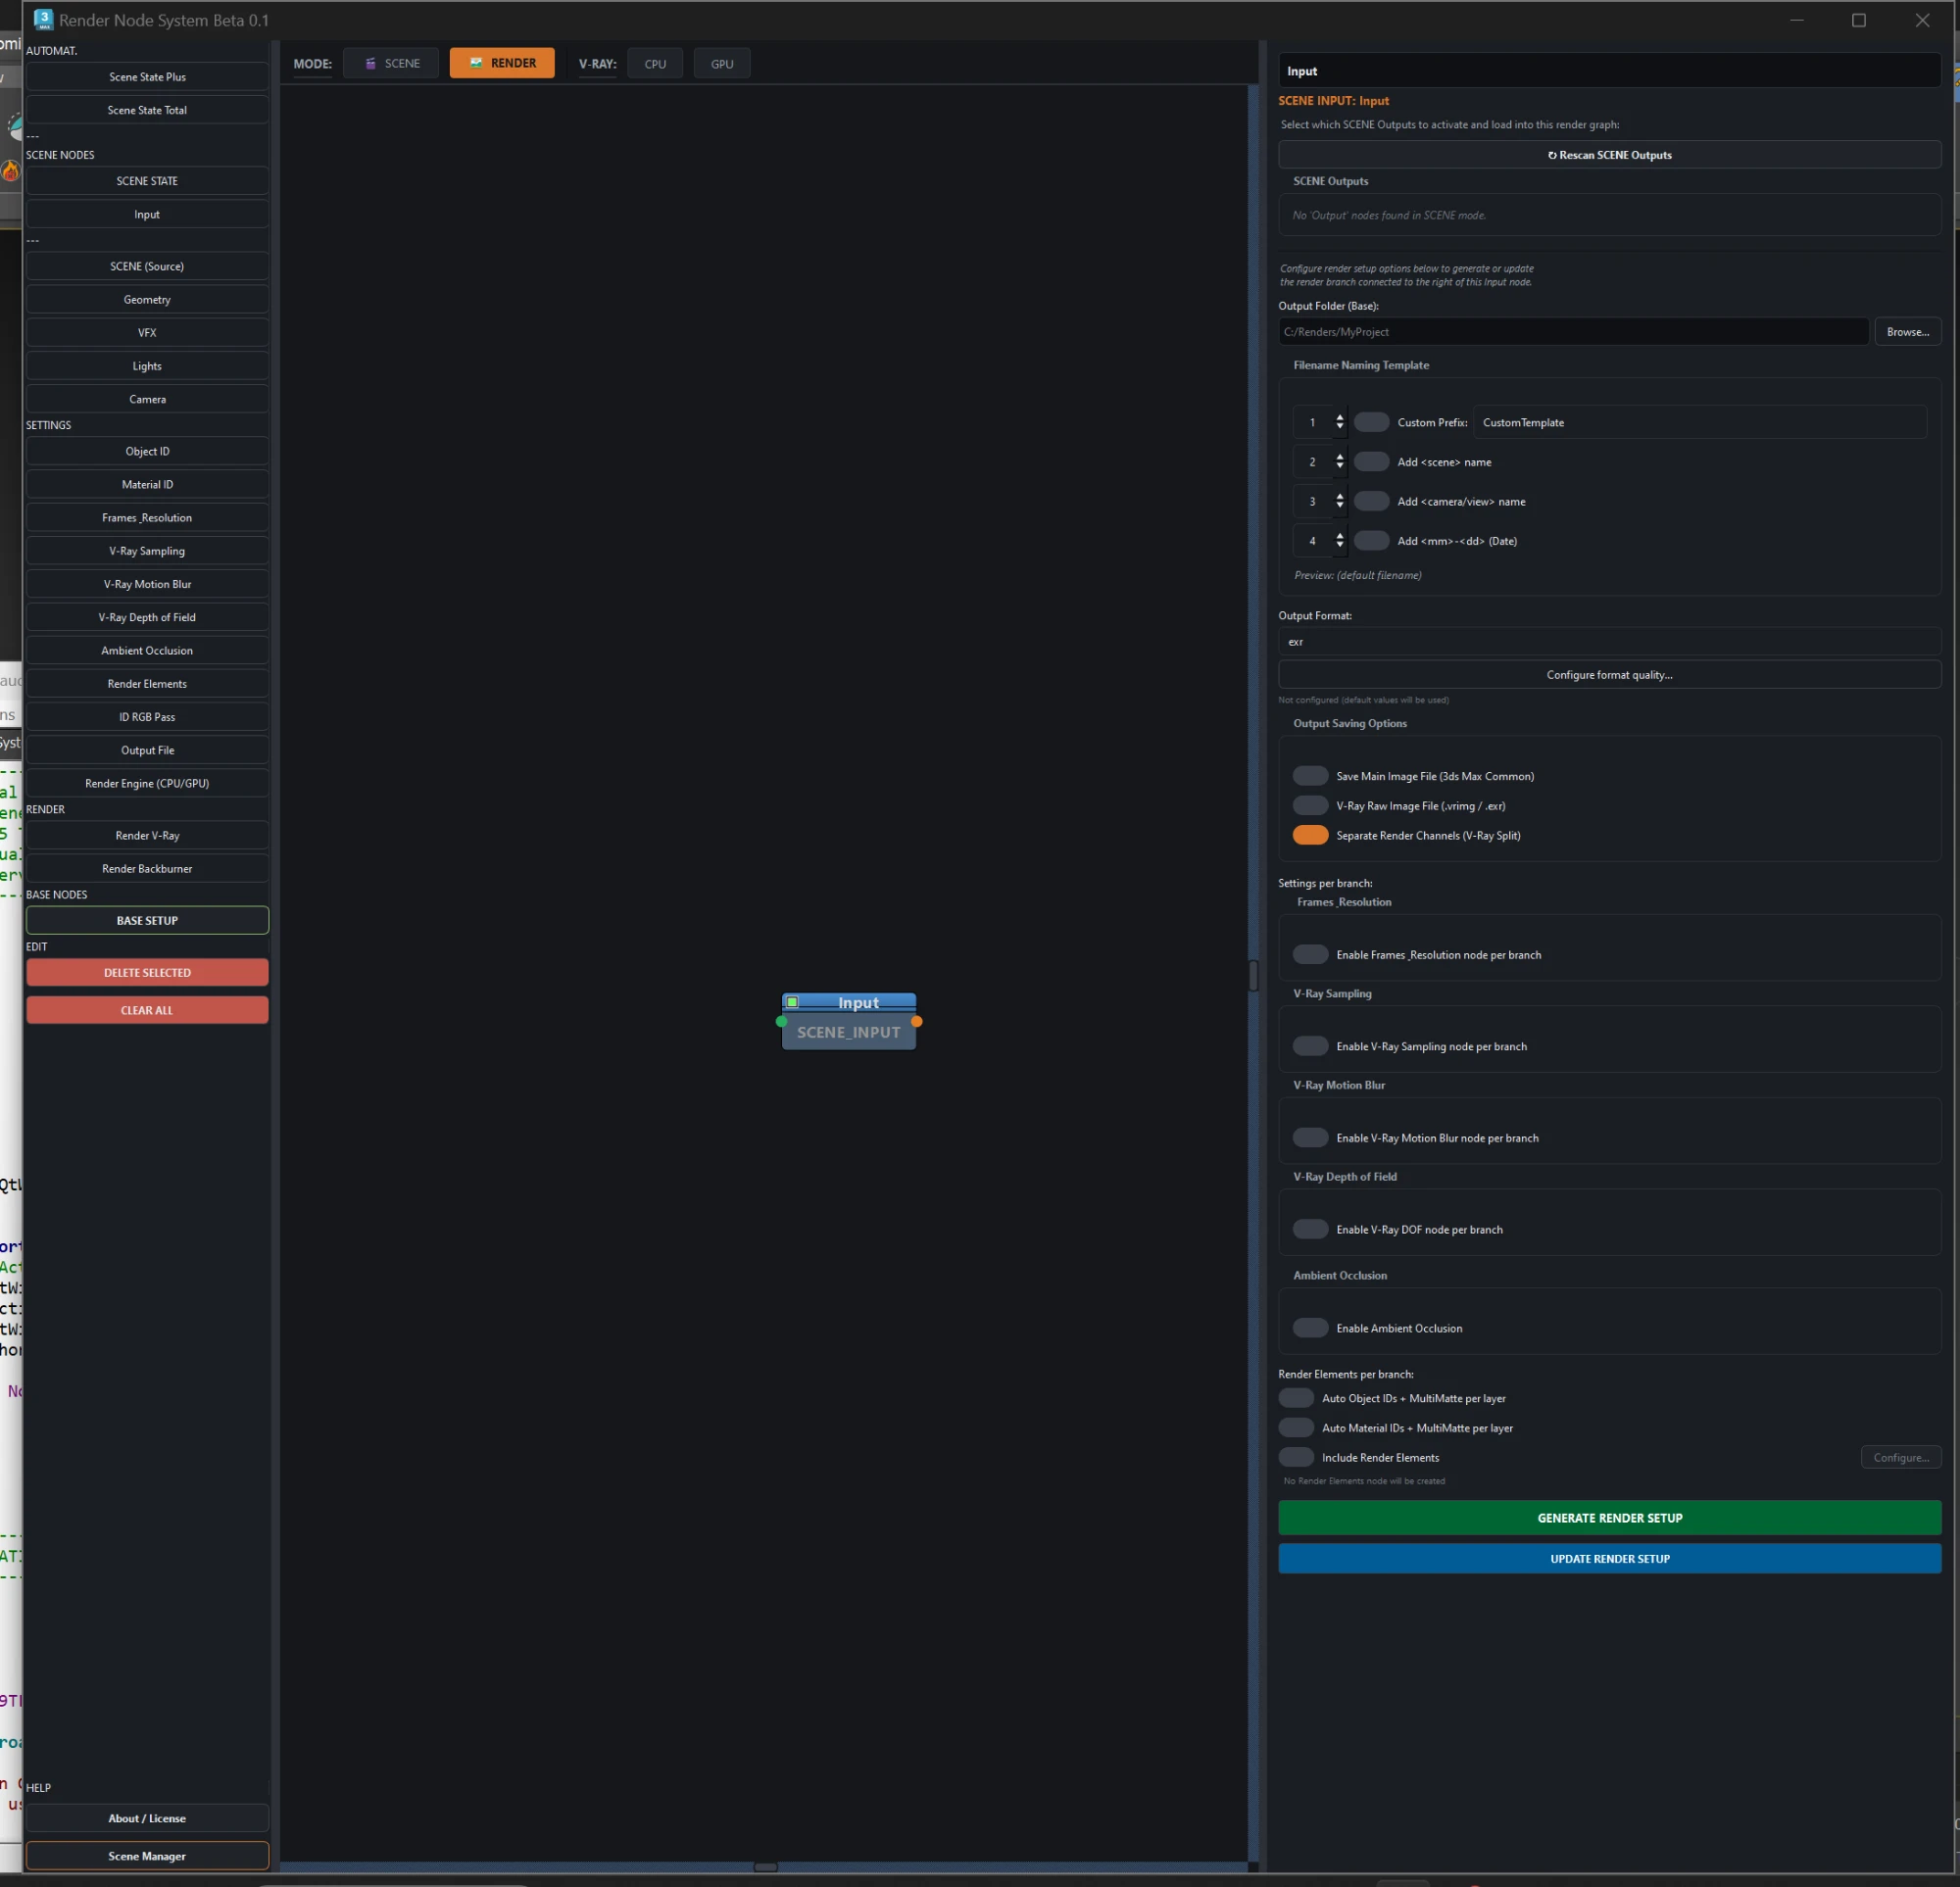
Input node
Bridge

Input

Loads one or more scenes from the SCENE graph, and from here generates or updates the whole render branch hanging to its right.

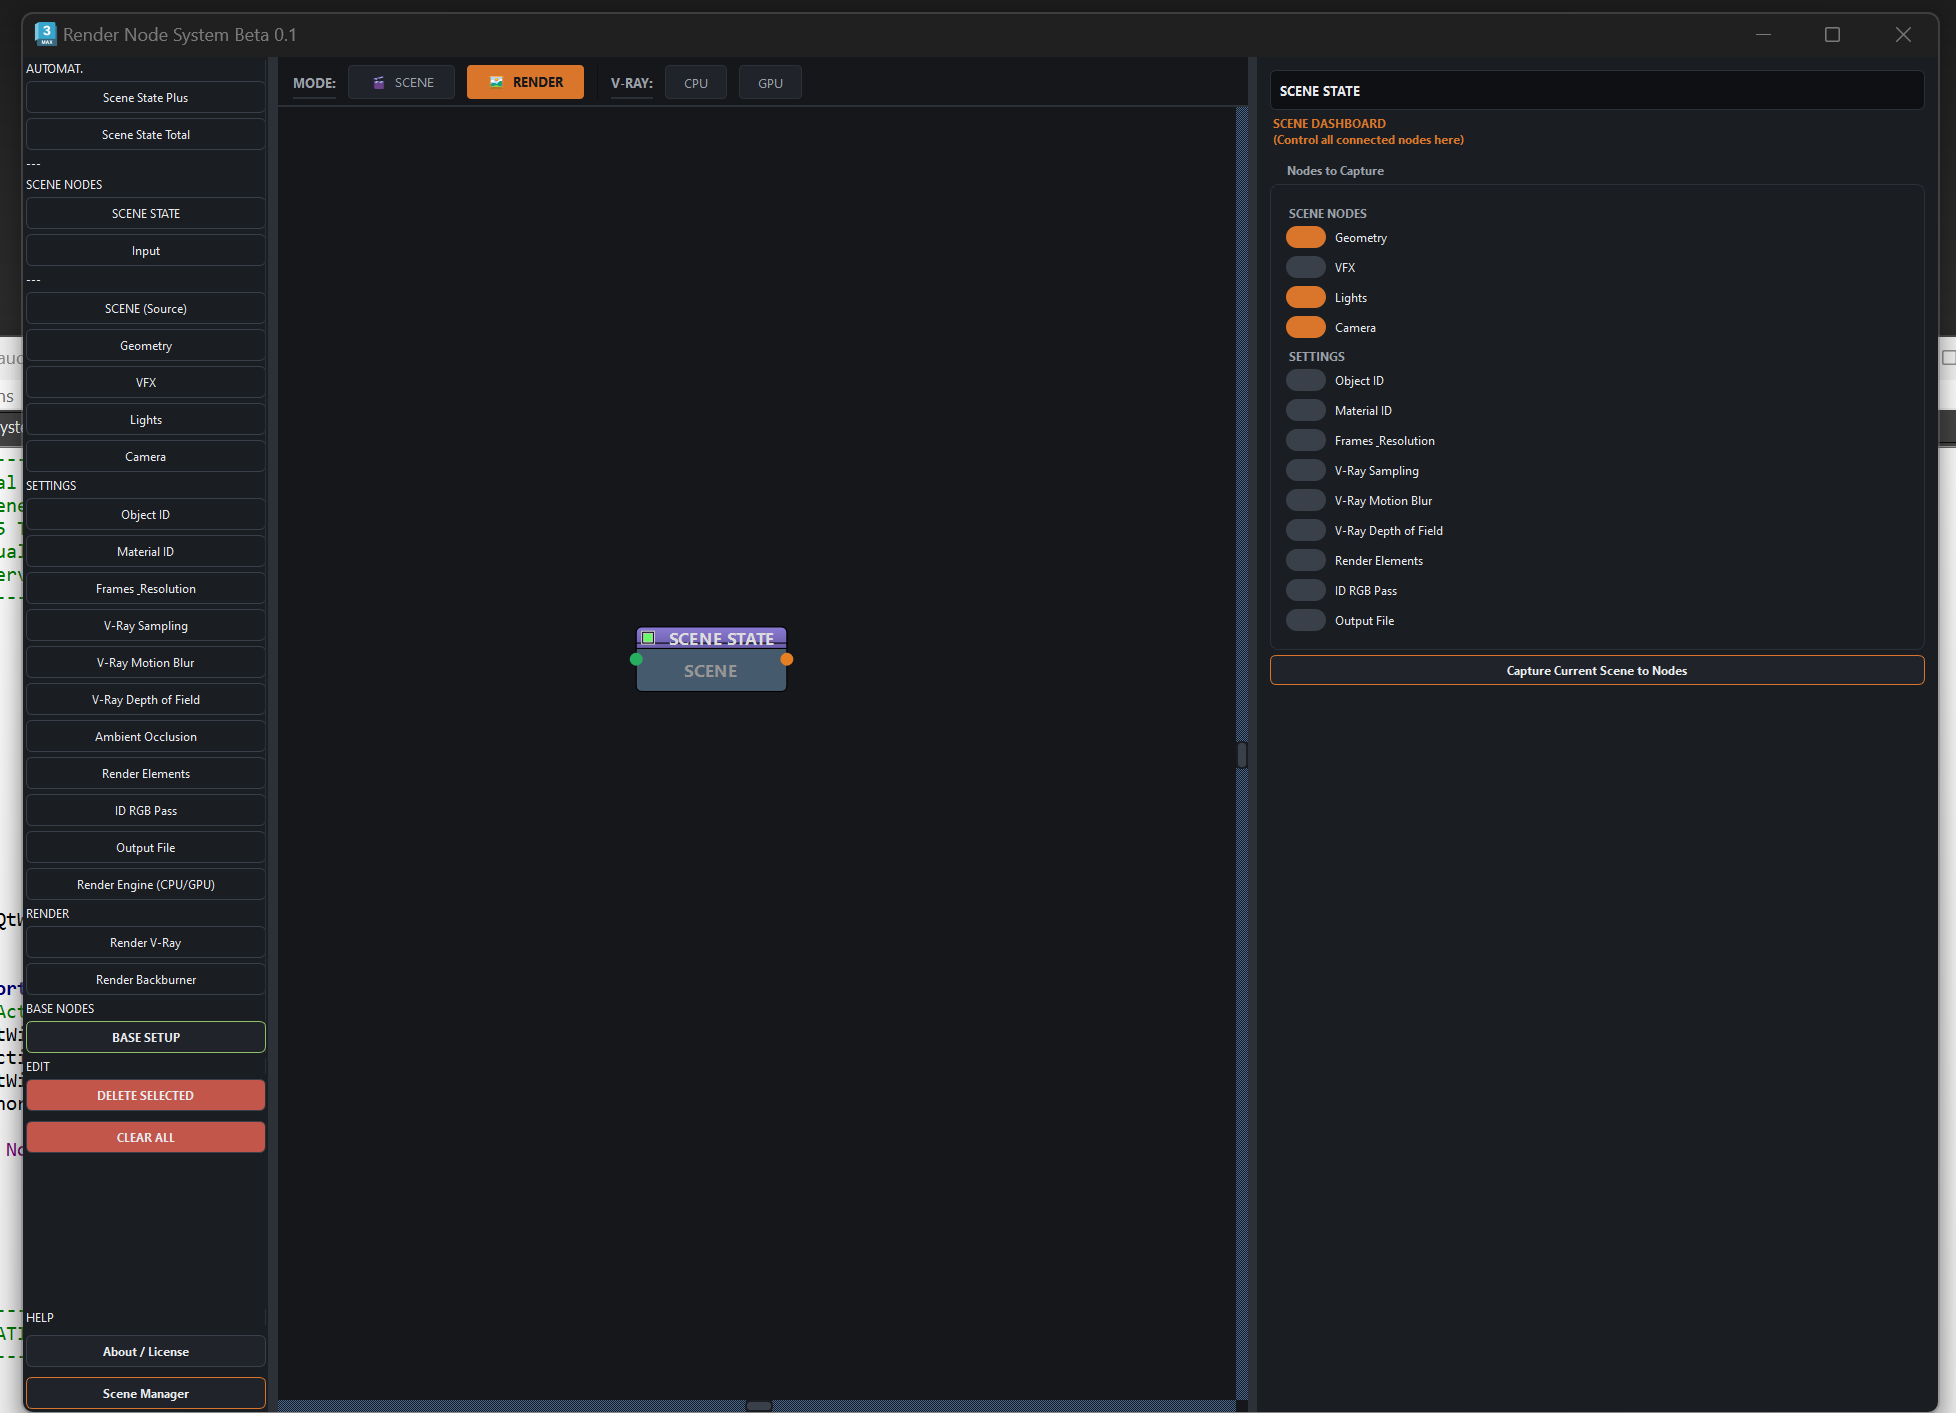
SCENE STATE node
State

SCENE STATE

The dashboard for the branch. You choose what gets captured — geometry, lights, camera, IDs, sampling, output — and apply it all to 3ds Max at once.

Out of the box only geometry, lights and camera are ticked.

04

IDs and render elements

The mattes you will be working with in comp.

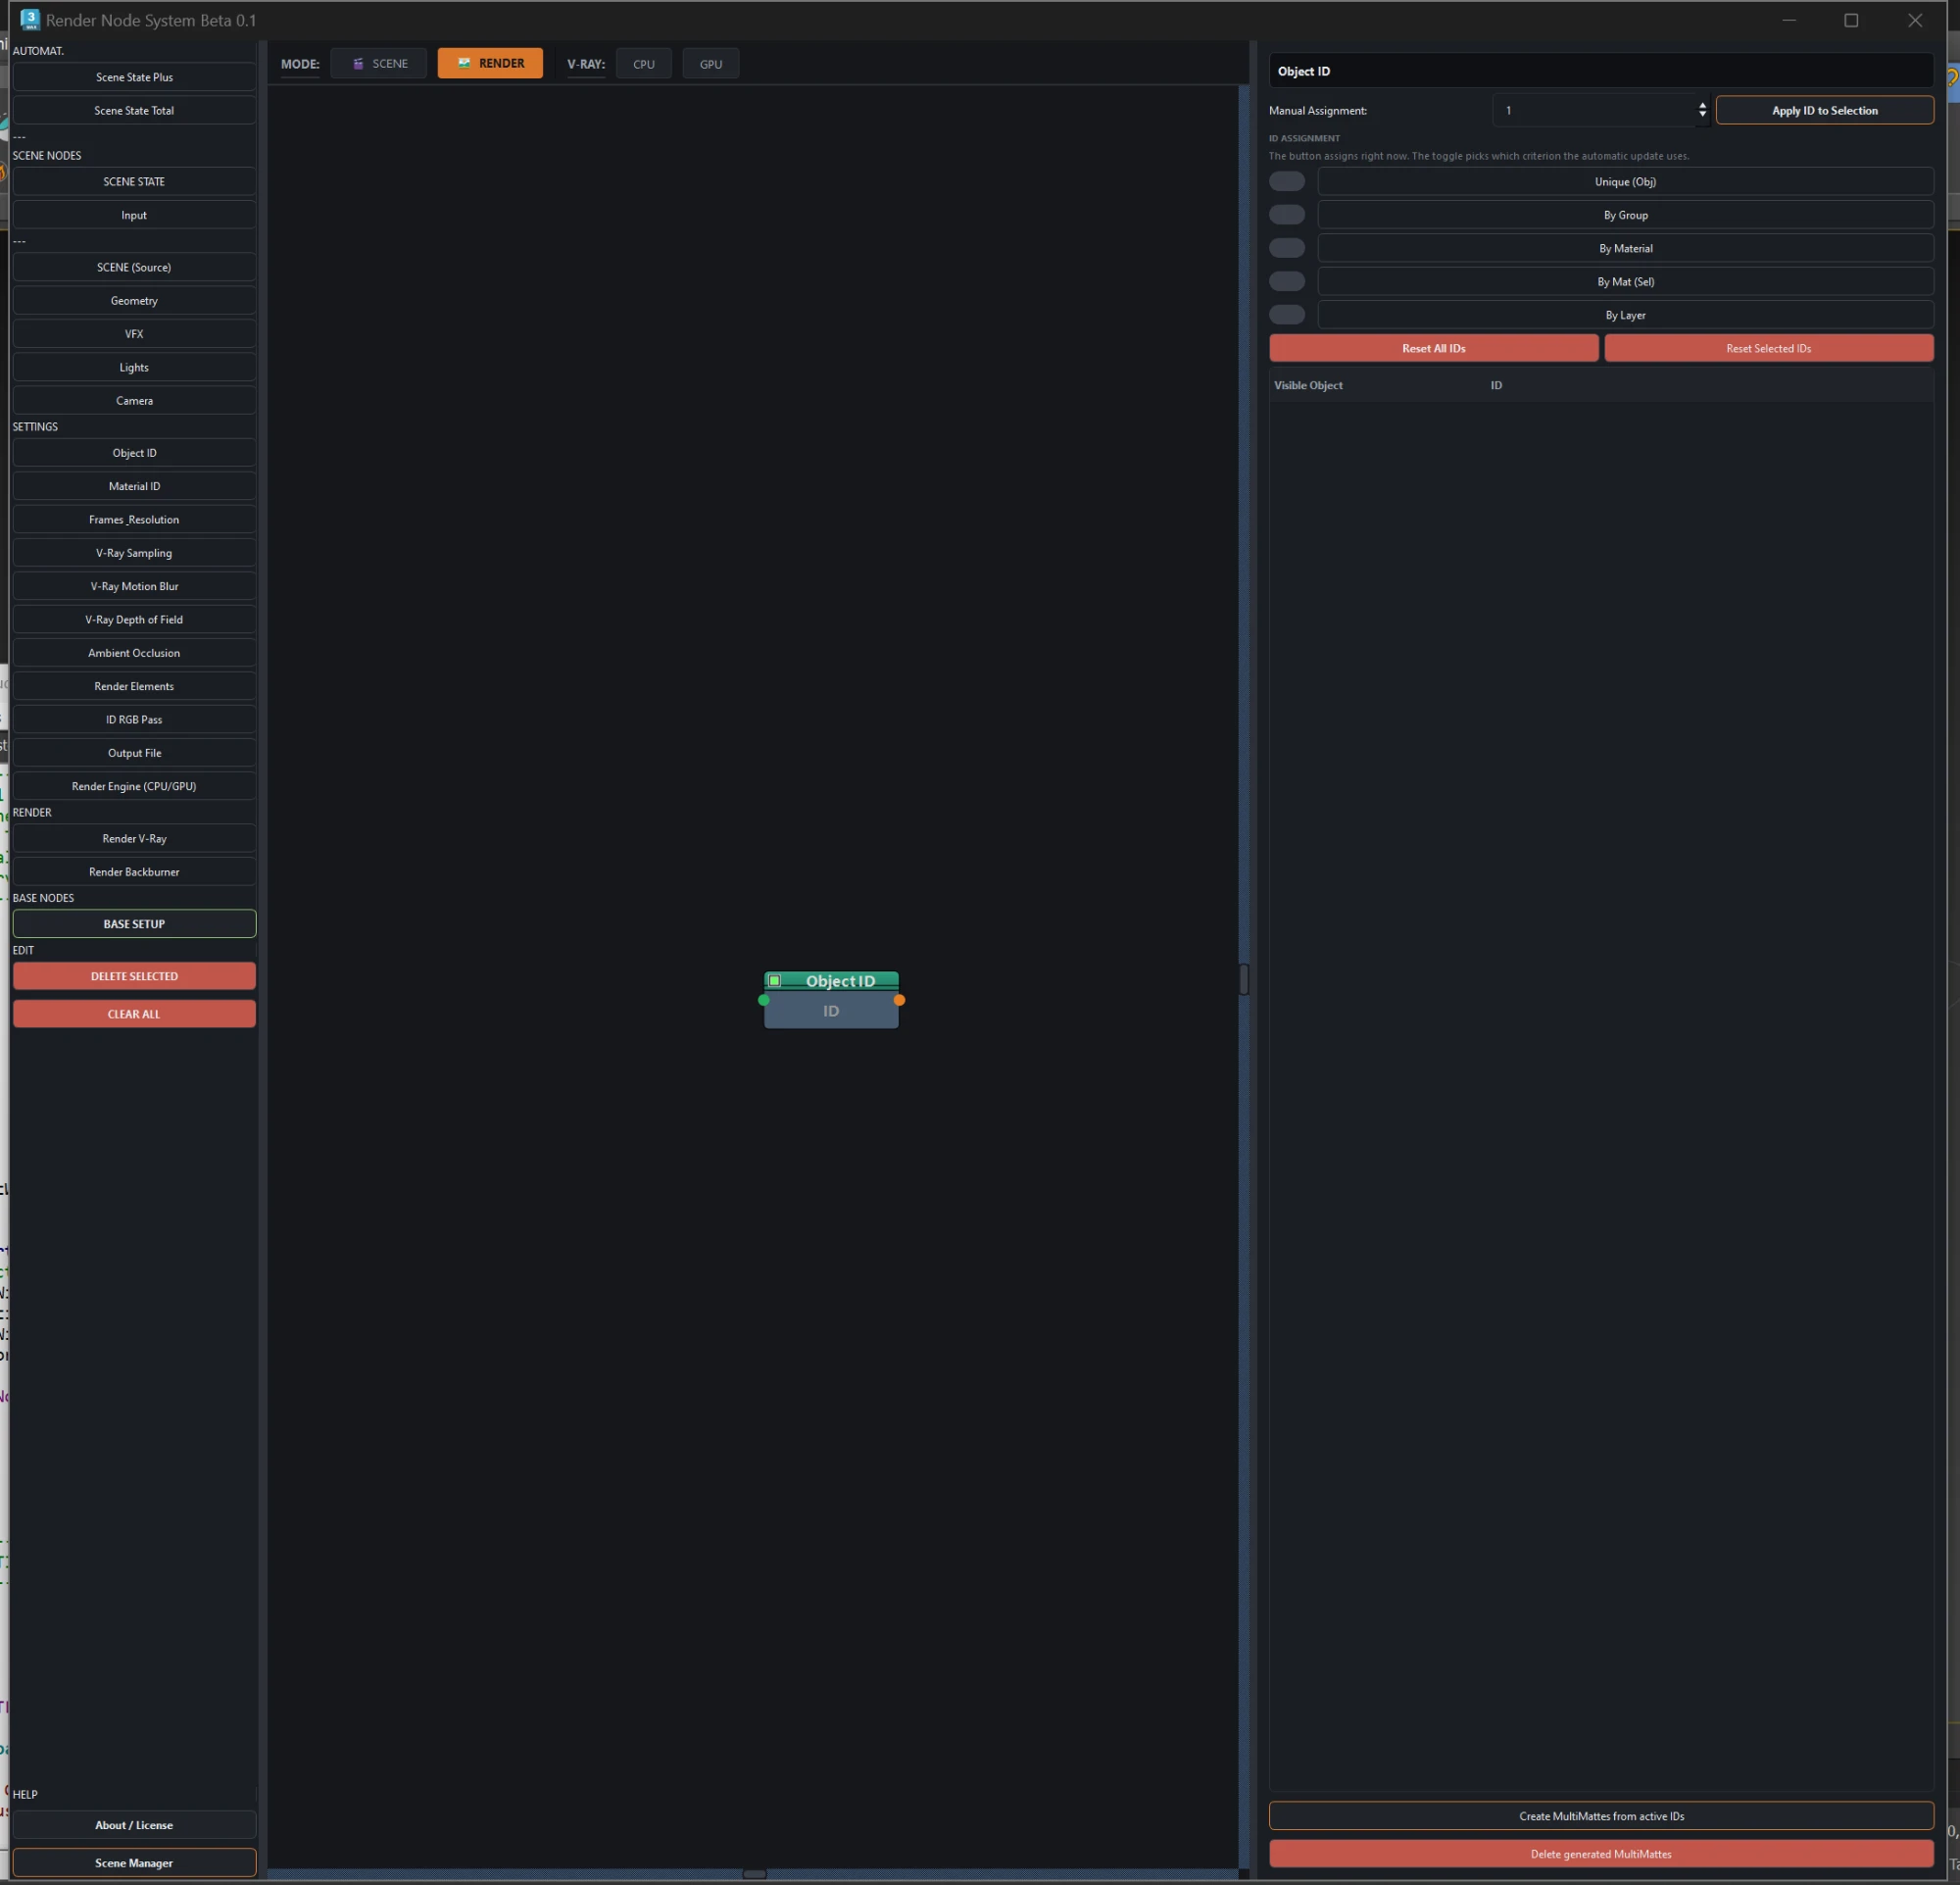
Object ID node
Mattes

Object ID

Hands out G-Buffer IDs five ways: per object, per group, per material, per selection or per layer — and generates the matching MultiMattes.

A freed number is never reused, so channels never shuffle.

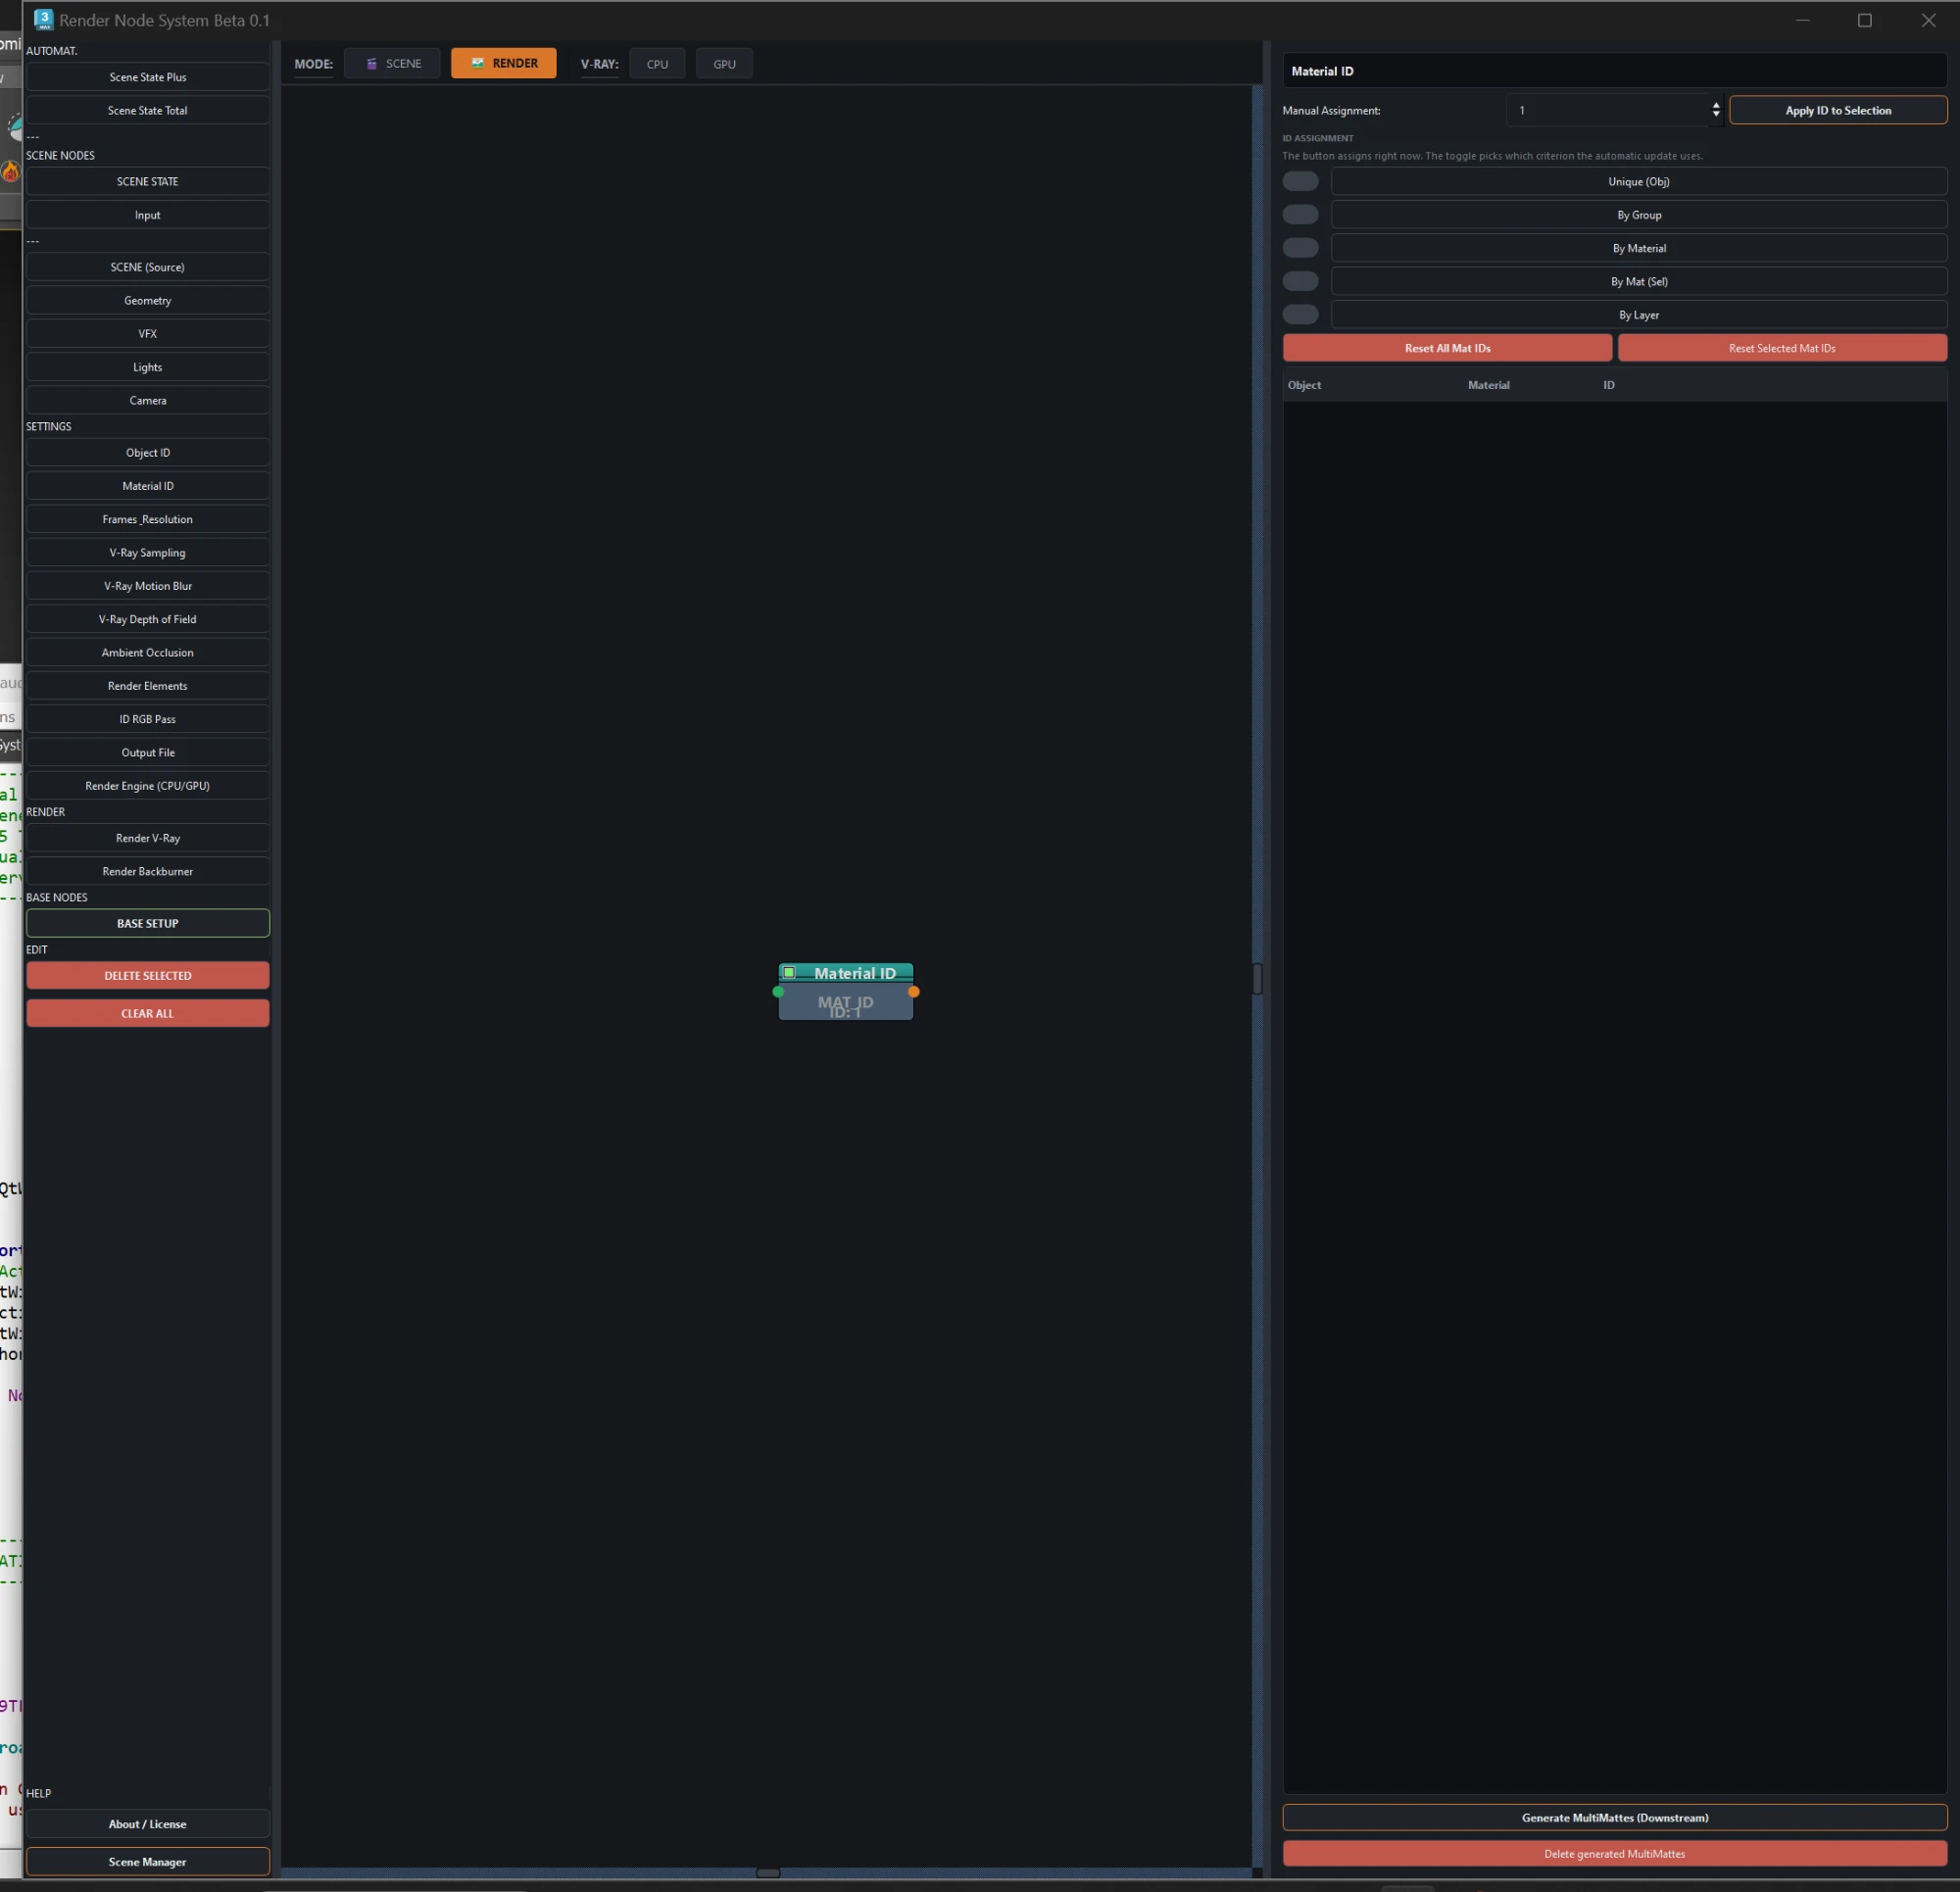
Material ID node
Mattes

Material ID

The same five criteria, but on the material's effects channel. Feeds MultiMattes with matID on, and reserves room for the sub-materials of a Multi/Sub-Object.

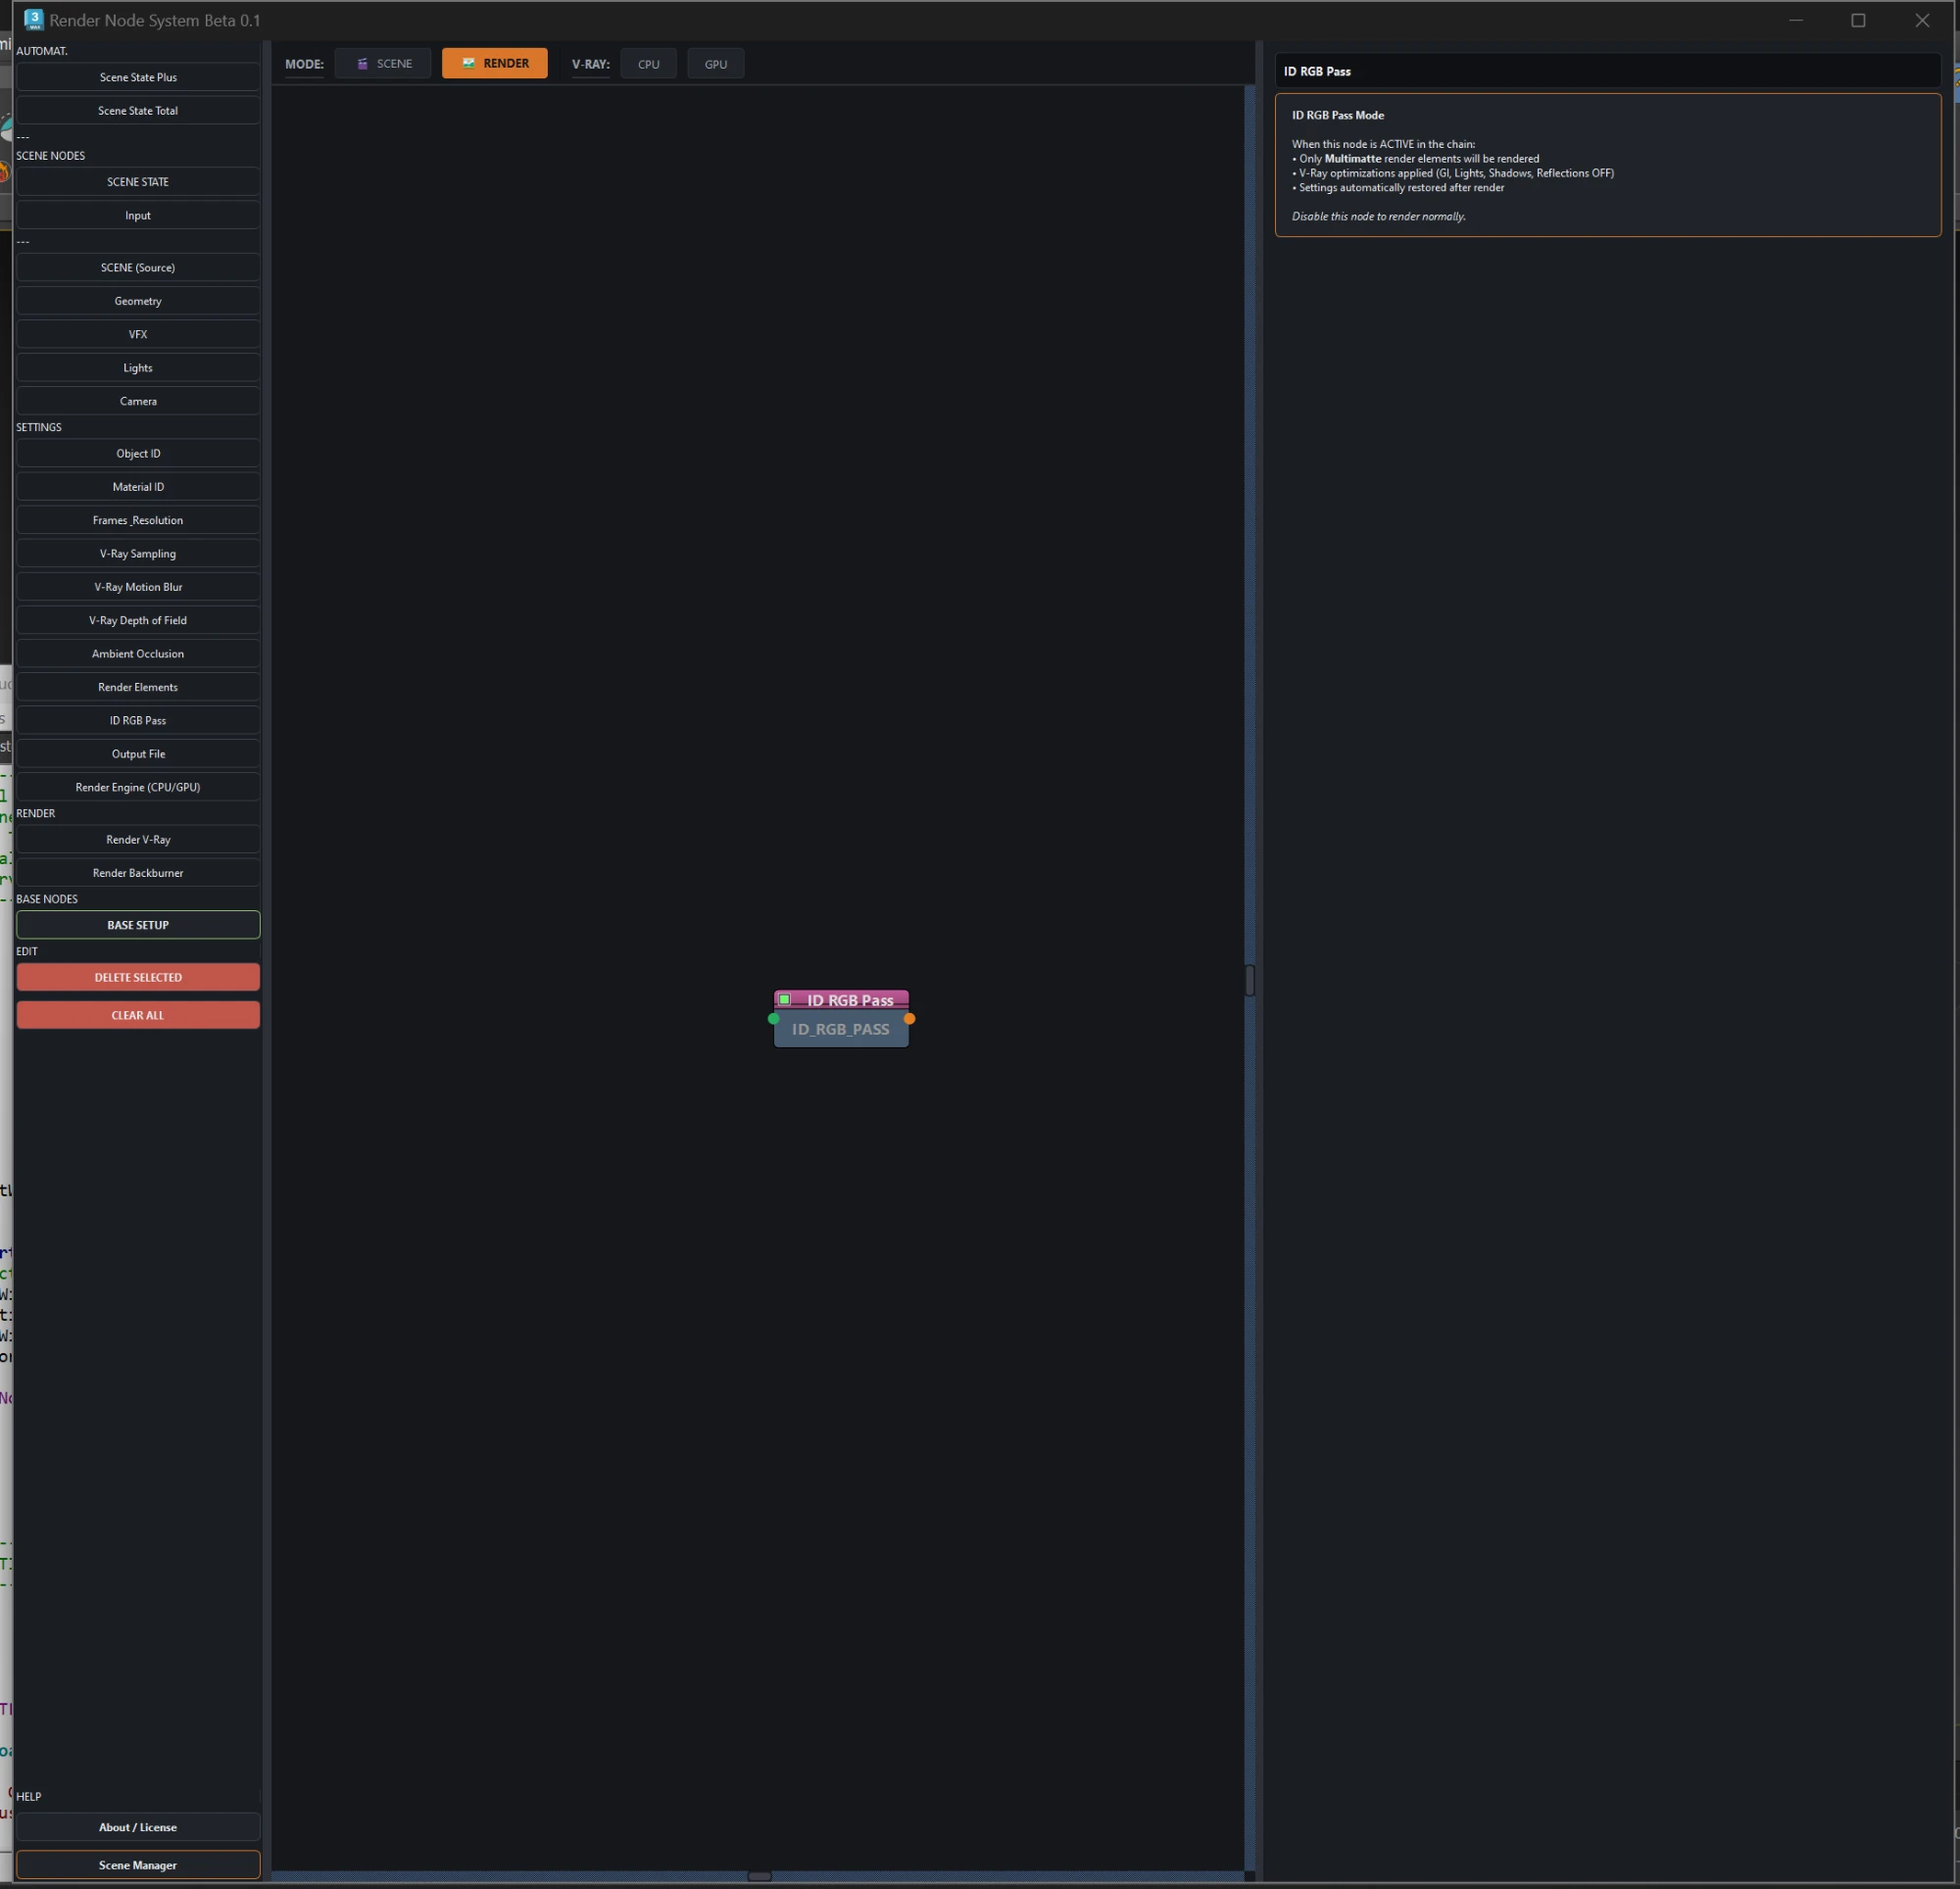
ID RGB Pass node
Fast pass

ID RGB Pass

With this node active only the MultiMattes render, with GI, lights, shadows and reflections off. Everything is restored afterwards.

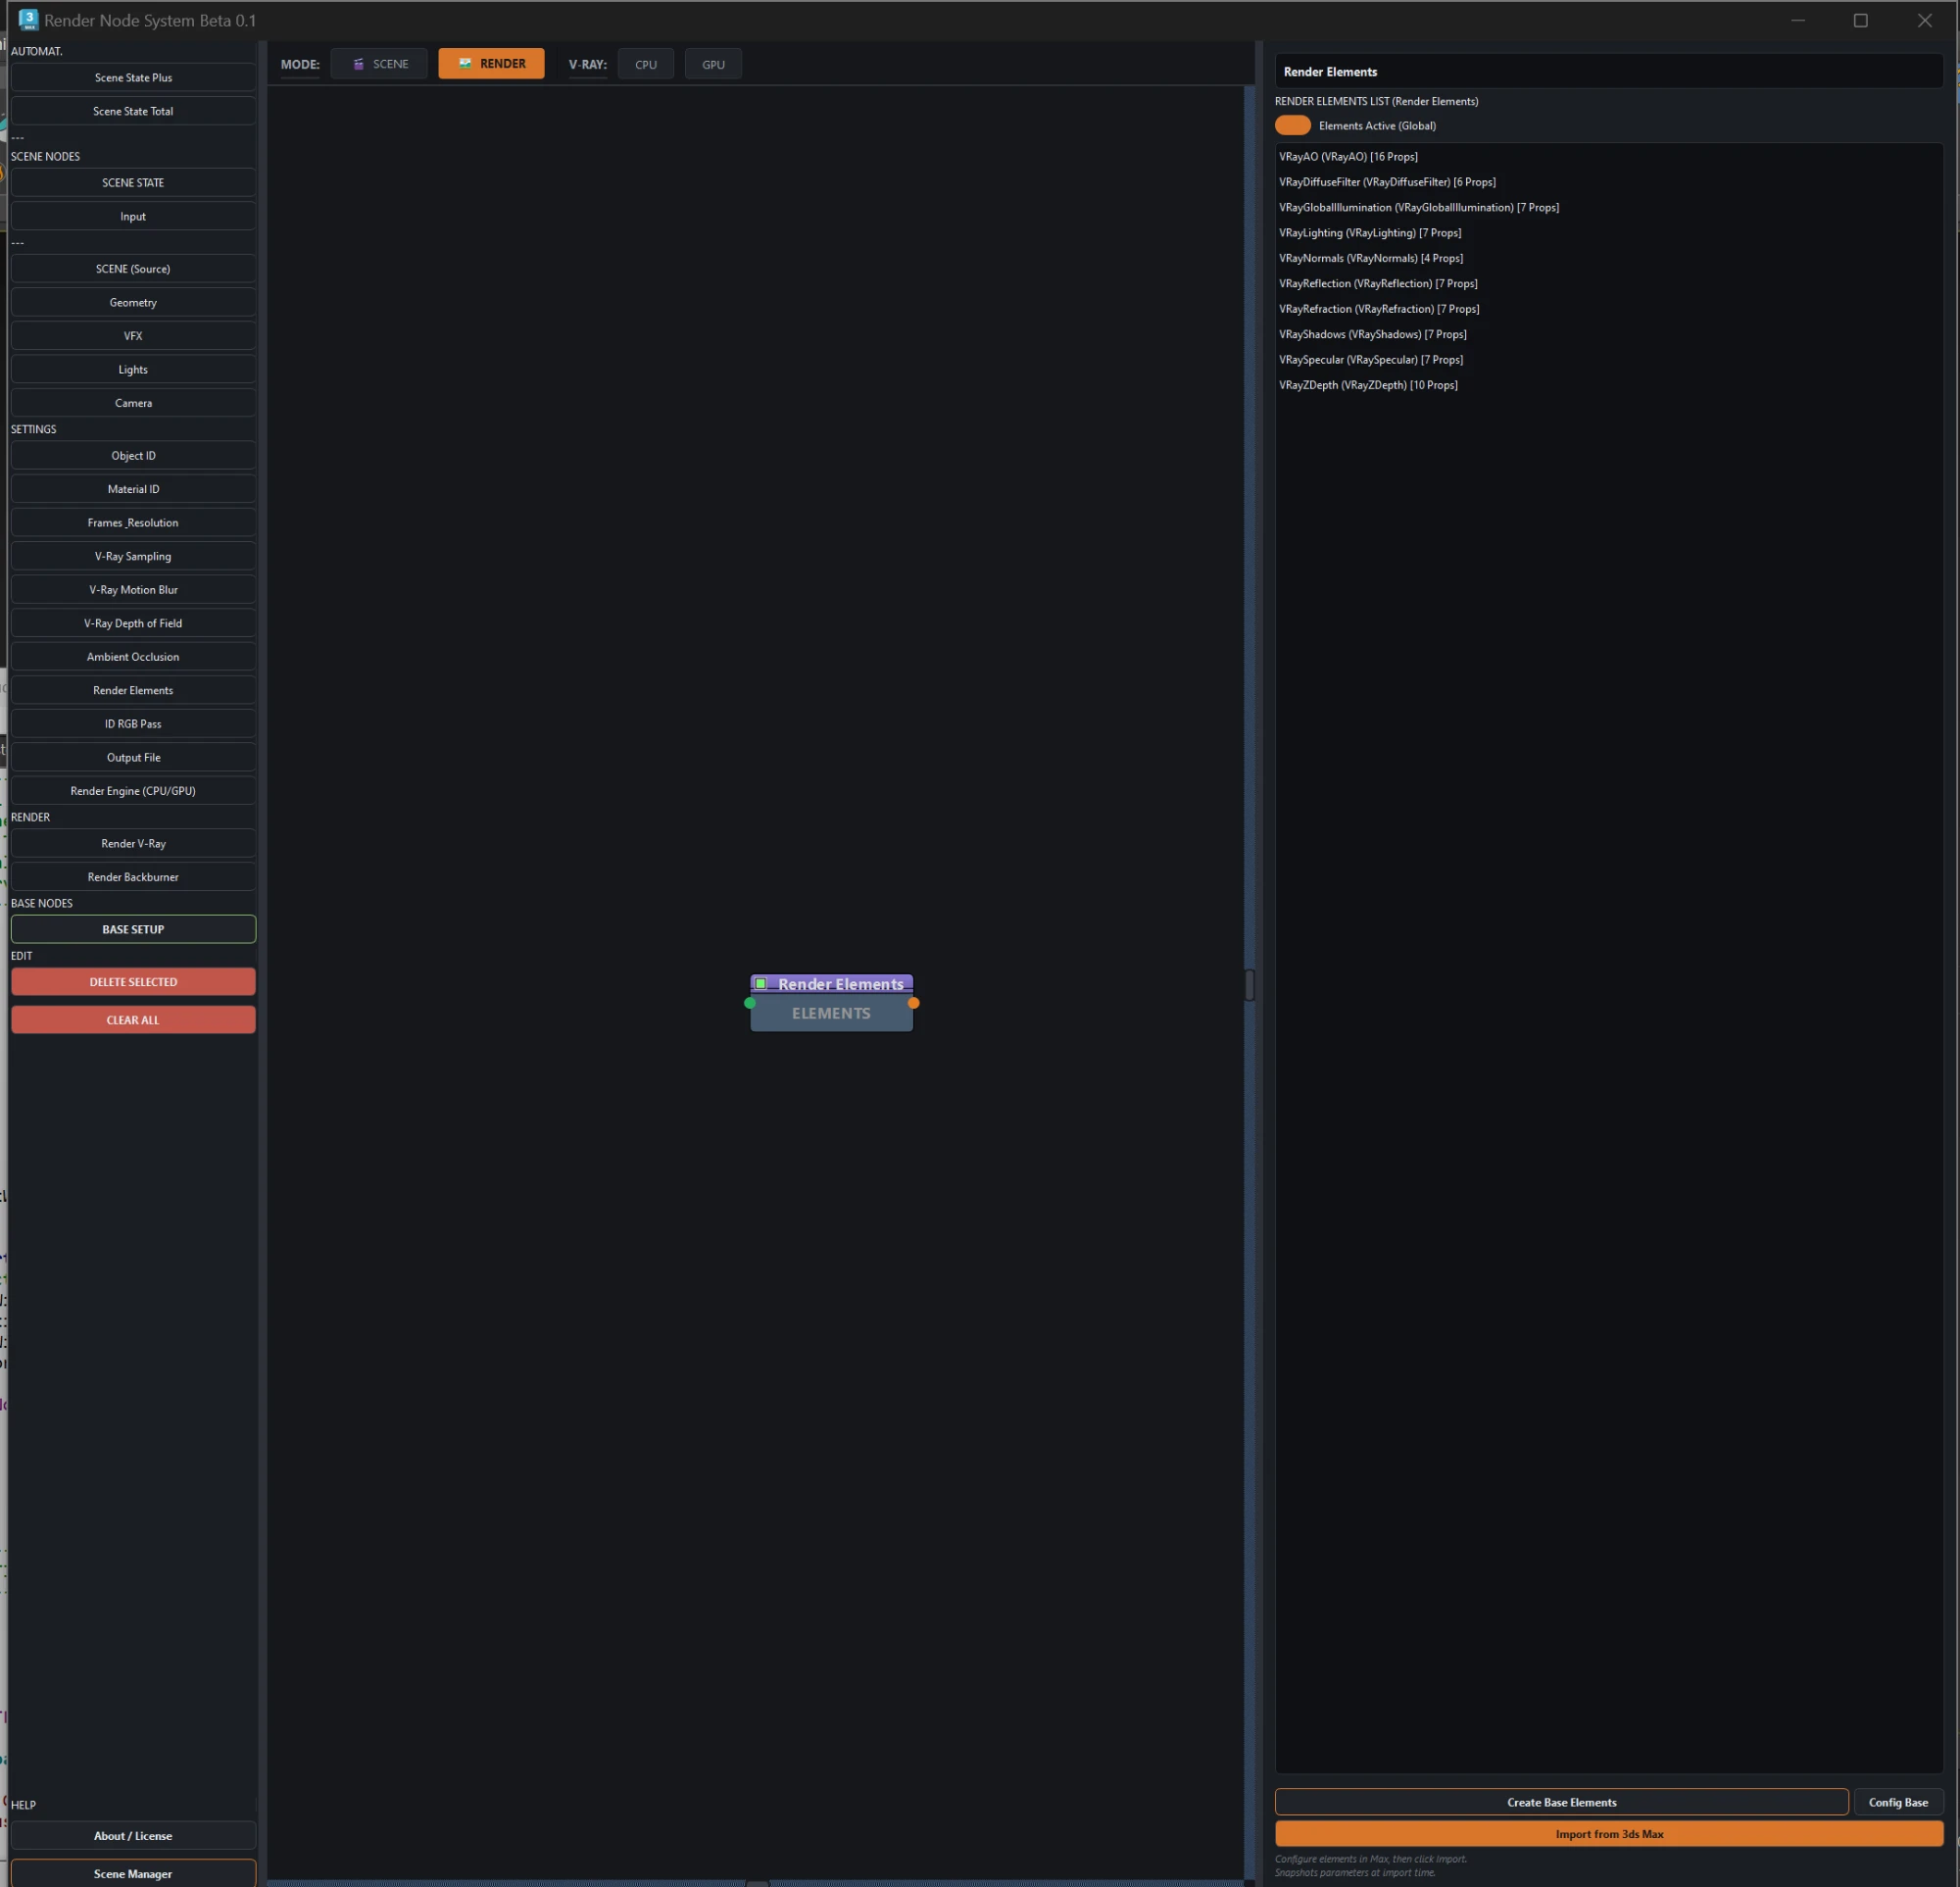
Render Elements node
AOV

Render Elements

The branch's render element list. Import what you already have in Max, or build it from a base set you save once and reuse.

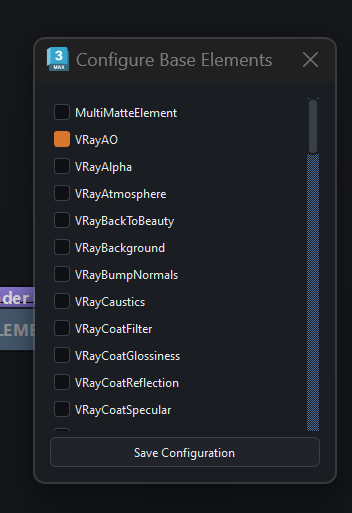
Base Elements configurator
Preset

Base Elements

Define the render elements you always use once and they are kept as a base set. From then on, any new branch builds them by itself.

05

Render settings

Each branch carries its own, independent from the rest.

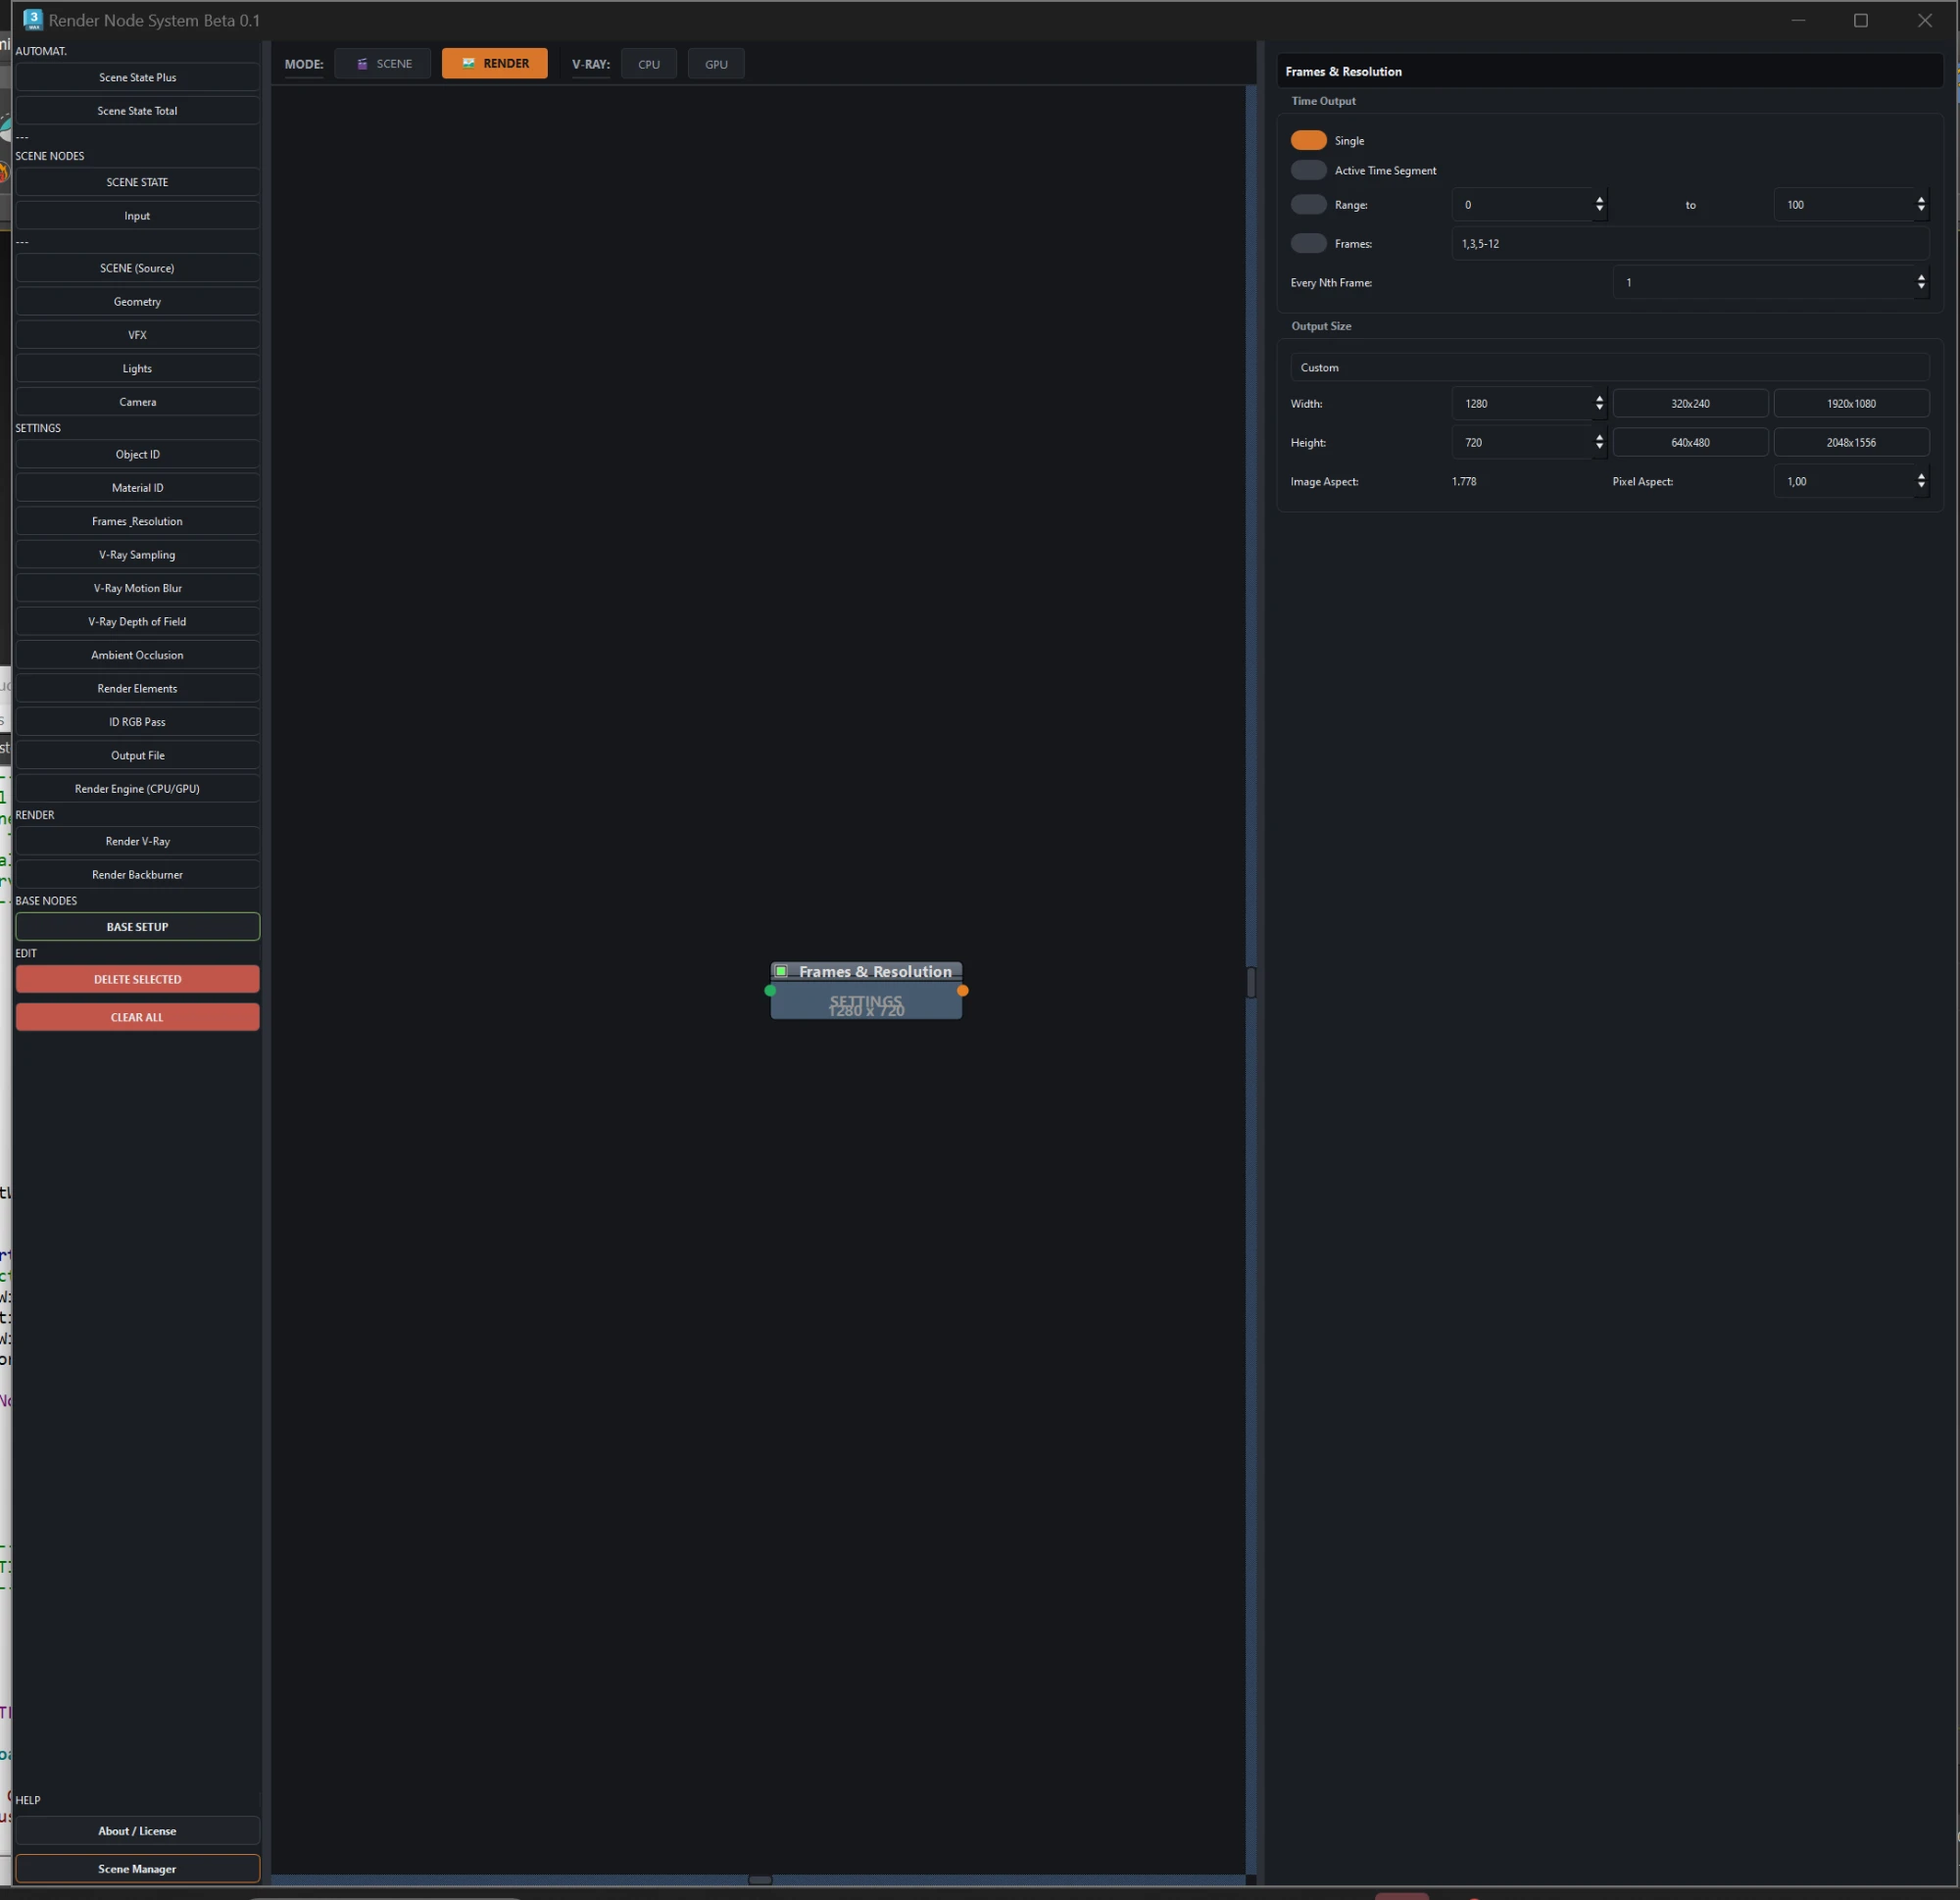
Frames and Resolution node
Settings

Frames & Resolution

Which frames and at what size: a single one, the active segment, a range or a loose list. Plus resolution, presets and aspect.

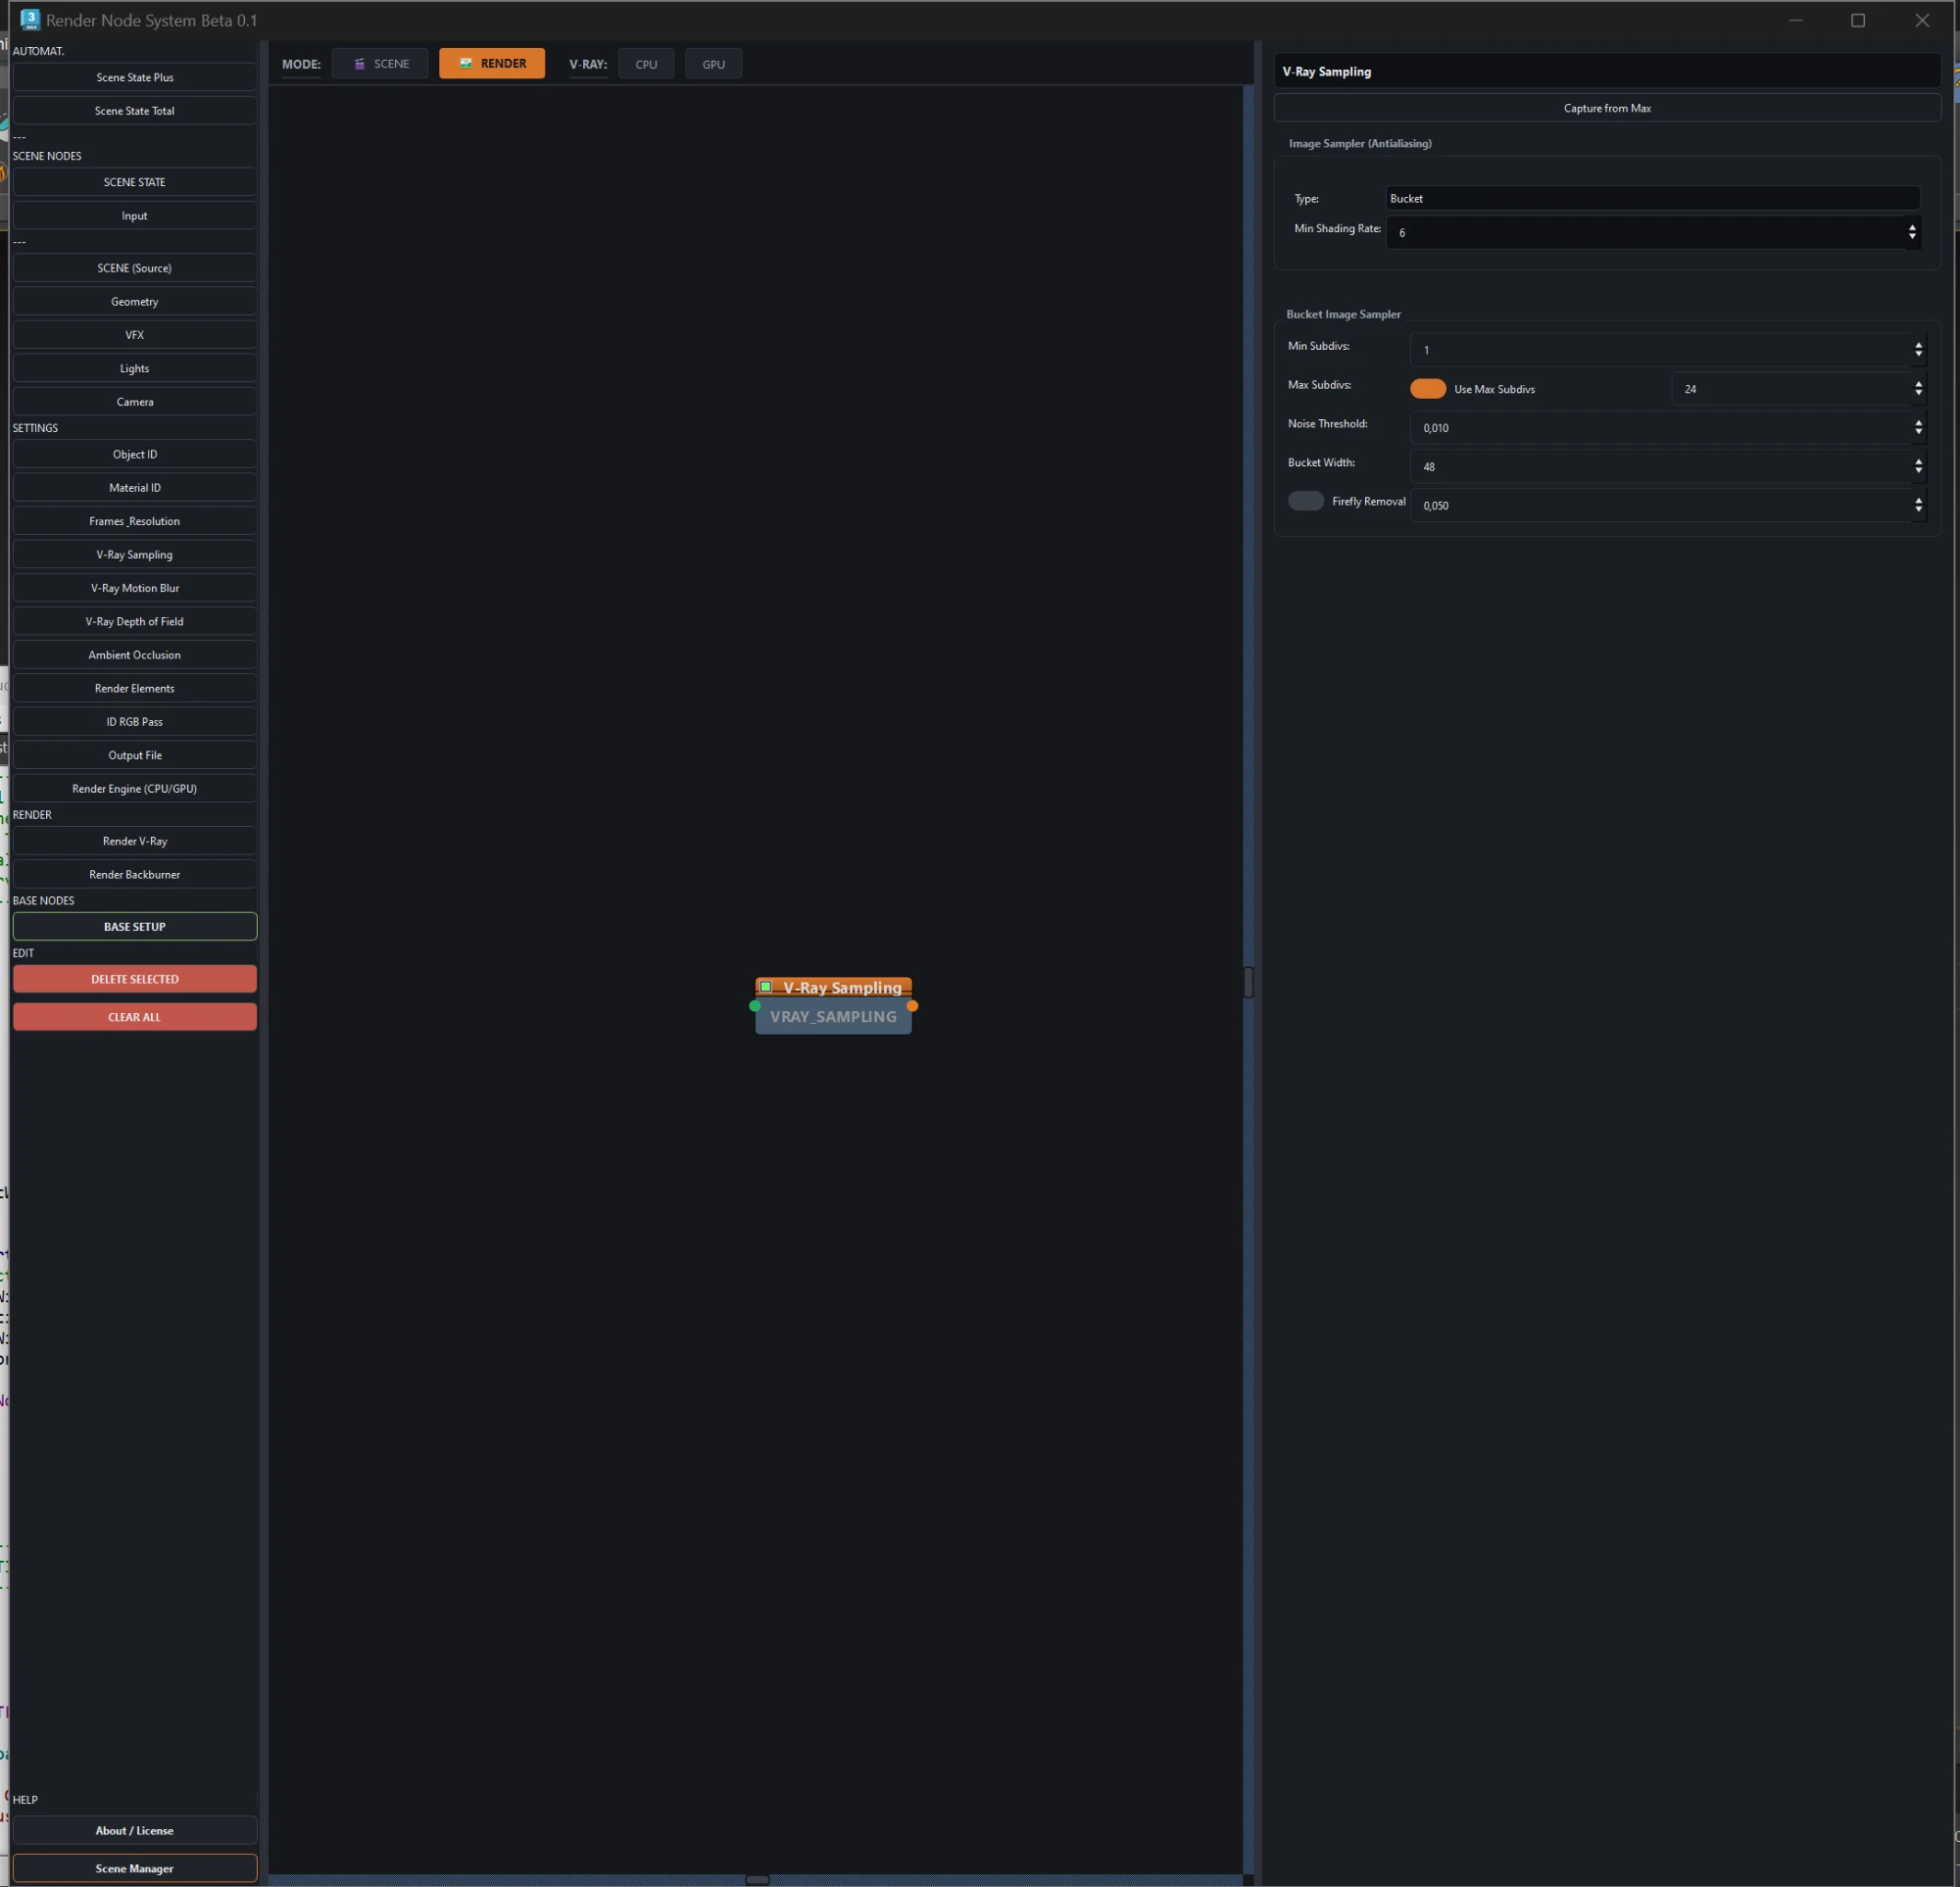
V-Ray Sampling node
V-Ray

V-Ray Sampling

Image sampler and noise control. Shows bucket or progressive parameters depending on the engine the branch uses, because CPU and GPU do not expose the same ones.

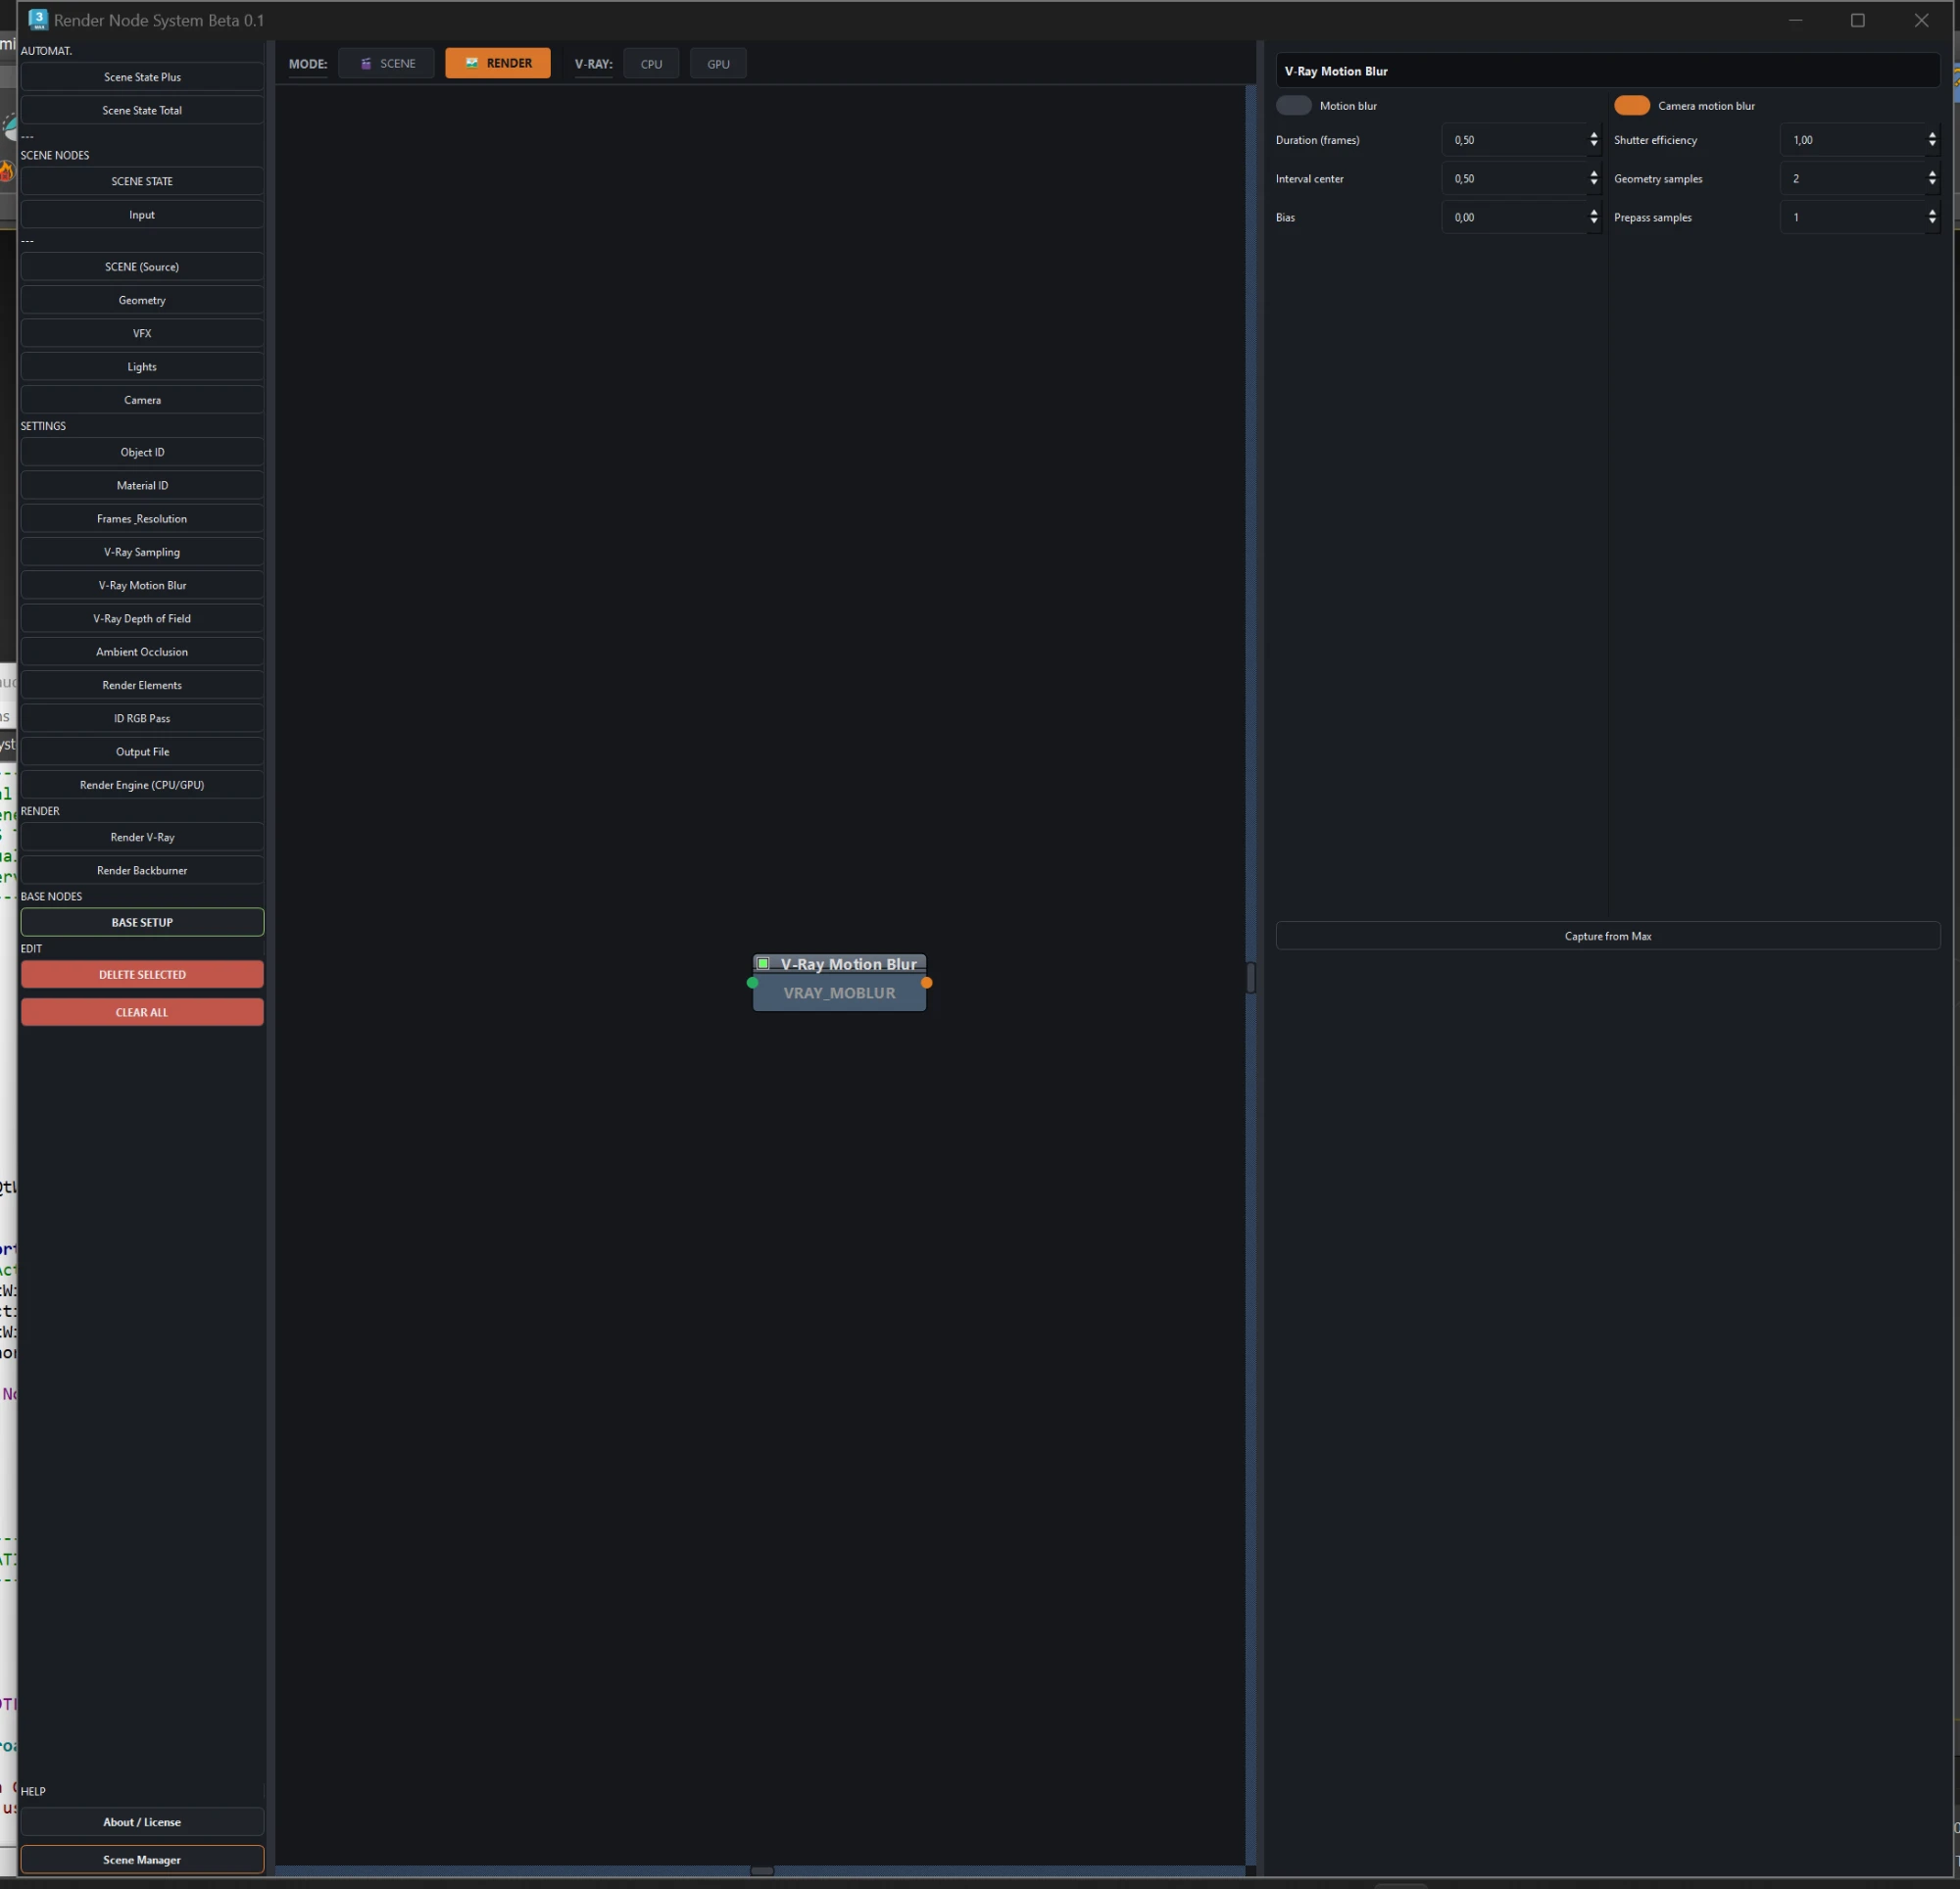
V-Ray Motion Blur node
V-Ray

V-Ray Motion Blur

Camera and geometry motion blur, with duration, interval centre, bias, shutter efficiency and samples.

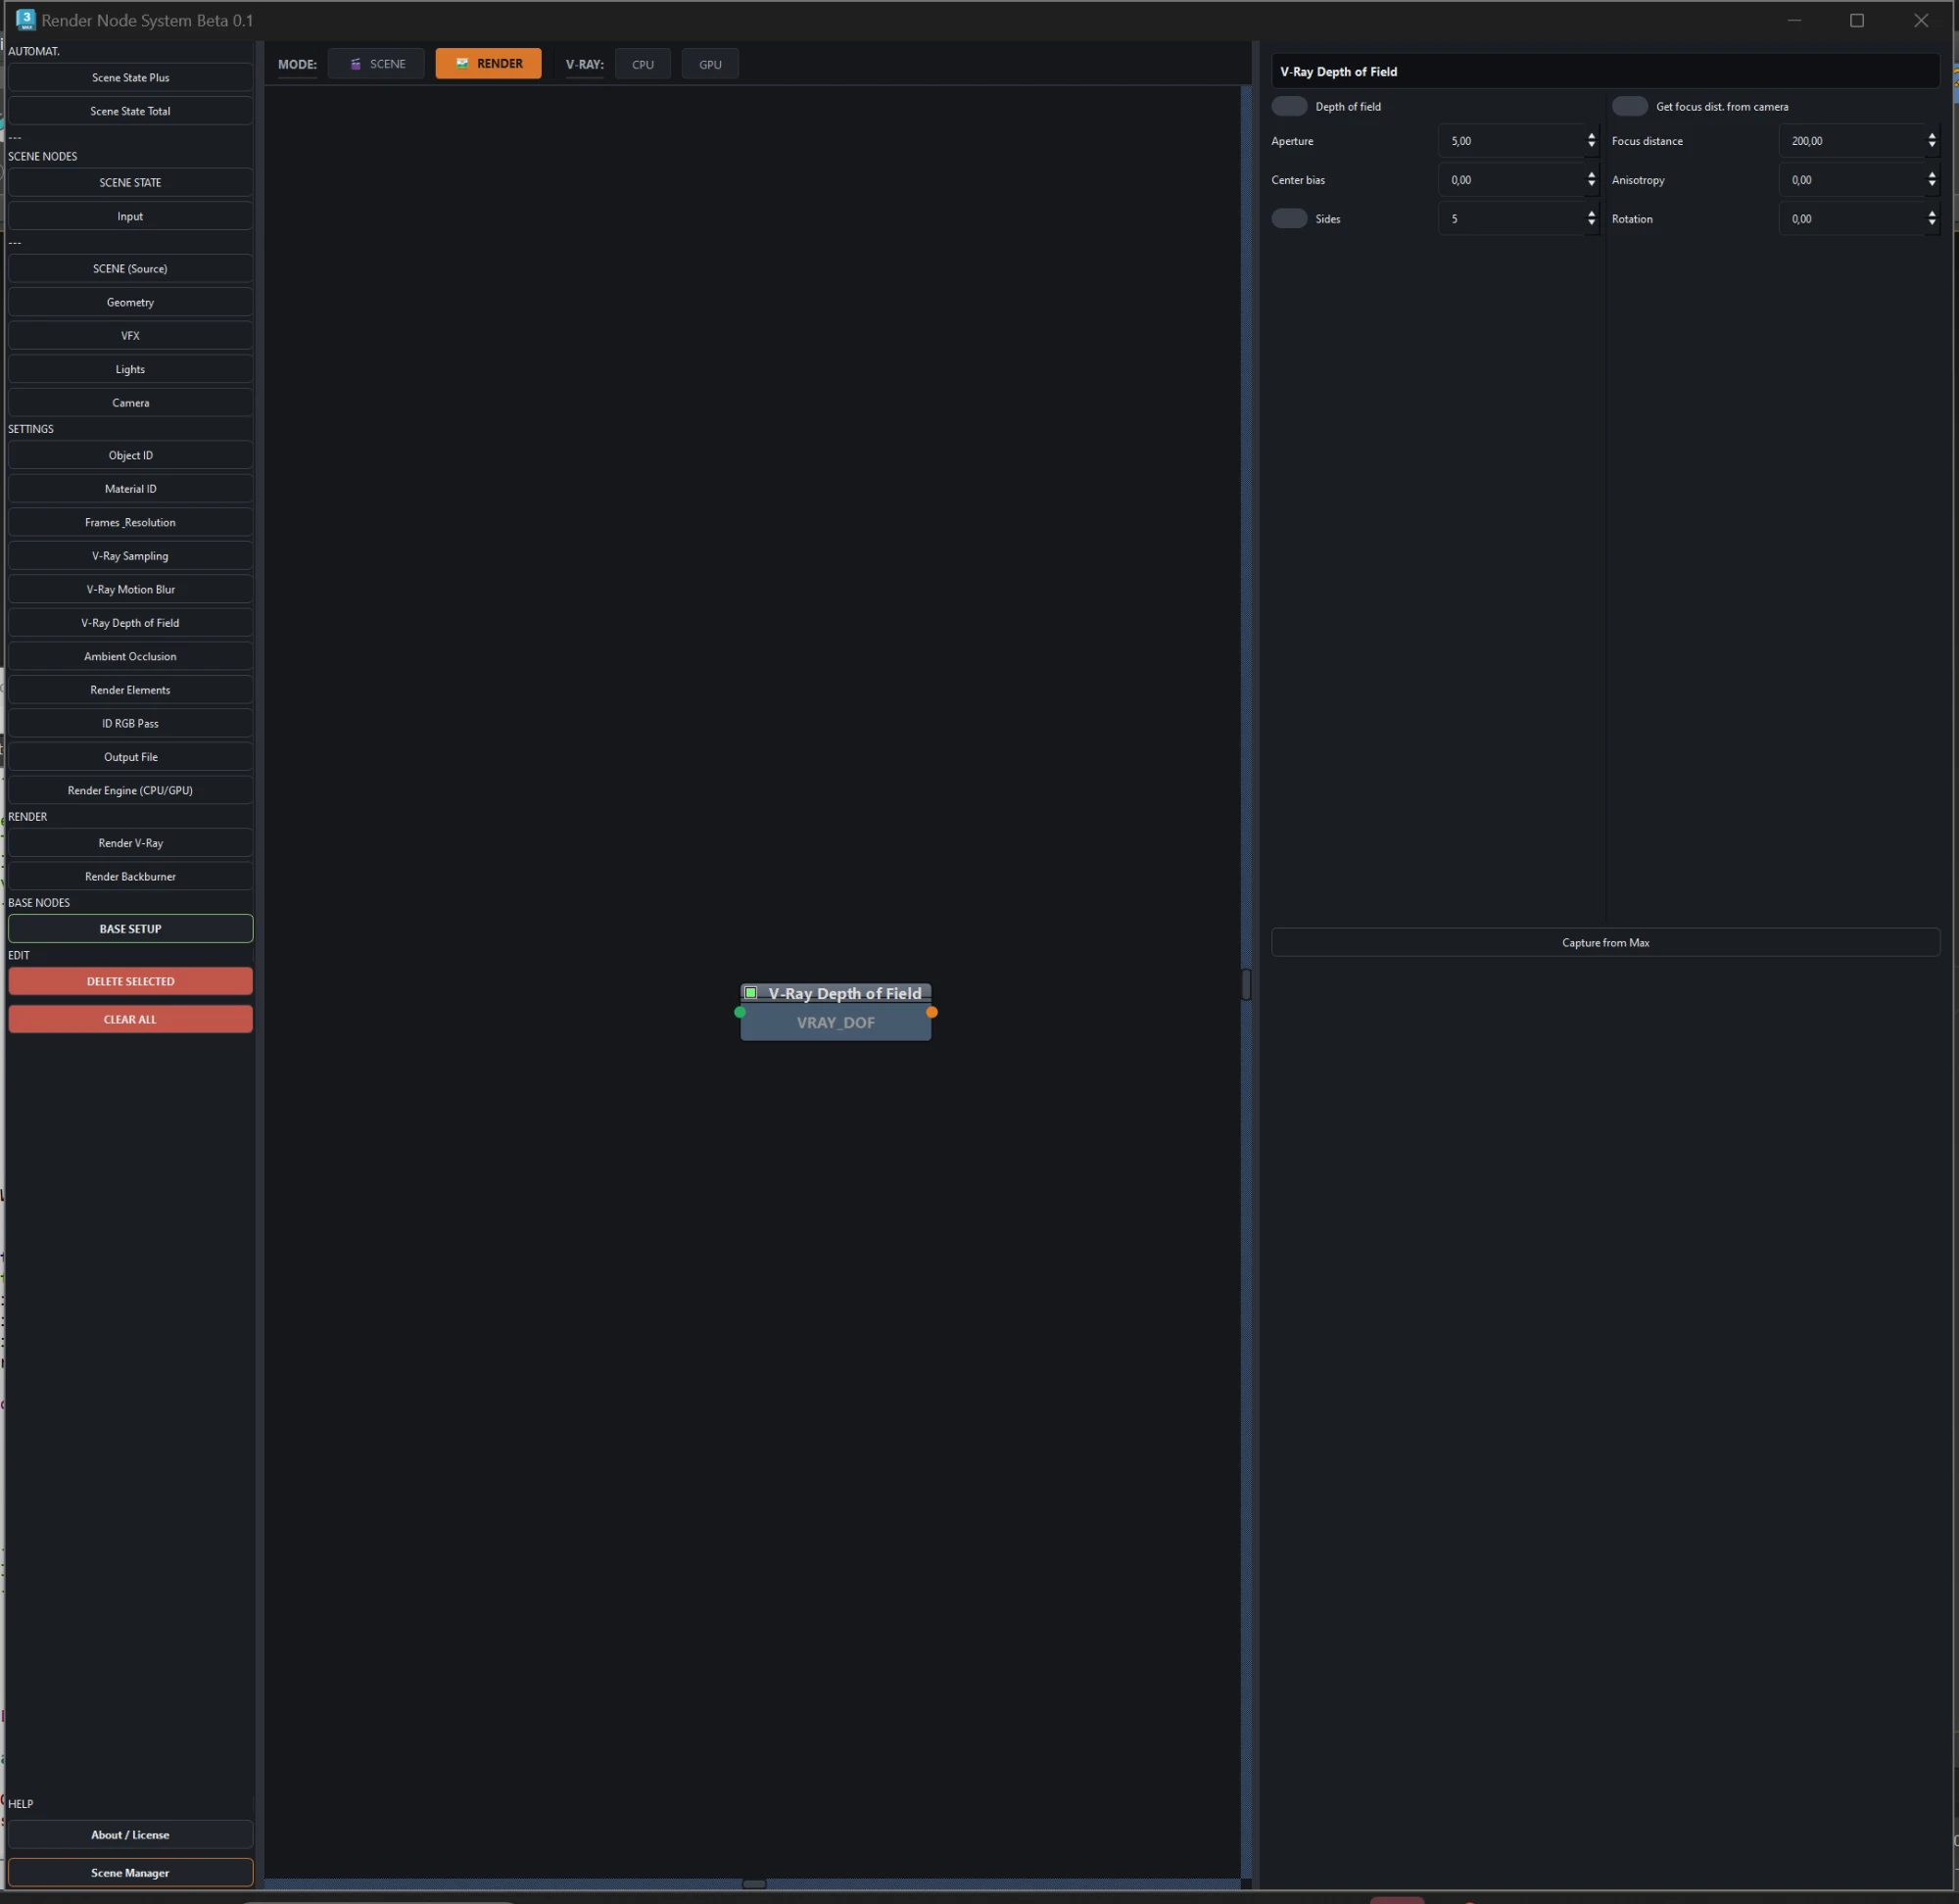
V-Ray Depth of Field node
V-Ray

V-Ray Depth of Field

Aperture, focus distance, bias and blade shape. It can take the focus distance straight from the camera.

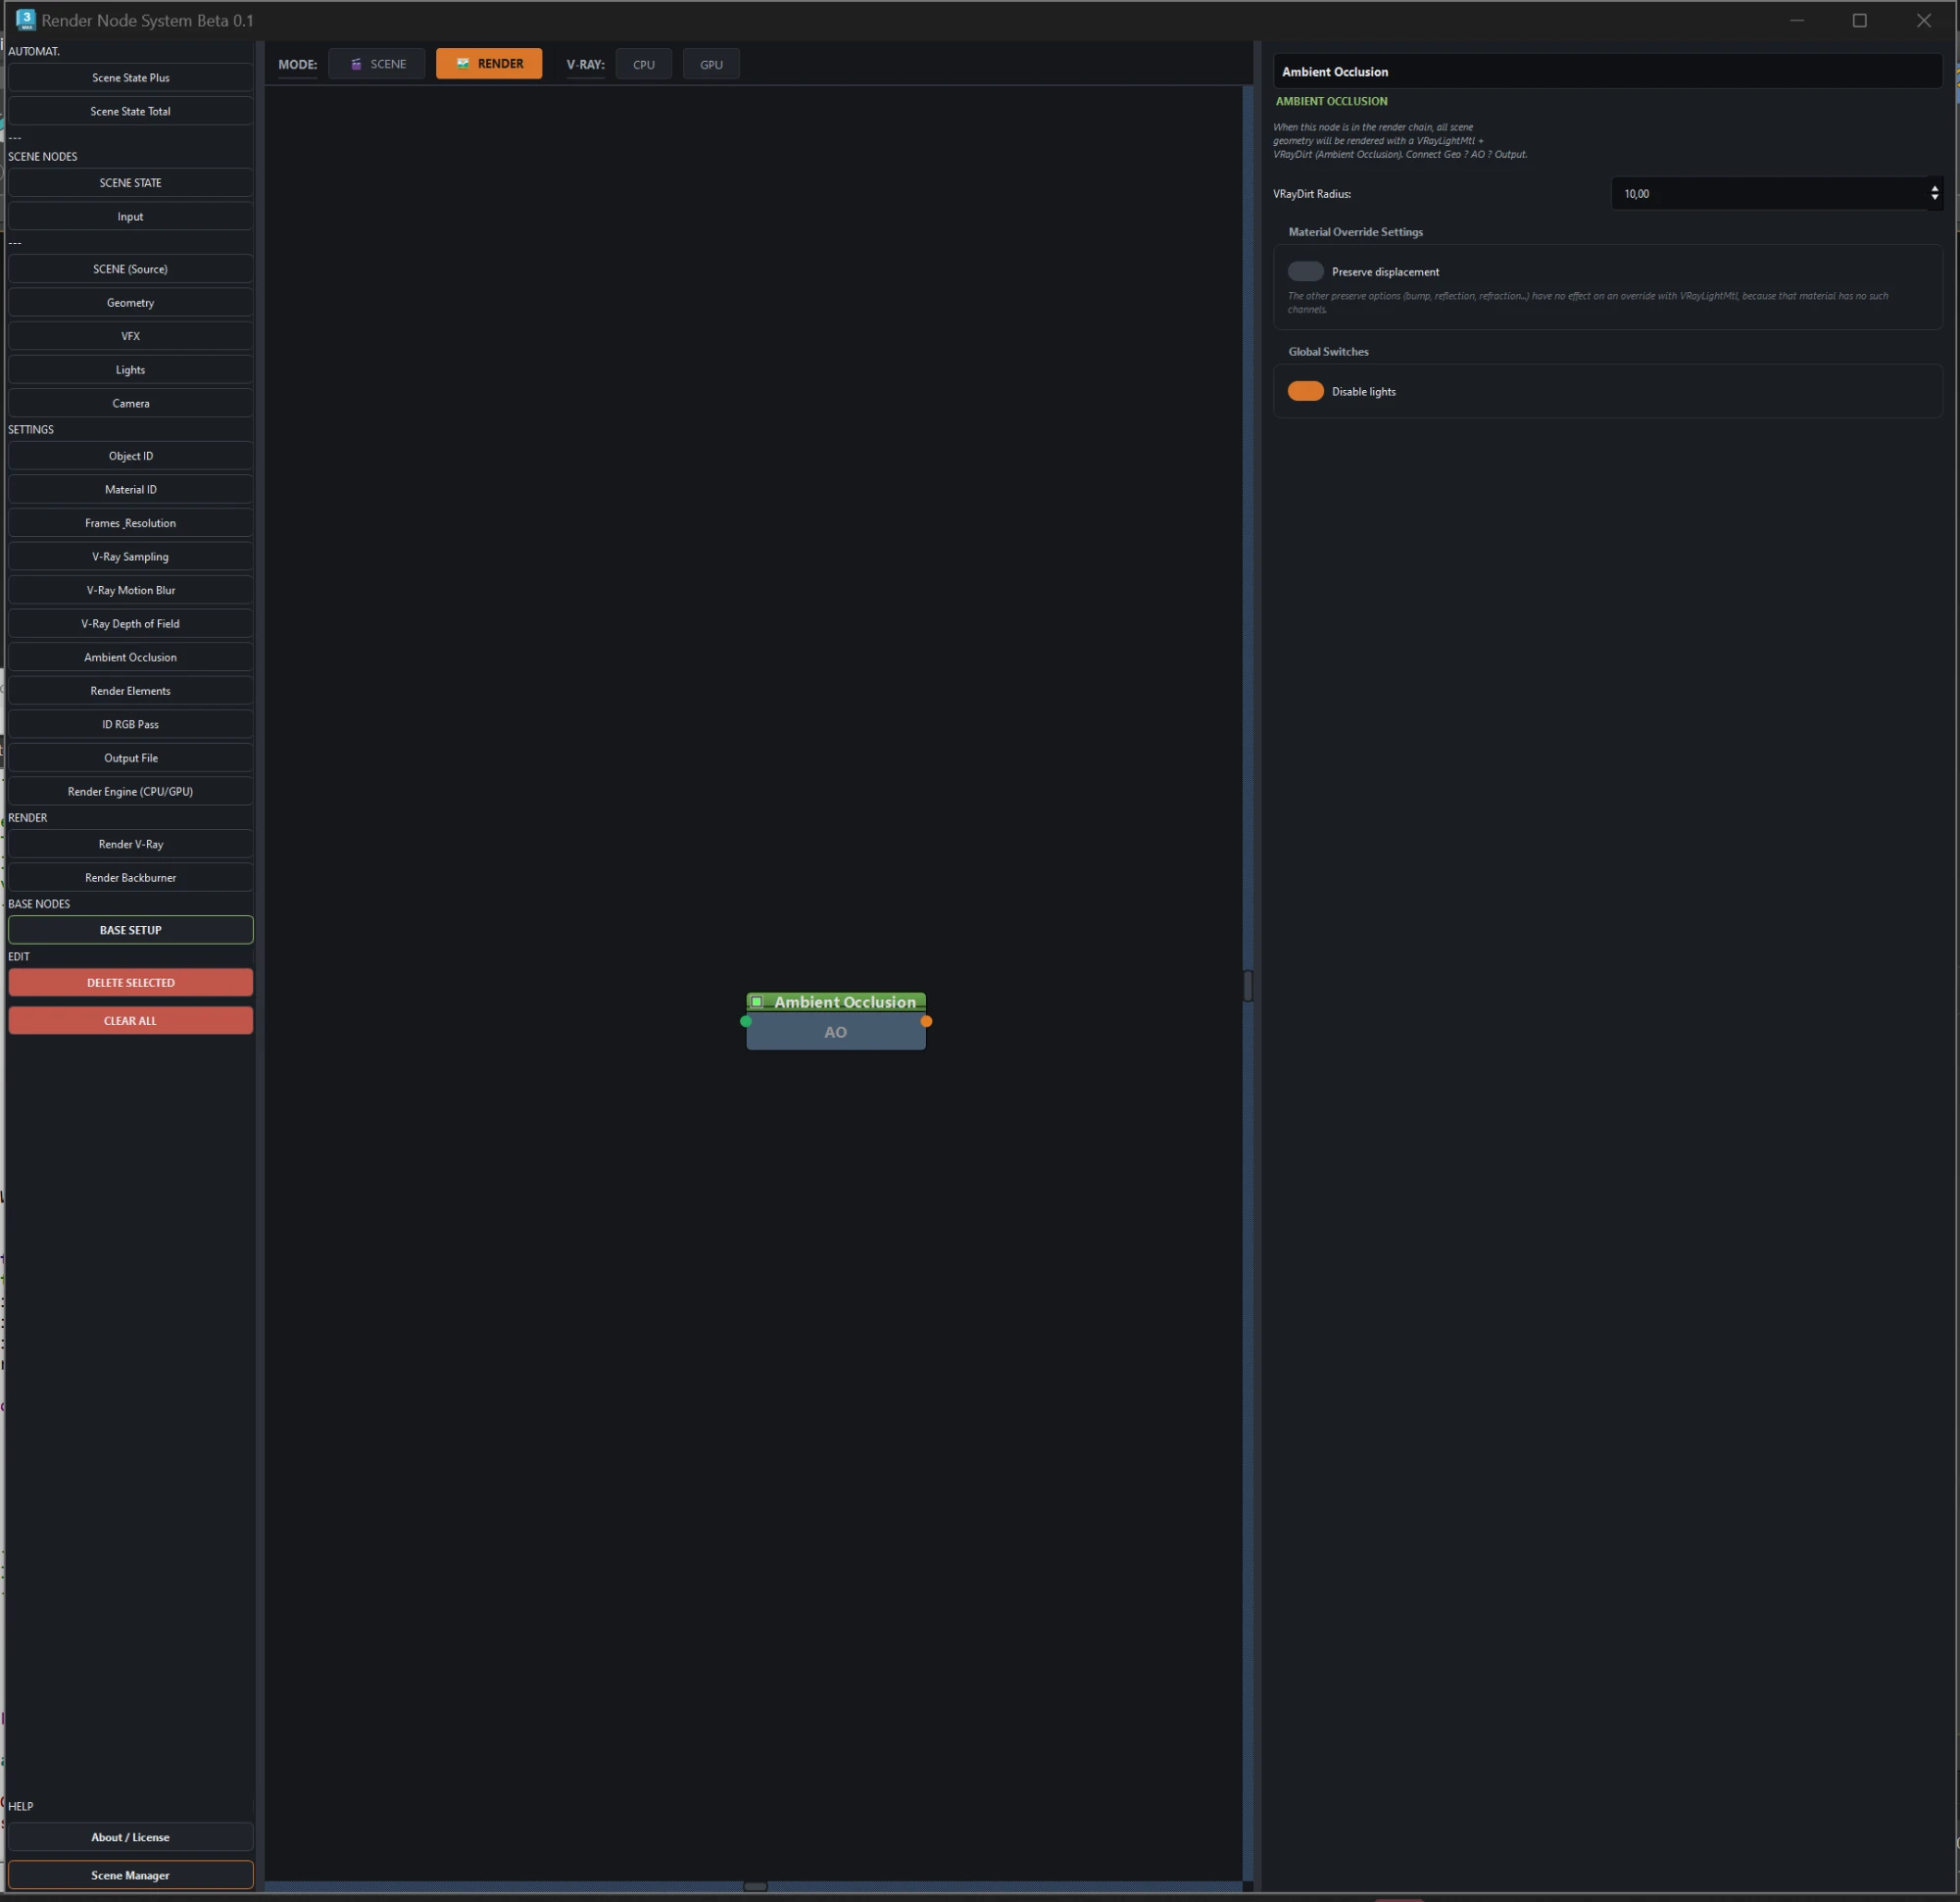
Ambient Occlusion node
V-Ray

Ambient Occlusion

An AO pass built on V-Ray's Material Override. Lights and GI go off for the pass and come back on their own afterwards, same as the materials.

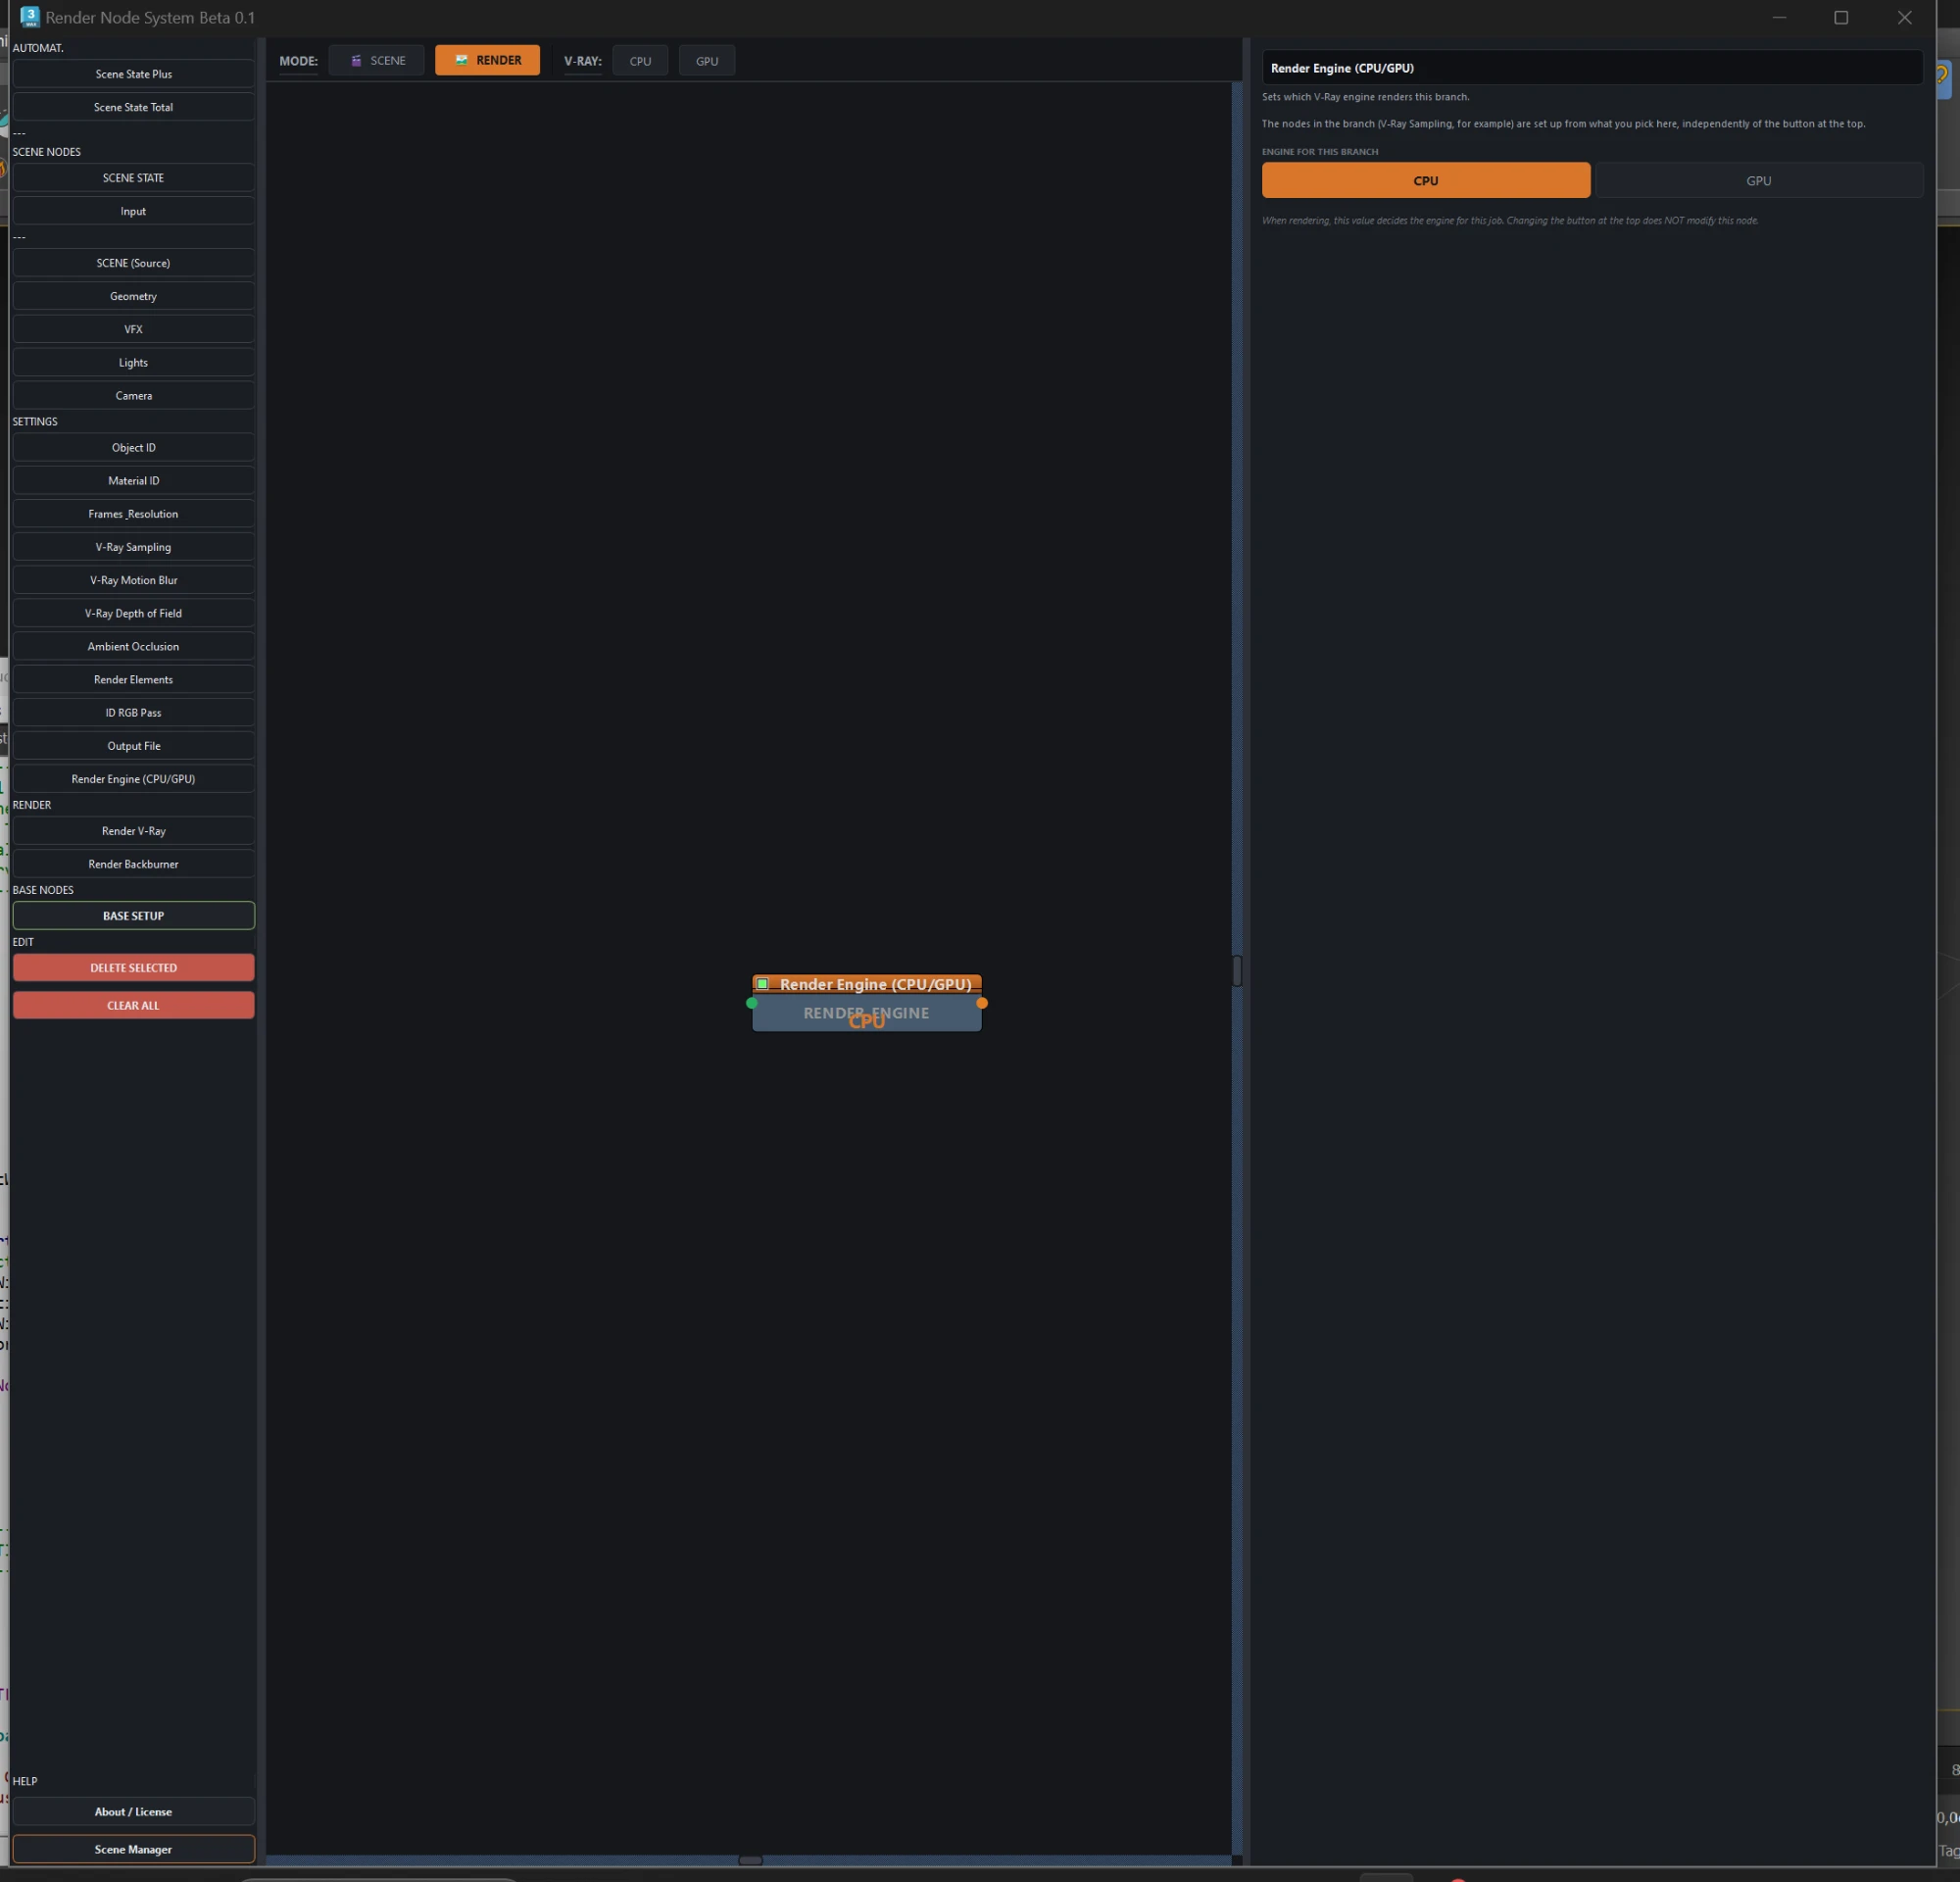
Render Engine node
V-Ray

Render Engine (CPU/GPU)

The engine for this branch. One branch on GPU for previews and another on CPU for the final, in the same batch. Changing the button at the top does not modify this node.

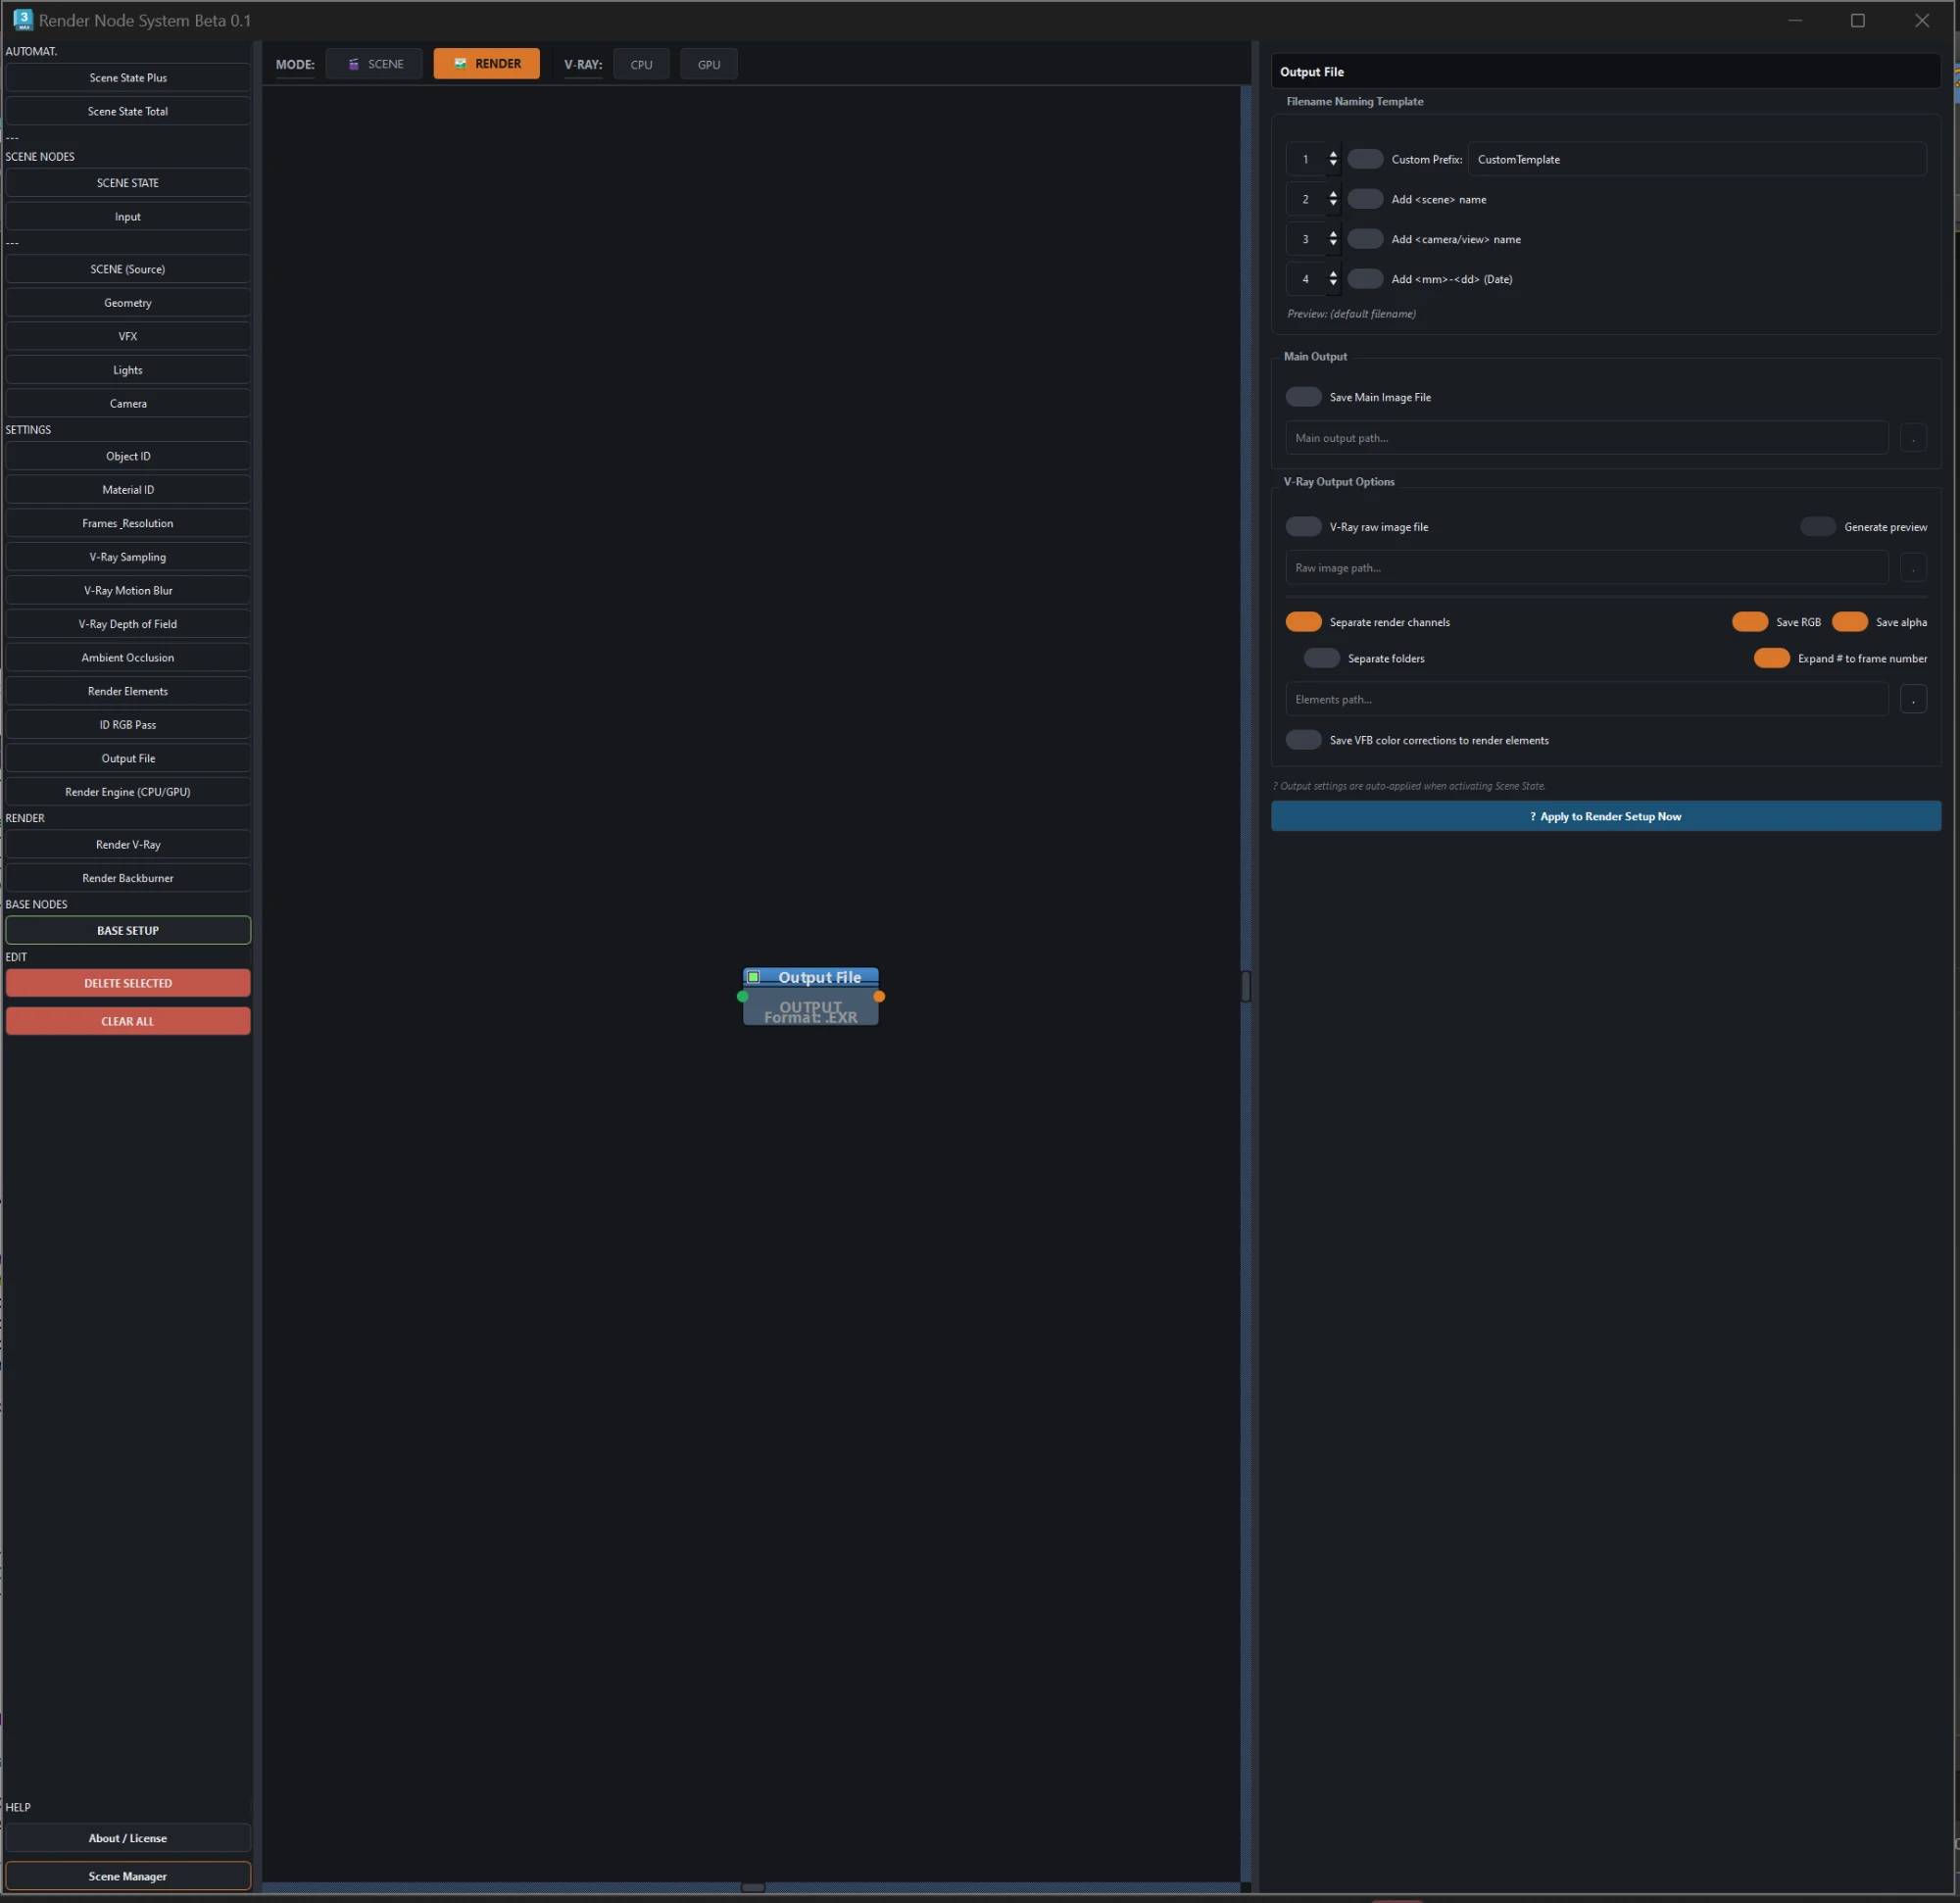
Output File node
Output

Output File

Paths, format and channels: main image, V-Ray raw and separate channels with RGB and alpha. Plus a filename template with prefix, scene, camera and date that you can reorder.

06

Launching

Every connected branch becomes a job in one queue.

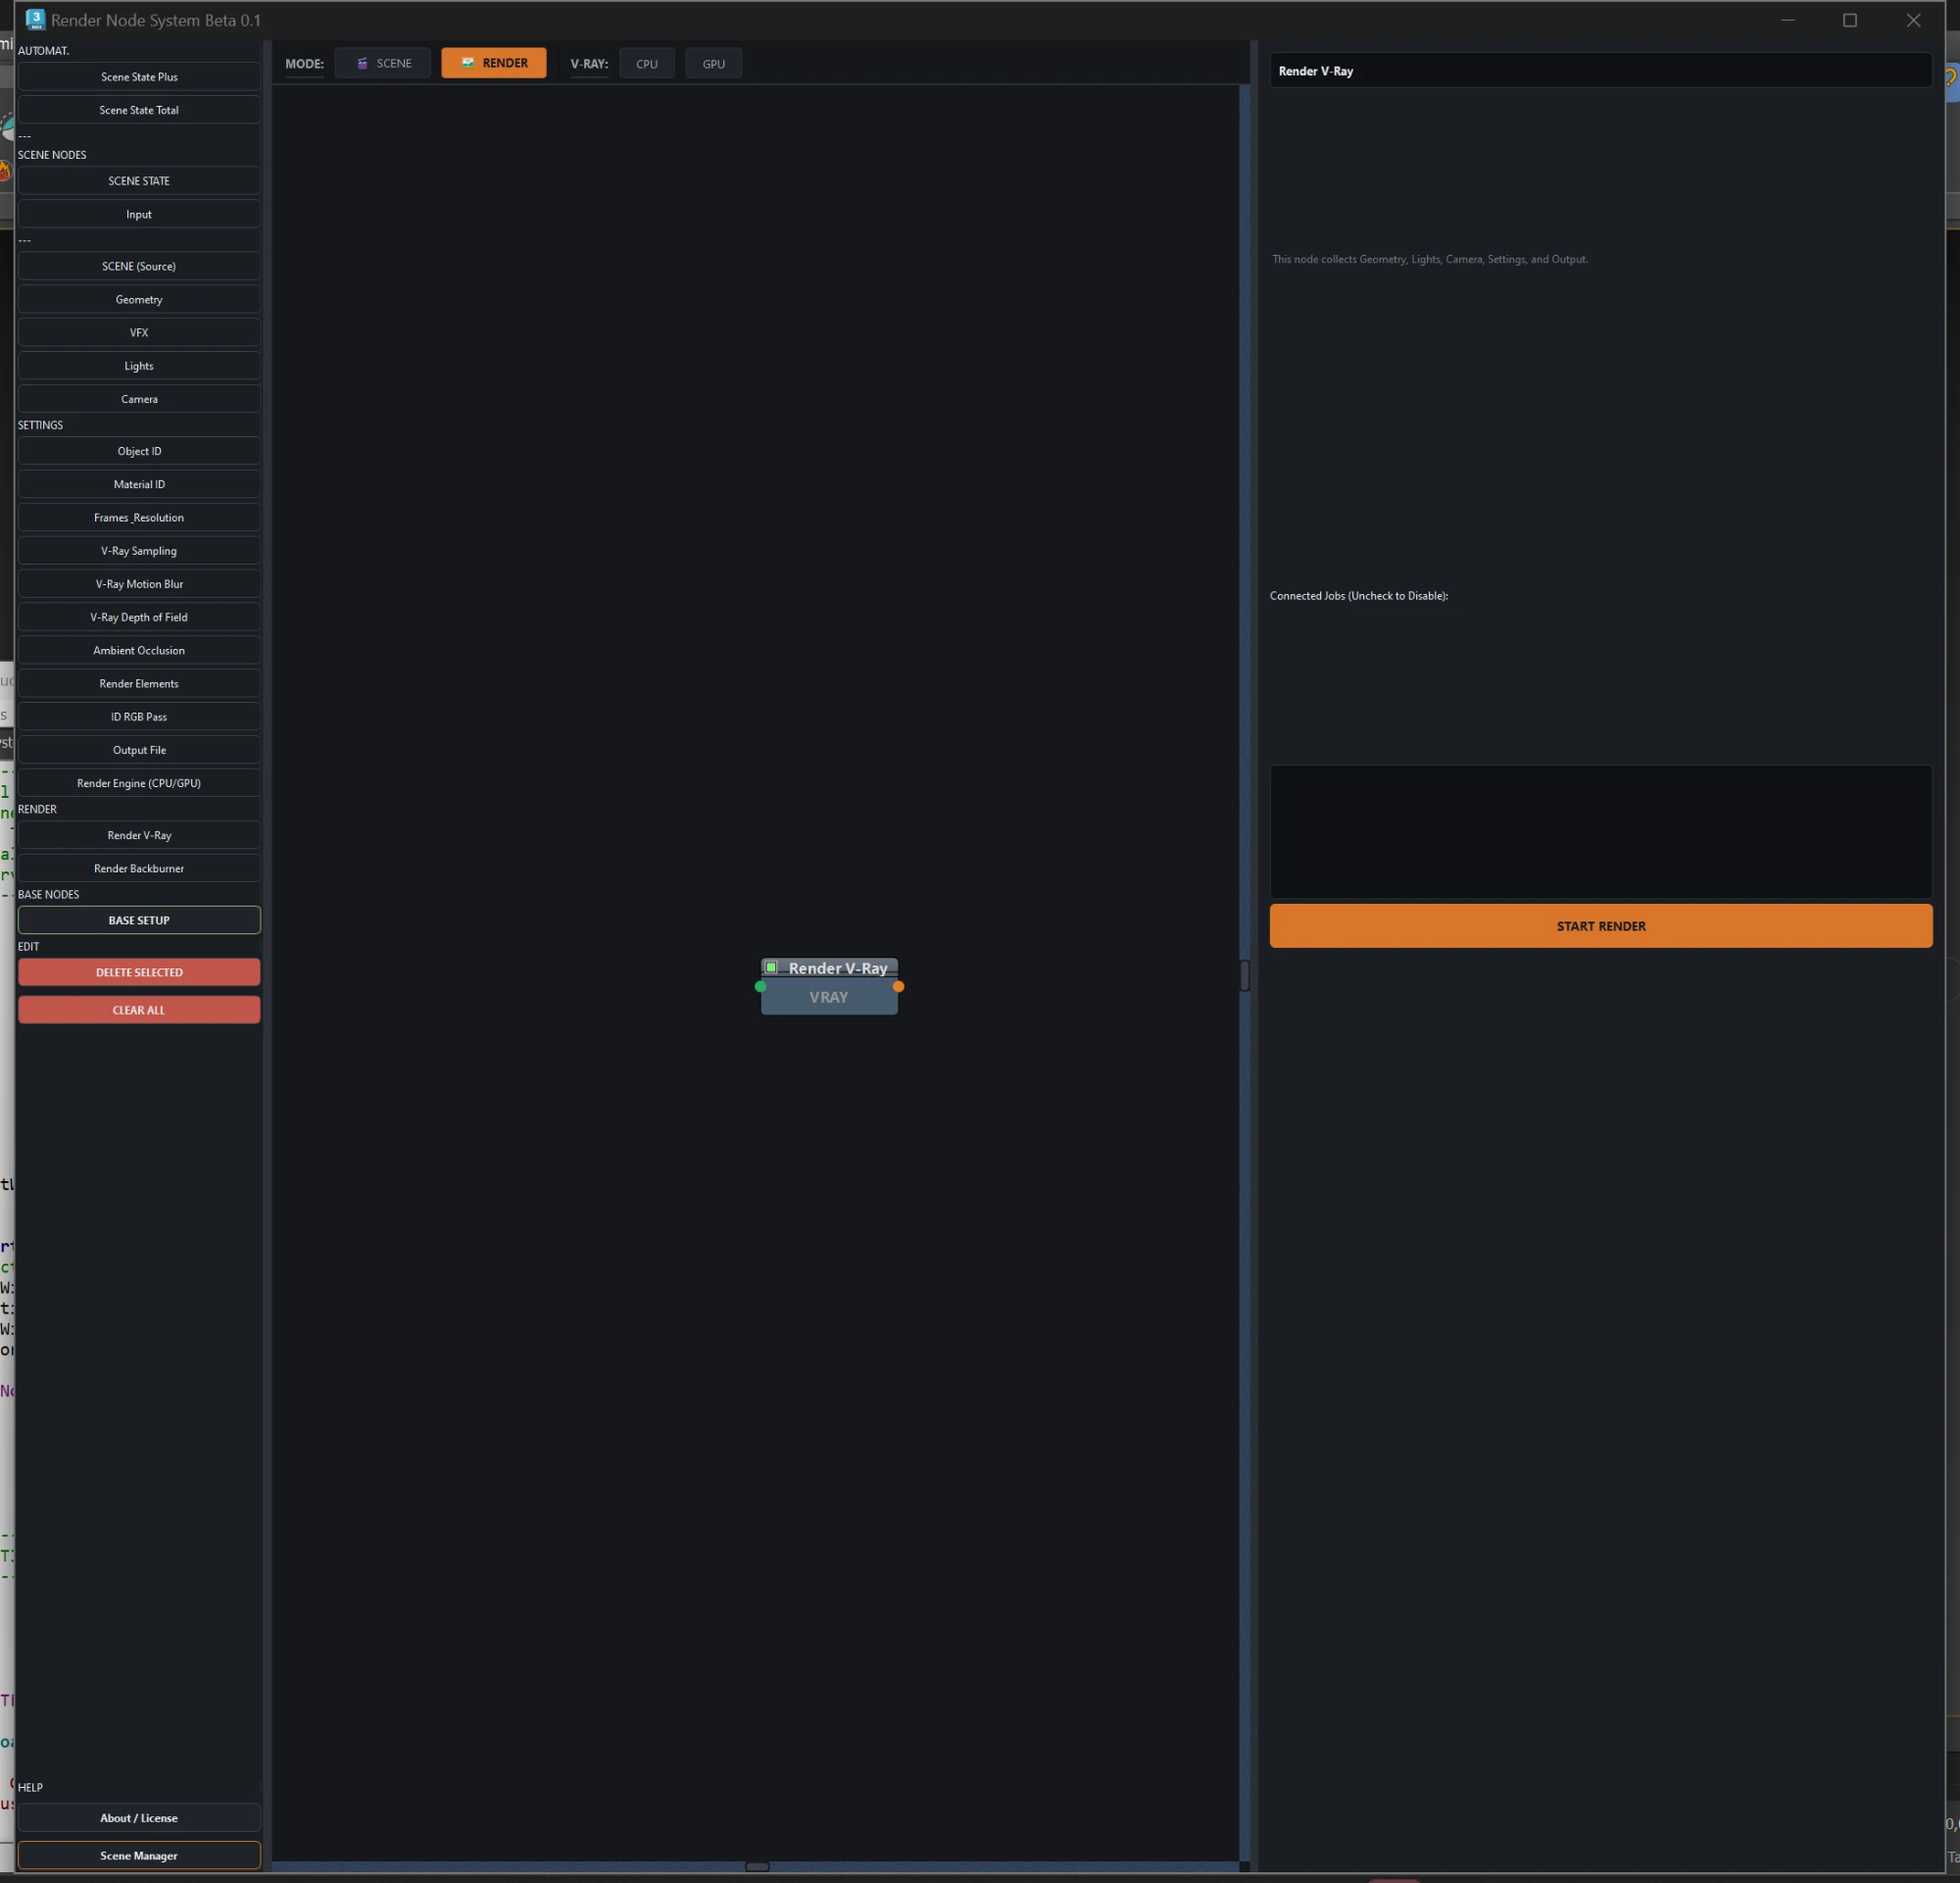
Render V-Ray node
Execute

Render V-Ray

Runs the queue on this machine. Each connected branch is a job you can tick or untick before starting.

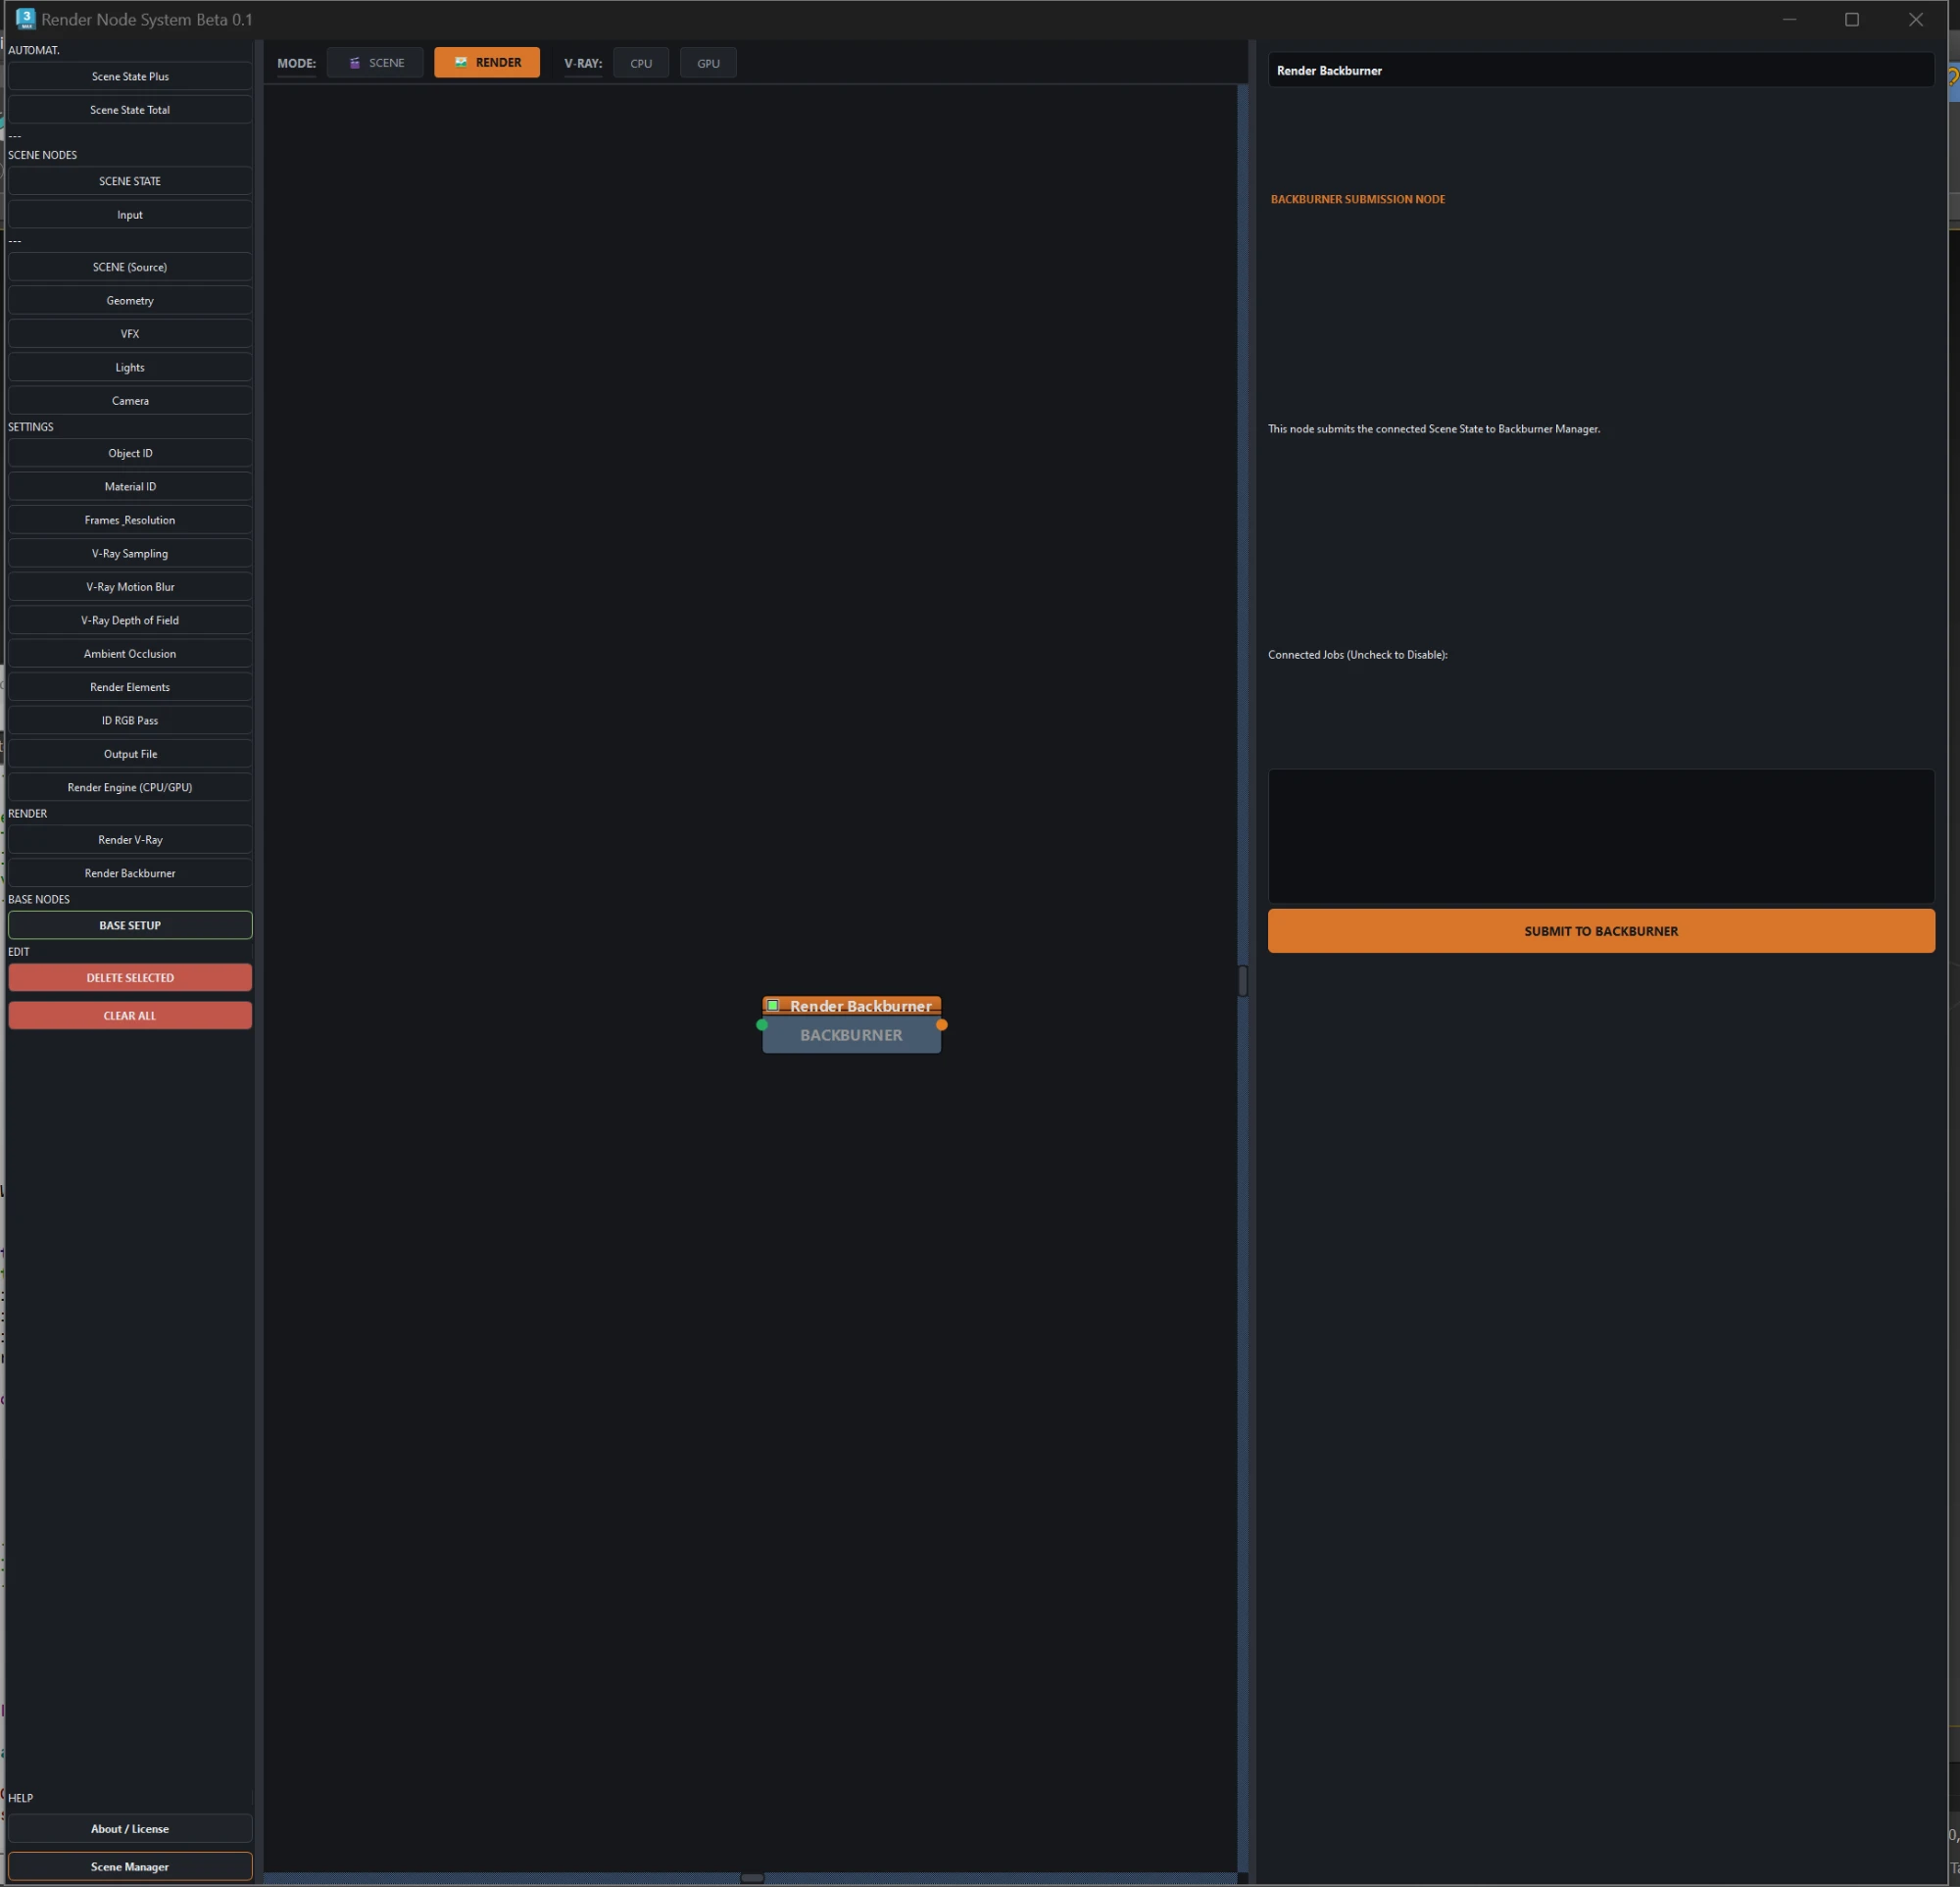
Render Backburner node
Farm

Render Backburner

Sends those same jobs to a Backburner manager instead of rendering locally.

Before you start

Requirements

Host
3ds Max 2025 and later
Renderer
V-Ray 7 — CPU & GPU
Farm
Backburner
Interface
English

Ready to try it?

One licence, updates included, and a Discord to ask in.